-
This site contains eBay affiliate links for which Sea-Doo Forum may be compensated.
You are using an out of date browser. It may not display this or other websites correctly.
You should upgrade or use an alternative browser.
You should upgrade or use an alternative browser.
2001 Seadoo Sportster LE. Just got it!
- Thread starter Bonmotwang
- Start date
- Status
- Not open for further replies.
Bonmotwang
Well-Known Member
No, keep going those pistons aren't gonna unscore themselves.
Ok. The middle screw came out like this with grease on the top

Sent from my iPhone using Tapatalk
Bonmotwang
Well-Known Member
All screws out.
Only one rod has a sign of rust
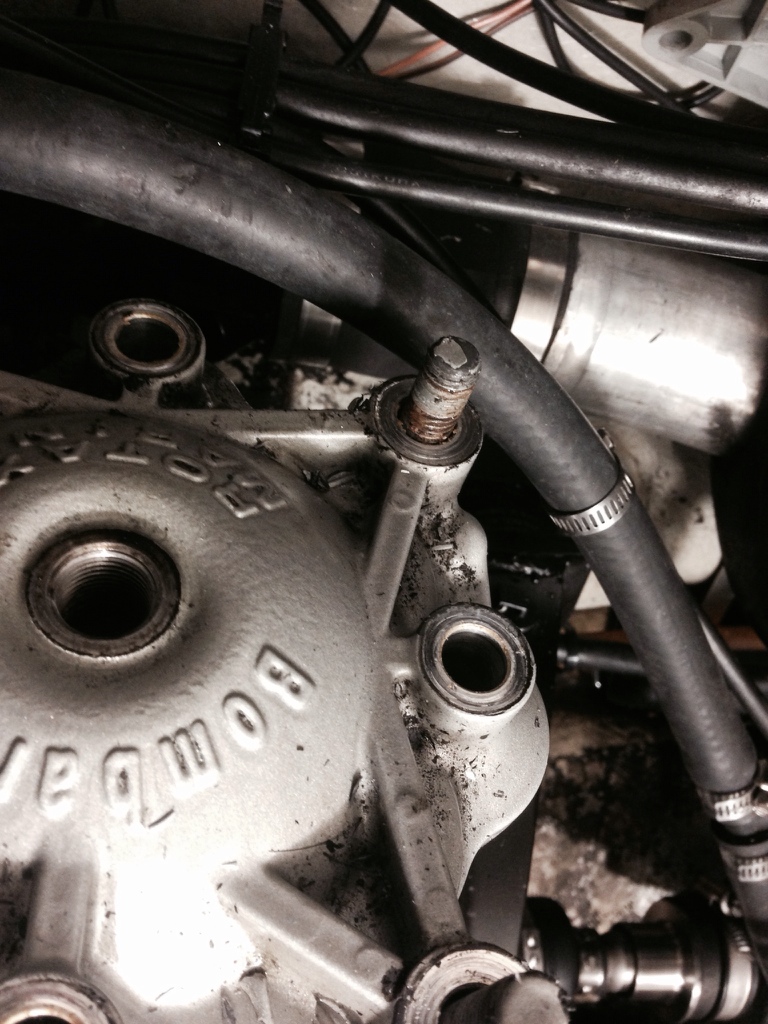
Sent from my iPhone using Tapatalk
Only one rod has a sign of rust

Sent from my iPhone using Tapatalk
Bonmotwang
Well-Known Member
How to get the head loose?
Sent from my iPhone using Tapatalk
Sent from my iPhone using Tapatalk
Bonmotwang
Well-Known Member

2 gaskets
Sent from my iPhone using Tapatalk
Bonmotwang
Well-Known Member
You have a plastic dead blow hammer and a rubber mallet handy? Gently tap on the outside contour of the head to loosen the gasket seal from below and on the sides.
Chisel helped

Sent from my iPhone using Tapatalk
Sportster-2001-951C-Stock
Well-Known Member
Hey Sportster, what if we bank it together and see whose blows up first :cheers:
I'm willing to discuss this possibility, I've been considering the purchase of a spare motor.
Bonmotwang
Well-Known Member
Opened.

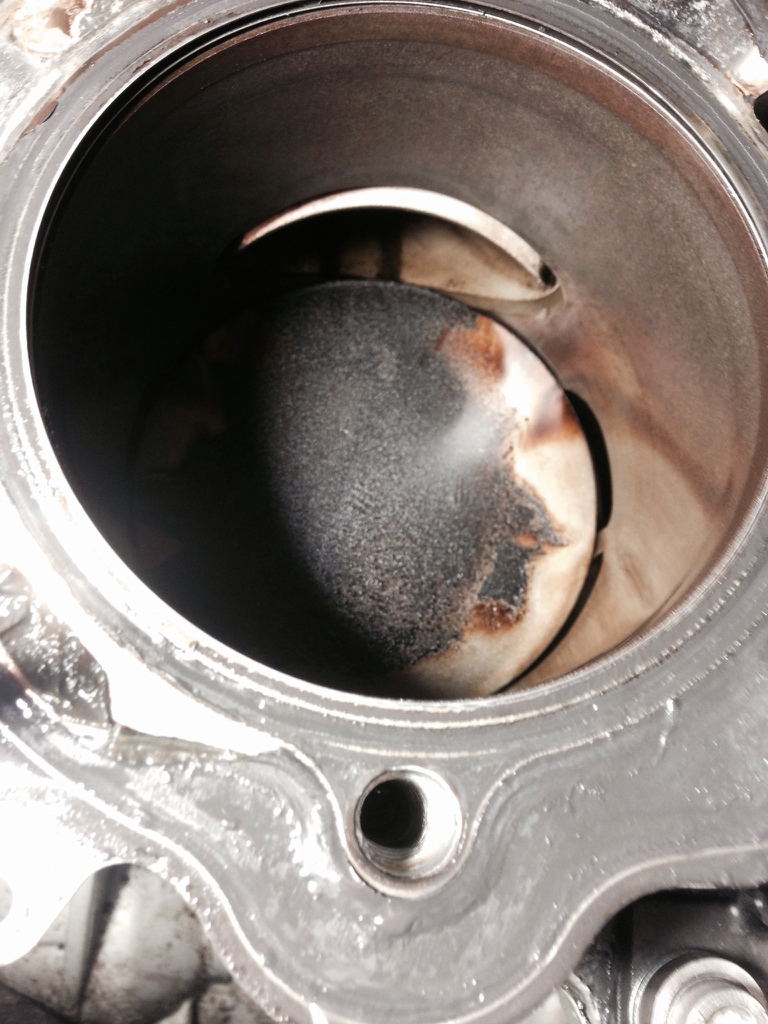
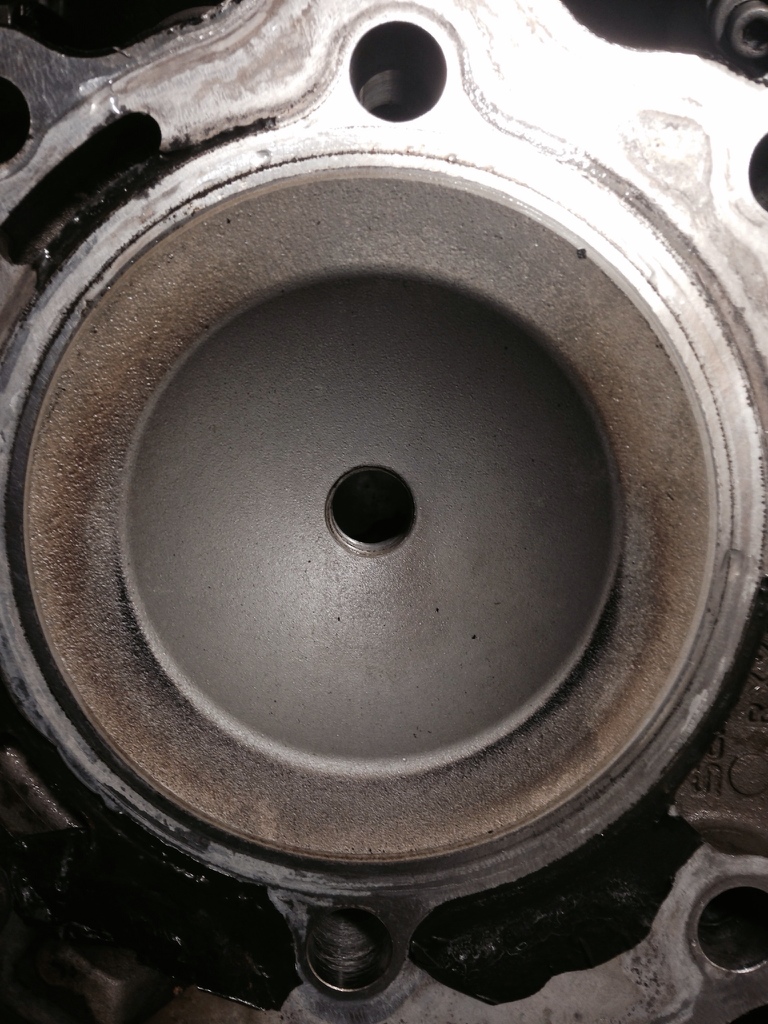
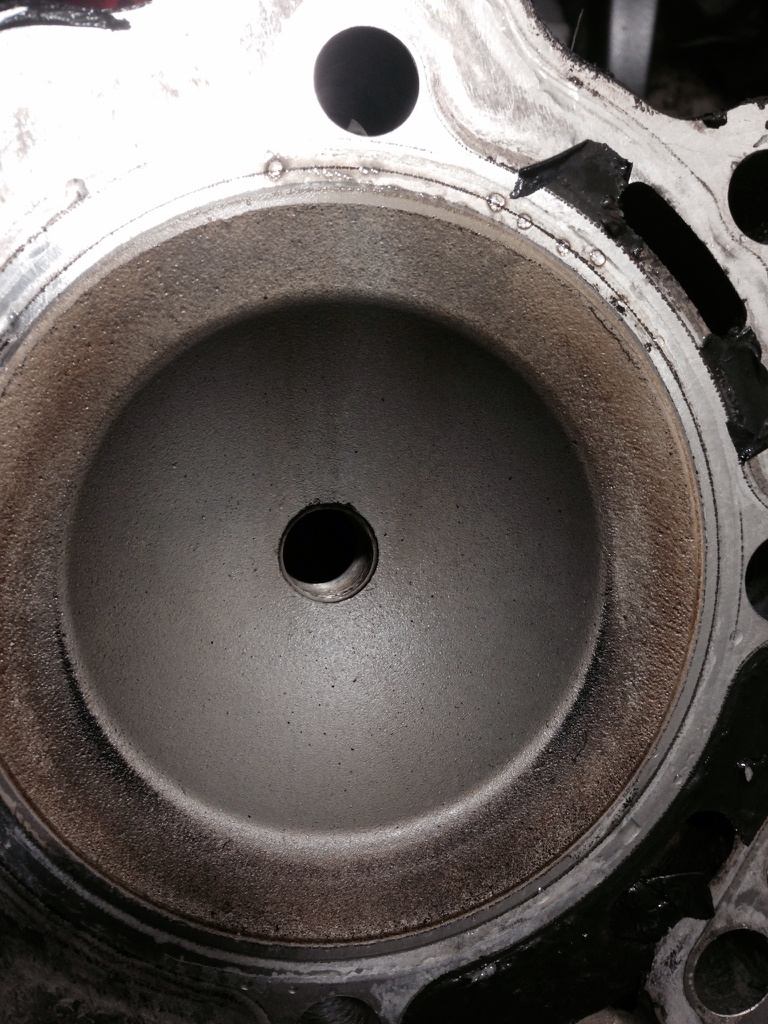
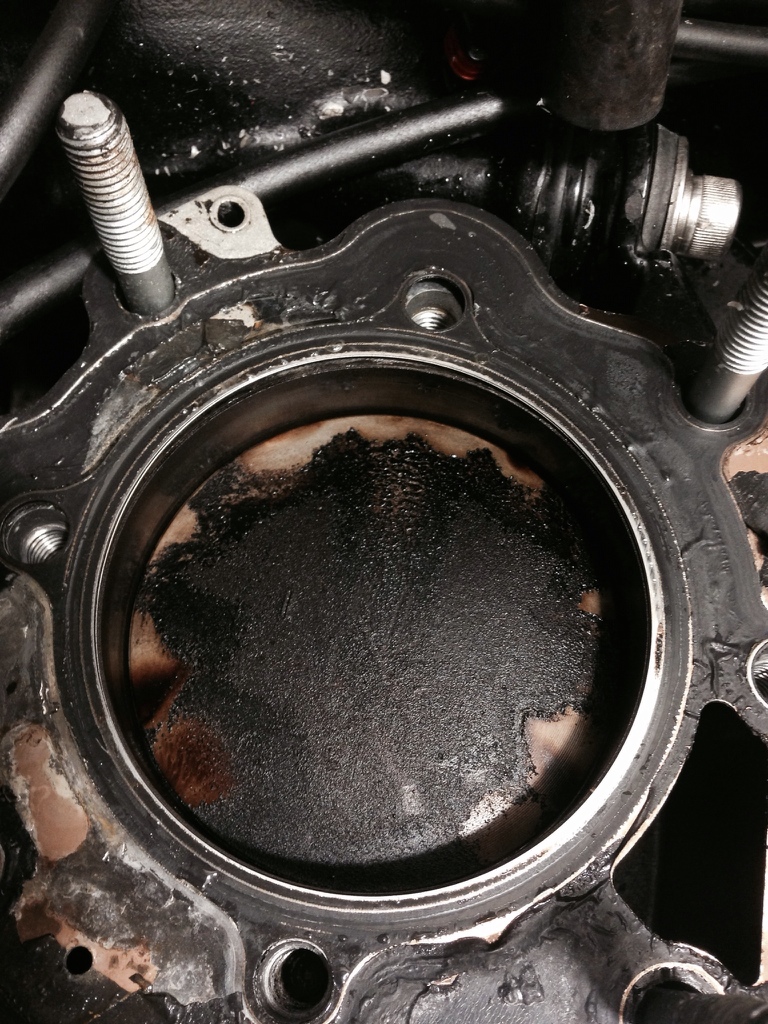
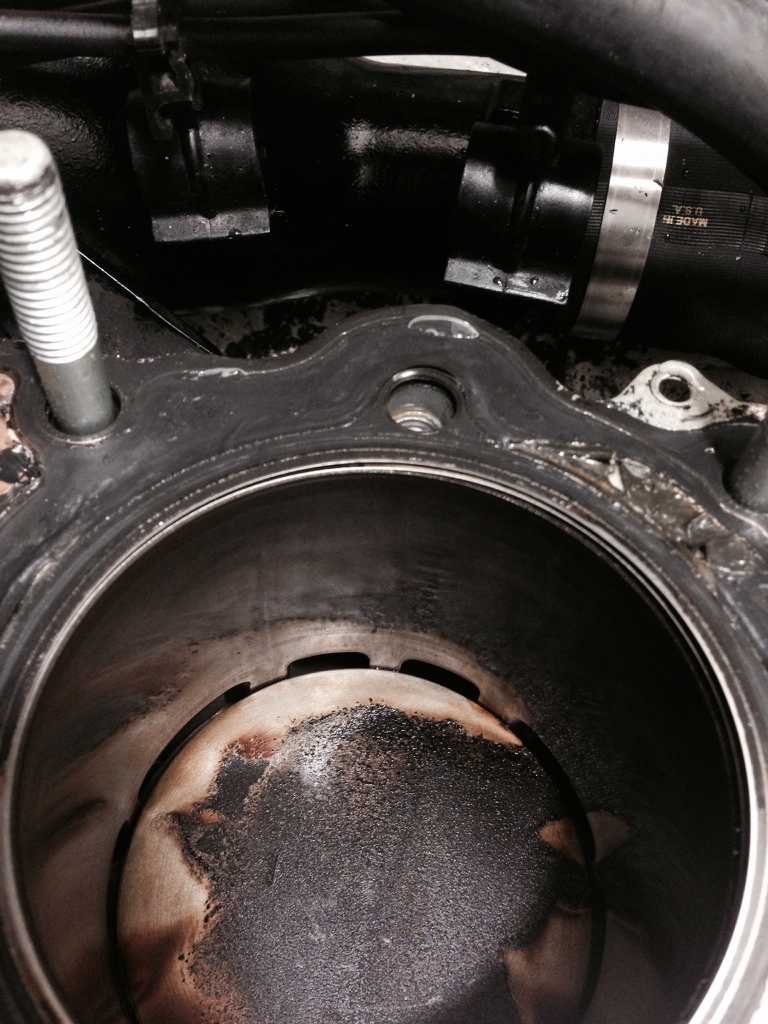
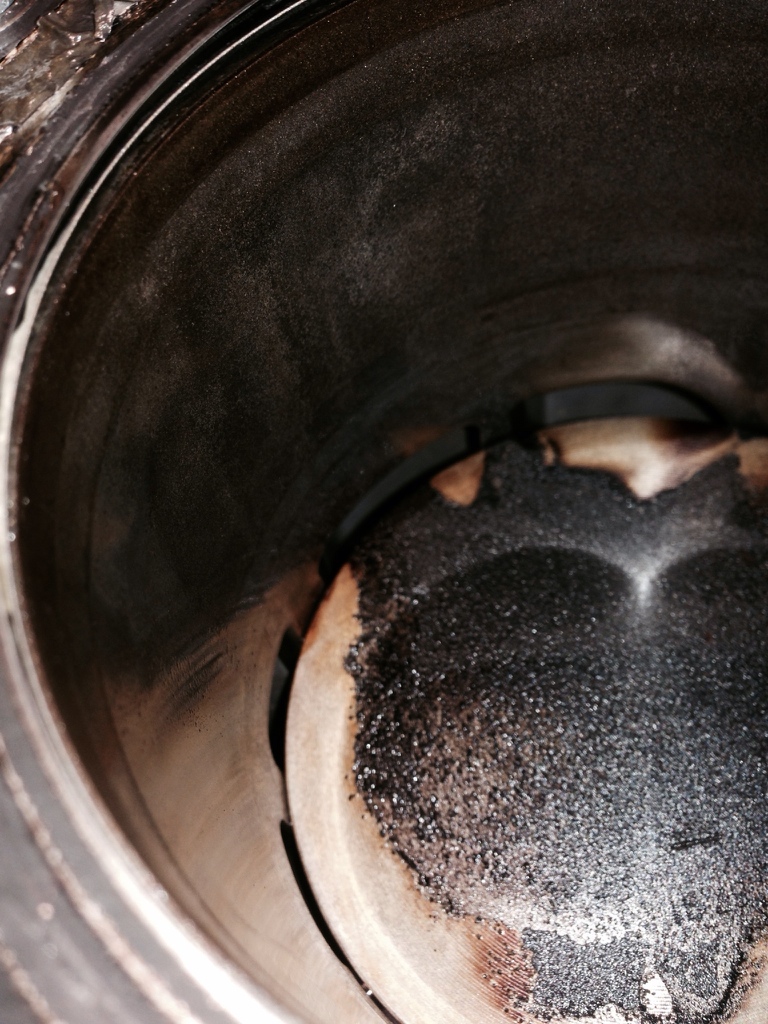
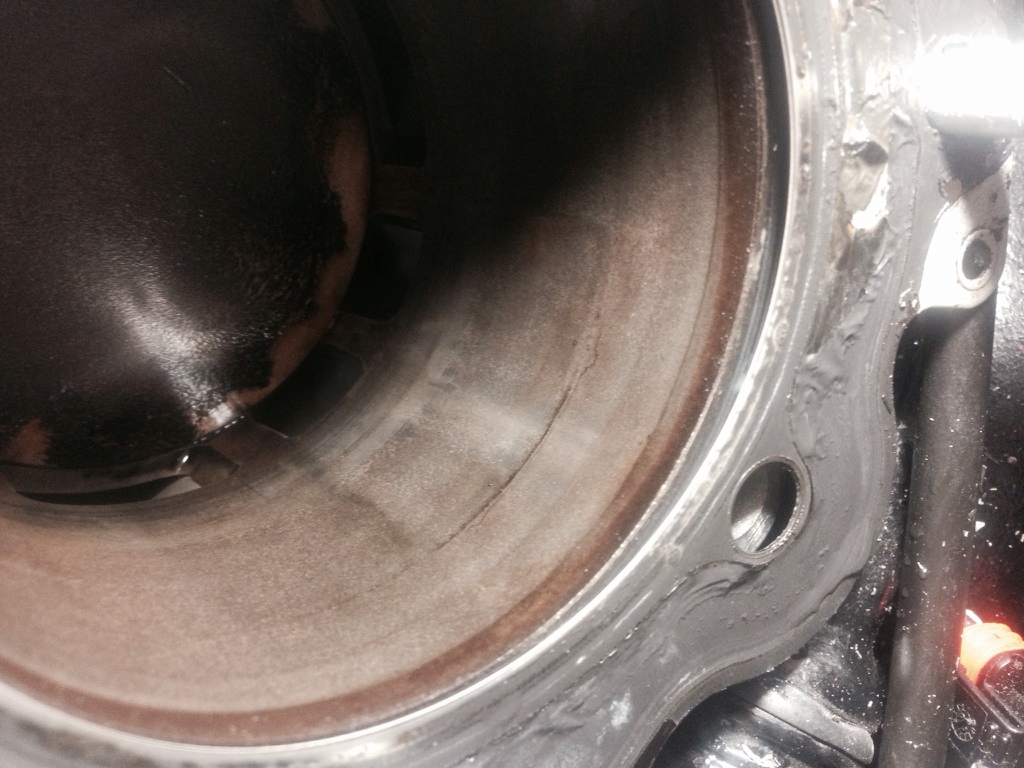
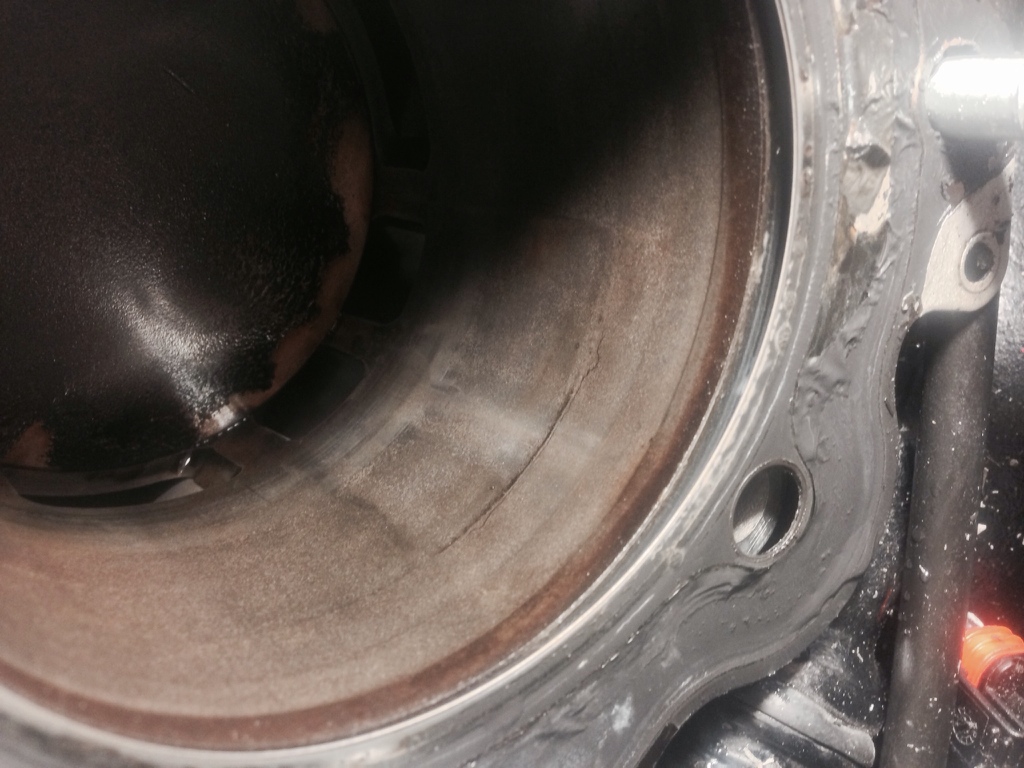
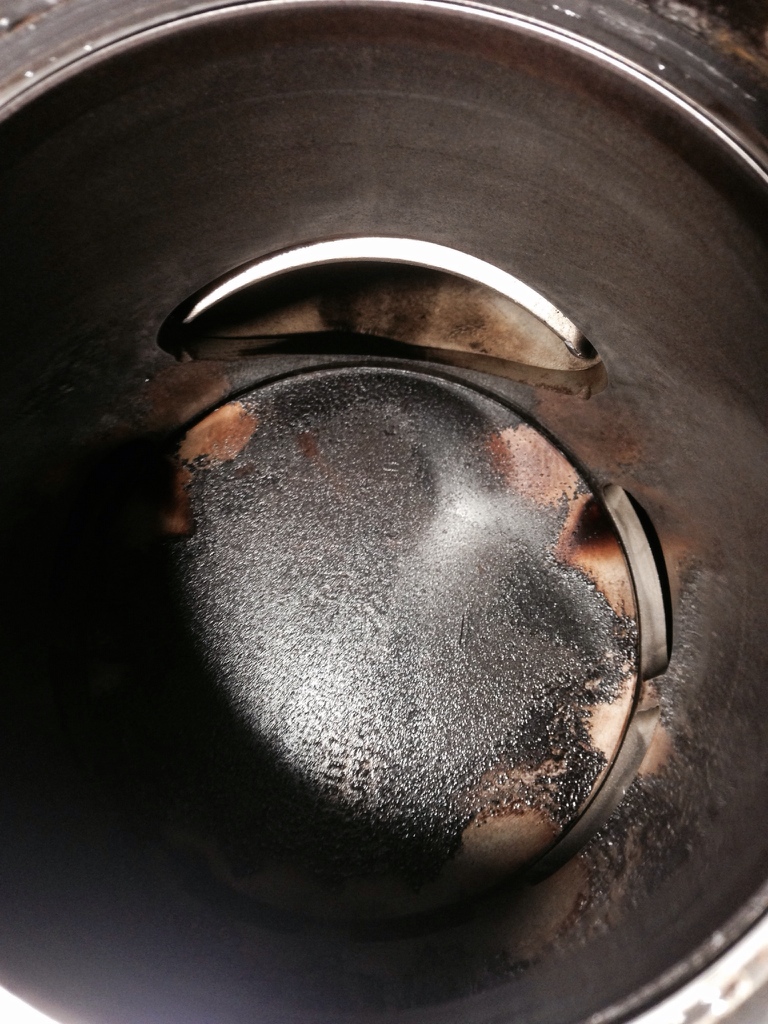
Both cylinders same condition. Pretty smooth and shiny, I touched by hand, couldn't feel anything.
What is the next step?
Edit: taking a break and eating a pear right now.
Sent from my iPhone using Tapatalk


Both cylinders same condition. Pretty smooth and shiny, I touched by hand, couldn't feel anything.
What is the next step?
Edit: taking a break and eating a pear right now.
Sent from my iPhone using Tapatalk
Last edited by a moderator:
Sportster-2001-951C-Stock
Well-Known Member
I think this gasket is a laminated type.
Bonmotwang
Well-Known Member
I think this gasket is a laminated type.
It feels like metal to me.
Sent from my iPhone using Tapatalk
Waterluvr
New Member
It looks like the piston edges have been working the same way a self cleaning oven has, lot of carbon has been burned off the edges. Head looks good, that's a really good start.
I'm looking at the SD parts diagram, they show an image that appears to be a caged wrist pin bearing so that's a plus
I'm looking at the SD parts diagram, they show an image that appears to be a caged wrist pin bearing so that's a plus
Sportster-2001-951C-Stock
Well-Known Member
Is that some pitting in the cylinder walls? If yes, I blame this on corrosion.
Is there a ridge you can feel at the top where the rings reverse direction? If yes, this represents cylinder wear near the top.
Is there a ridge you can feel at the top where the rings reverse direction? If yes, this represents cylinder wear near the top.
Waterluvr
New Member
Is that some pitting in the cylinder walls? If yes, I blame this on corrosion.
Is there a ridge you can feel at the top where the rings reverse direction? If yes, this represents cylinder wear near the top.
It sure looks that way, hopefully the next size up on the boring bar will take that out. ~He takes some seriously good pics!
Bonmotwang
Well-Known Member
It sure looks that way, hopefully the next size up on the boring bar will take that out. ~He takes some seriously good pics!
I will wipe of the oil and take some more pictures. The some of the pitting lines are the oil. Hold on.
Bonmotwang
Well-Known Member
This is PTO side. You can see 3 lines. And I can feel them too. Is the vertical one the ring gap?

Sent from my iPhone using Tapatalk

Sent from my iPhone using Tapatalk
Sportster-2001-951C-Stock
Well-Known Member
It feels like metal to me.
Sent from my iPhone using Tapatalk
Yes, it is a metal gasket that has a coating, looks like it's laminated layers.
Bonmotwang
Well-Known Member
Removed the gasket. The water jacket is very clean.
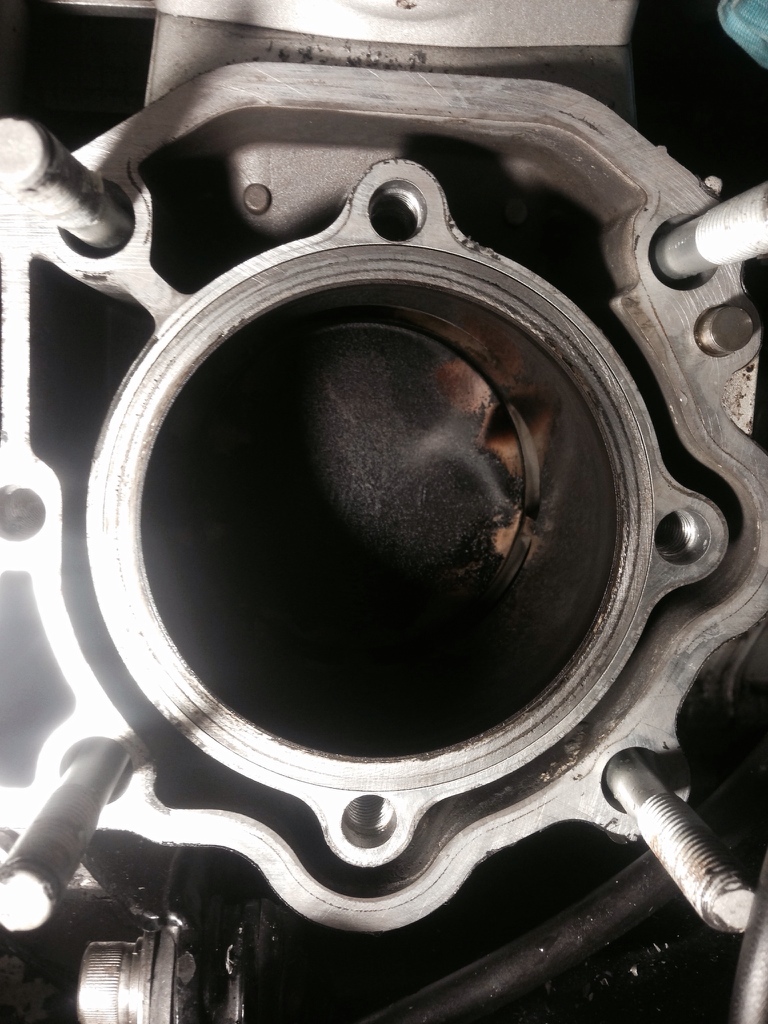
Sent from my iPhone using Tapatalk

Sent from my iPhone using Tapatalk
Sportster-2001-951C-Stock
Well-Known Member
The ring gap is located between the ports, it cannot be exposed to any port or the end of the ring will snag inside the port.
Bonmotwang
Well-Known Member
Mag side 3 lines. The top ring pitting line is deeper than the PTO side, the vertical line almost hard to see. I had to adjust the shooting angle to capture it.
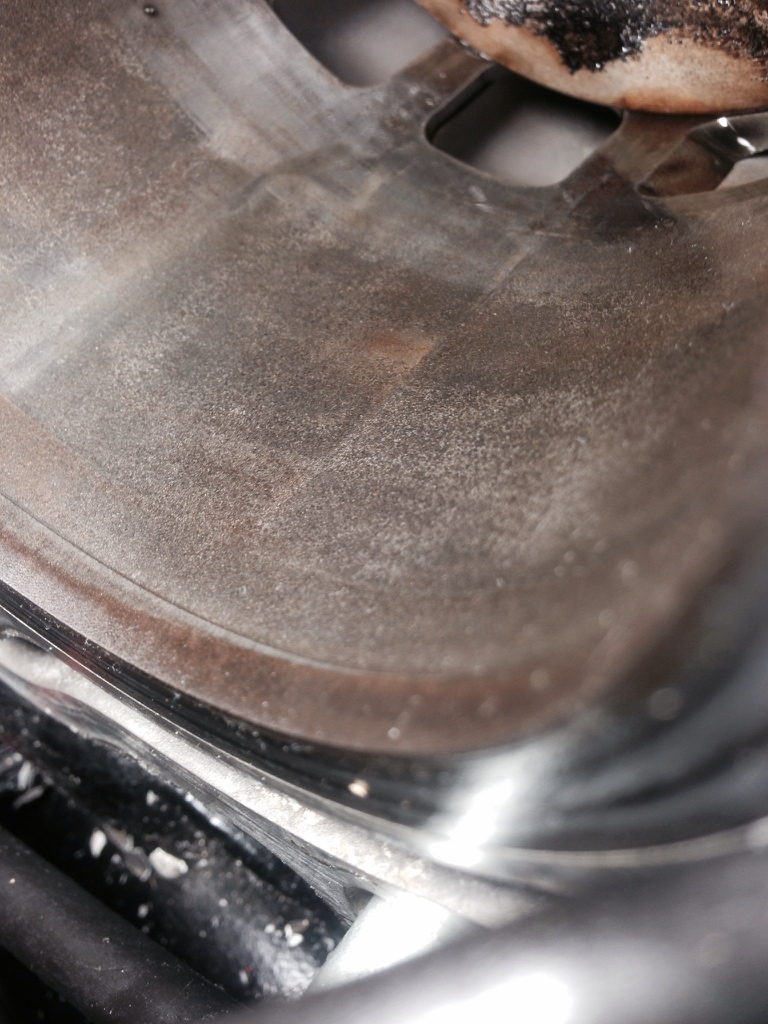
Sent from my iPhone using Tapatalk

Sent from my iPhone using Tapatalk
Waterluvr
New Member
Your next step when you're ready is to slide the cylinders up and off the pistons. You need to break the seal of the base gasket and your plastic dead blow mallet is a good way to do this. Or a block of wood and light taps with like a one pound hammer around the base and corners. Be careful and avoid prying up on anything.
Bonmotwang
Well-Known Member
The ring gap is located between the ports, it cannot be exposed to any port or the end of the ring will snag inside the port.
Right on. Two lines are at exactly same angle and between two ports.
Sent from my iPhone using Tapatalk
Bonmotwang
Well-Known Member
Did another check. Moved the piston to the top and push side ways by hand. It has about 0.030" play. And I can see the top ring stays right with the cylinder.
So the rings are not seized?
Same as the other piston.
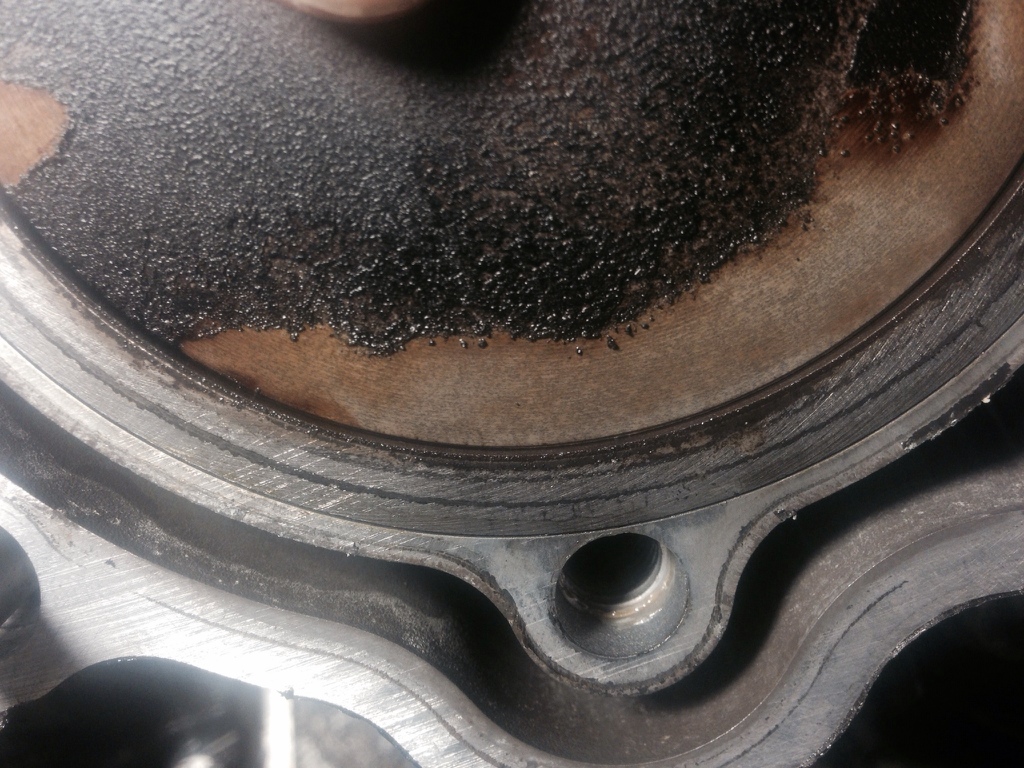
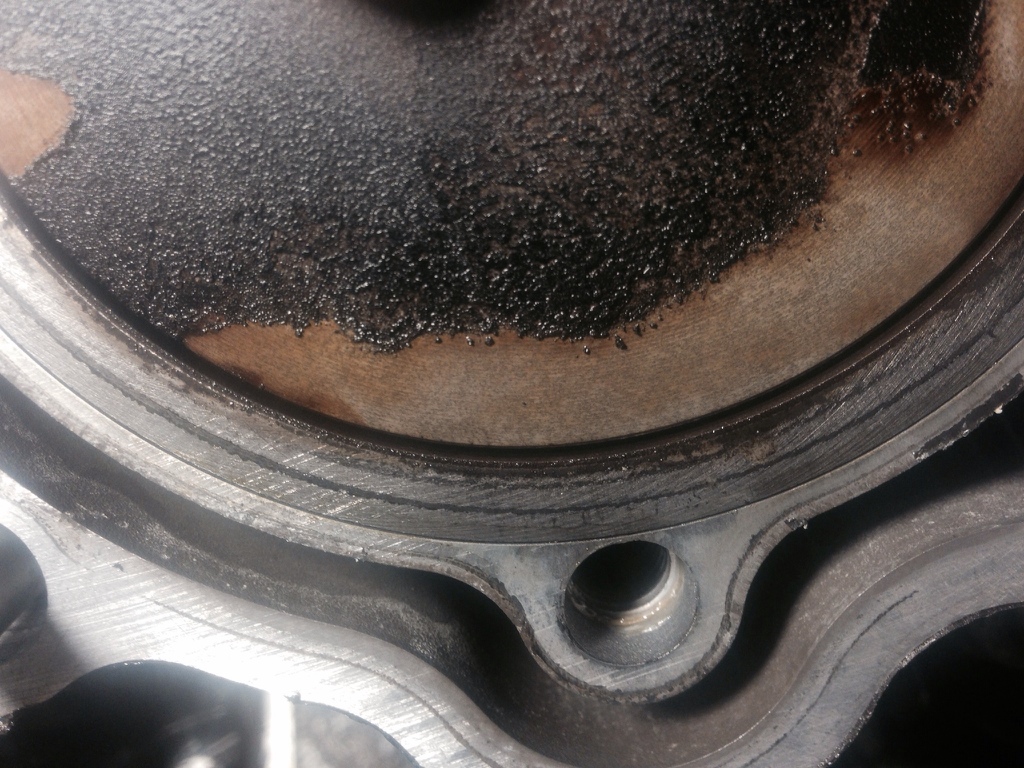
Sent from my iPhone using Tapatalk
So the rings are not seized?
Same as the other piston.


Sent from my iPhone using Tapatalk
Bonmotwang
Well-Known Member
Your next step when you're ready is to slide the cylinders up and off the pistons. You need to break the seal of the base gasket and your plastic dead blow mallet is a good way to do this. Or a block of wood and light taps with like a one pound hammer around the base and corners. Be careful and avoid prying up on anything.
Manual said you have to remove the rods/studs before remove the cylinder.
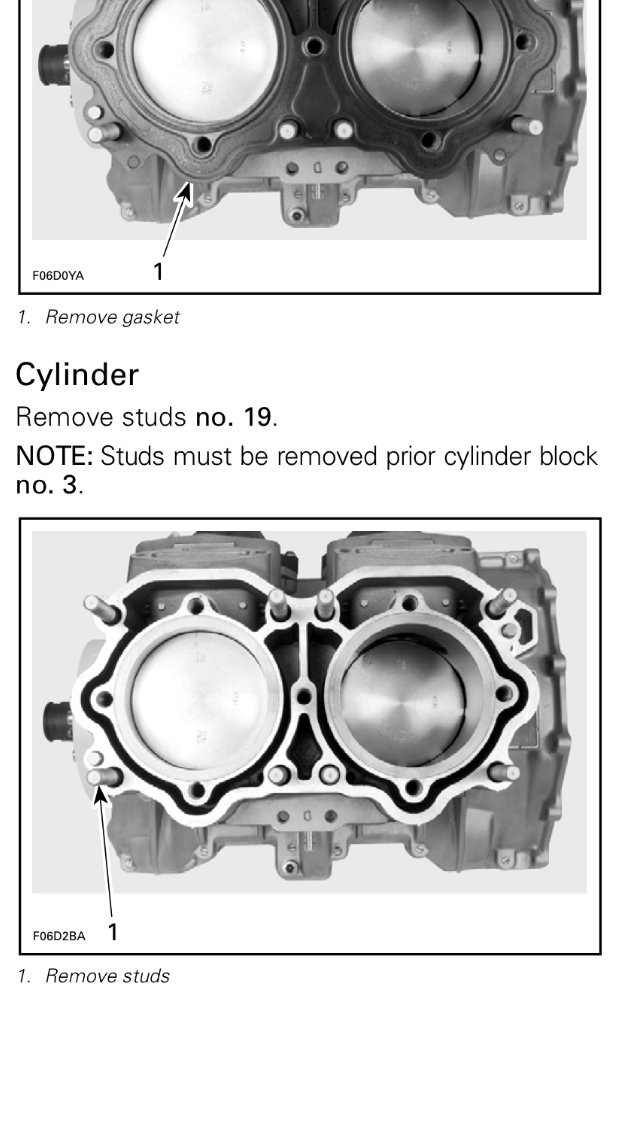
Sent from my iPhone using Tapatalk
- Status
- Not open for further replies.
Similar threads
- Replies
- 1
- Views
- 220
- Replies
- 7
- Views
- 653
- Replies
- 3
- Views
- 348


