• This site contains eBay affiliate links for which Sea-Doo Forum may be compensated.

2001 Seadoo Sportster LE. Just got it!

Status
Not open for further replies.
Oil for premix. He said it mix with gas better. I have 8/10 tank of gas. He said put both in before heading out to the lake.
649.jpg


Sent from my iPhone using Tapatalk
 
Dry is the answer you seek. How's it going so far?

I prefer dry as well, if the surfaces are in good condition. Sometimes I use some sealer like copper-spray in the case the surfaces are rough, but I don't like to do this if possible.

For the bottom around that corroded water jacket I think I would use some Permatex 2B under the gasket in the corroded area. Maybe some JB weld would work also, during the assembly put JB-Weld there in the corroded holes then place the gasket on and the cylinder, keep building the motor while the JB sets up.

Those cylinders sure look dirty to me, I think they weren't very clean and still contained abrasive.
 
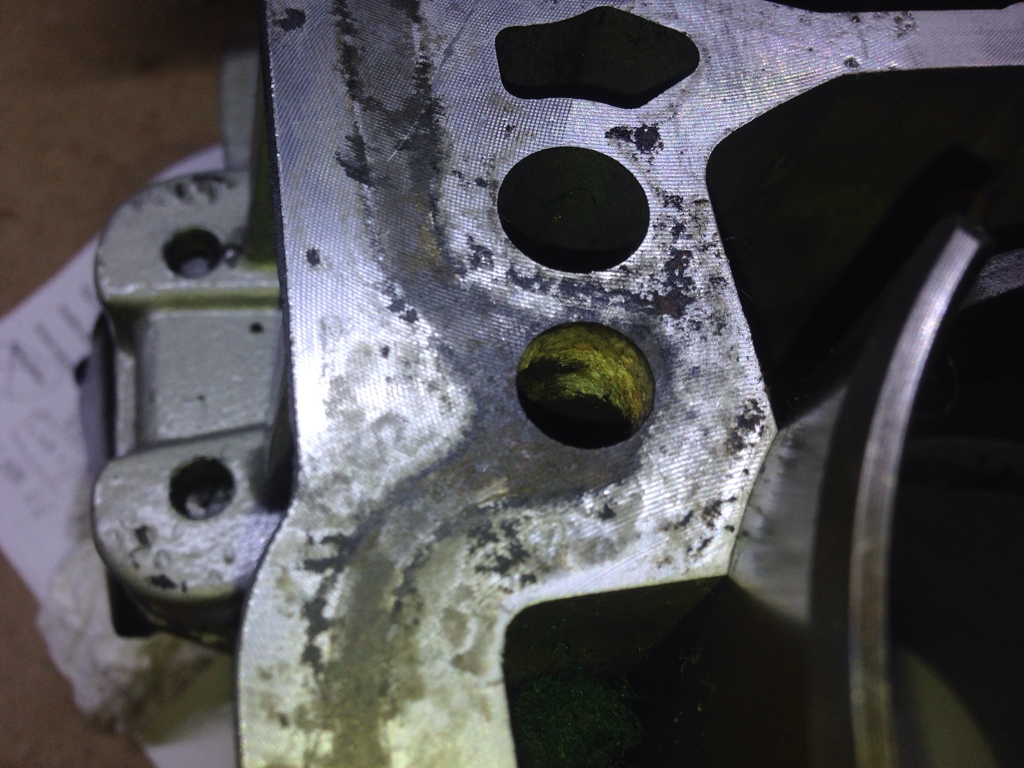
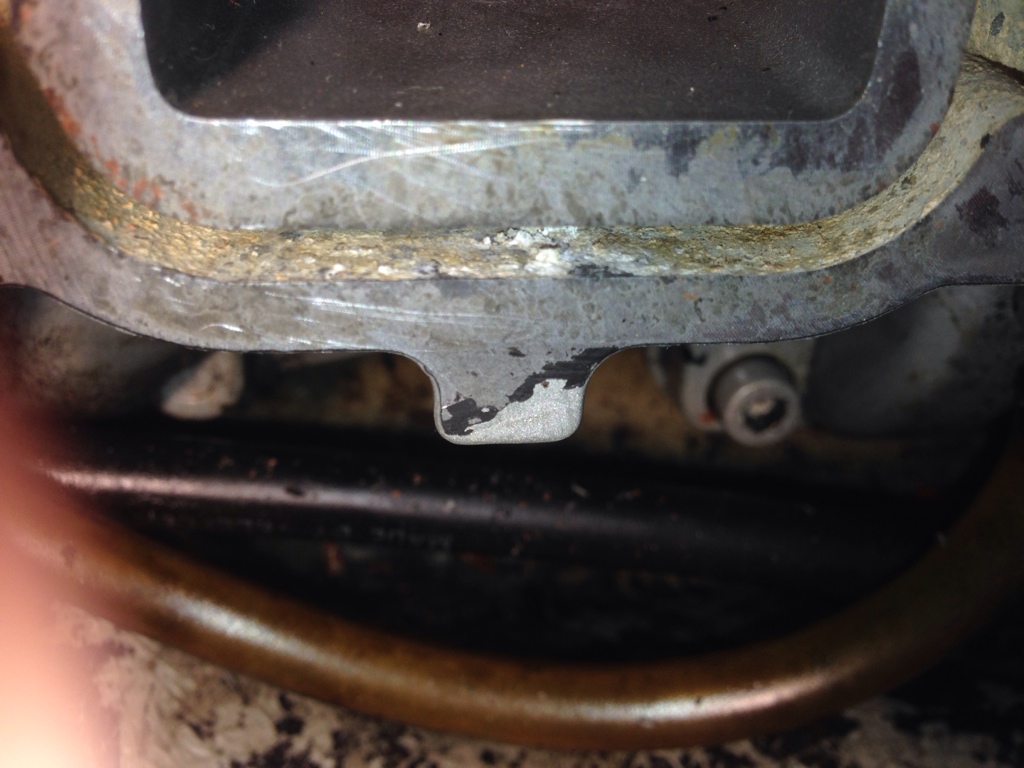
Is this the corrosion you are talking about?
650.jpg

But water passes through these holes, don't they?

Those 8 bolt holes are clean.

Still trying to find a solution to wash the cylinder with hot water. Something new :-D

Can I just sink it into a big pail and pour in boiling water and use a tooth brush to clean inside also outside and gasket surface?

It looks like rebuilding is all about details. If youtube does the teaching, then everybody can rebuild. I would consider you tube as the start :-) and gold is in here ... ...


Sent from my iPhone using Tapatalk
 
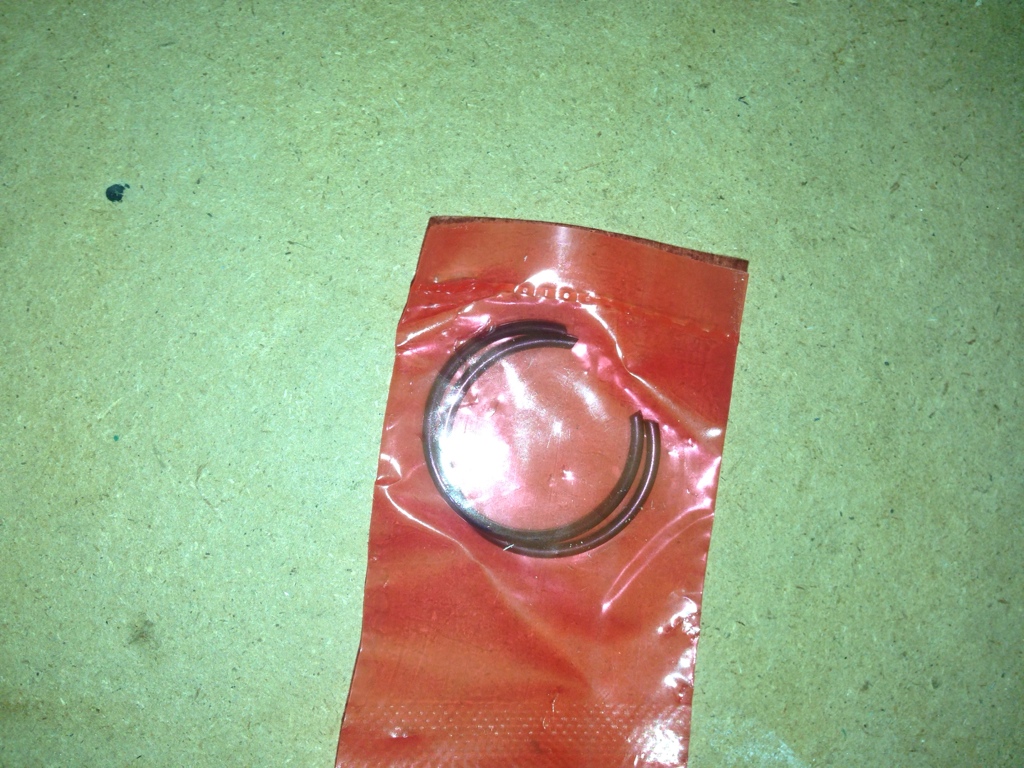
These clips will be a pain.
651.jpg


I thought it changed to the one with two holes.

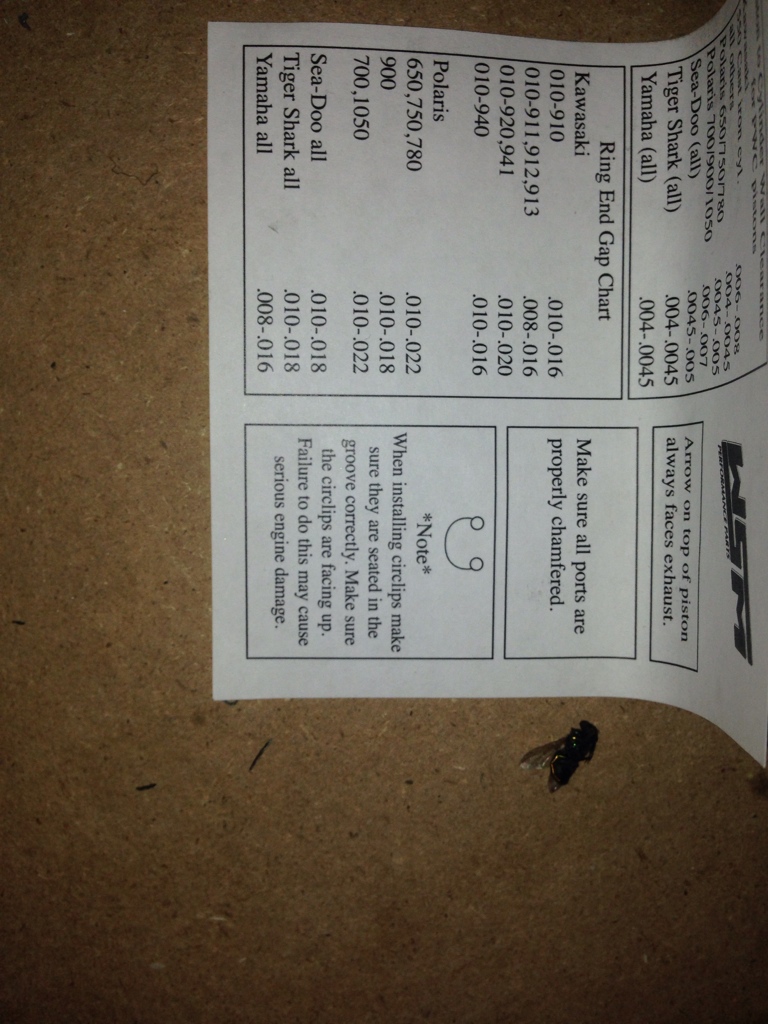
And also the instruction says the opening have to be up by saying facing up?
This the note:
652.jpg


Sent from my iPhone using Tapatalk
 
Is this the corrosion you are talking about?
650.jpg

But water passes through these holes, don't they?

Those 8 bolt holes are clean.

Still trying to find a solution to wash the cylinder with hot water. Something new :-D

Can I just sink it into a big pail and pour in boiling water and use a tooth brush to clean inside also outside and gasket surface?

It looks like rebuilding is all about details. If youtube does the teaching, then everybody can rebuild. I would consider you tube as the start :-) and gold is in here ... ...


Sent from my iPhone using Tapatalk

I thought I could see in the case under the base gasket of PTO cylinder there was aluminum corroded away but could be I mistook the photo. I placed a red oval in your photo where it looked that way and reposted it.

If all the surfaces look good there should be no problem IMO. The head gasket has a special coating on it to allow for expansion and contraction while sealing to the metal so I hope there isn't some oil to interefere. I really don't like to use any sealer if the surfaces are smooth and flat, the special coating on the head gasket is designed to work as it is but of course it cannot compensate for gouges, scratches or deep corrosion.

I think for the cylinder I would put it in the large sink and wash it with as hot of water as possible. Compressed air, dry towels and WD-40 can help avoid rusting but the abrasive must be washed away IMO. You can see abrasive with a white paper towel as before.

Hastings says this, about that:

"CYLINDER CLEANING

The single most critical factor of any cylinder refinishing job is the cleaning of that cylinder after the honing operation.

It can be stated, pistons, rings, and cylinder bores will forgive slight variations in roughness, cross hatch angle, etc. No engine component will tolerate dirt!

Honing cylinders leaves two types of "dirt" on the cylinder wall, honing stone residue, and cast iron dust. If not removed before the engine is reassembled, the world’s finest lapping compound is waiting to destroy all the hard work of assembly the instant the engine is started.

Proper cylinder cleaning consists of a thorough scrubbing of the block with hot, soapy water taking care to clean the surface under the cylinder facing the crankcase. Rinse with hot water, dry, and lightly oil to prevent rust.

For detailed honing questions it is wise to contact the manufacturer of your specific equipment. They are experts in metal finishing and of course completely understand their own equipment.

In general if the foregoing practices are used excellent engine performance will result. "

https://www.hastingsmfg.com/ServiceTips/cylinder_bore_refinishing.htm
 
Is this deep corrosion pitting that might allow water to leak into crankcase?

This is the other side of the base gasket. I have used plastic scraper and wiped with wd40. Still a lot of black dirt left there. So this the evident of water seeping through the gasket and into the cylinder and into the crankcase?
653.jpg


Sent from my iPhone using Tapatalk
 
Repost of the circled spot
654.jpg

655.jpg


I may have done the wrong thing by using a chisel to remove the gasket and left some fine scratches. I hope it won't hurt the seal.


Sent from my iPhone using Tapatalk
 
This is the other side of the base gasket. I have used plastic scraper and wiped with wd40. Still a lot of black dirt left there. So this the evident of water seeping through the gasket and into the cylinder and into the crankcase?
653.jpg


Sent from my iPhone using Tapatalk

I'm not sure if it's pitting I can see but if it is then I would try to use a coating of some kind of sealer, 3M motoseal is one product that will work for some pitting or if the pitting is very minor then a thin film of Permatex 2B will do the job.

If the surface is smooth and not corroded away then only the dry gasket is enough.

To make our amateur "racing" motors with high compression we used to assemble with no base gasket and only use motoseal, LOL. We blew up some of them, too.... from too much compression, and too lean for high compression with cheap fuel. Also we only installed the top ring for a faster revving engine, LOL!

So a professional builder will check squish gap or cylinder head cc at top dead center after torquing head, to make sure. A rough check of compression is acceptable maybe? You have new pistons, so a different base gasket may be necessary to achieve proper squish and avoid detonation. I think Seadoo specifies the combustion chamber cc volume for this purpose so after assembly and torquing the head you can verify combustion chamber cc volume.
 
Repost of the circled spot
654.jpg

655.jpg


I may have done the wrong thing by using a chisel to remove the gasket and left some fine scratches. I hope it won't hurt the seal.


Sent from my iPhone using Tapatalk

I use a razor blade and then remove gasket stains with a scotchbrite wheel pad on the die grinder but even then it's necessary to avoid scratches. I think the scotchbrite wheel pad helps to remove burrs and minor scratches from scraping off the gasket.

A more proper way to remove the traces of gasket is by using gasket remover but I don't like the chemicals.

Too bad, living in the modern world, hard to find a razor blades any more. Razor blade was my favorite tool that I stole from my father for my wood project when I was a kid.

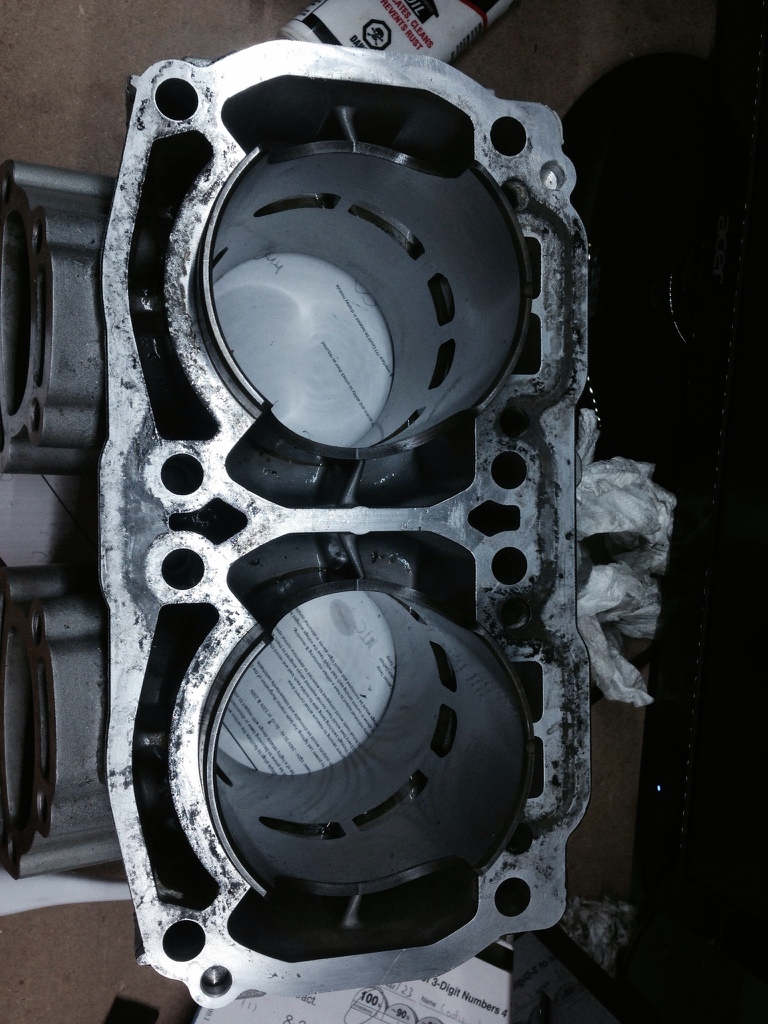
trying to understand the way cylinder works by looking at the cylinder. Are those ports bide the exhaust for fuel/air mist coming into the combustion chamber? And also for the crank shaft to sling some oil into the cylinder?
 
I use a razor blade and then remove gasket stains with a scotchbrite wheel pad on the die grinder but even then it's necessary to avoid scratches. I think the scotchbrite wheel pad helps to remove burrs and minor scratches from scraping off the gasket.

A more proper way to remove the traces of gasket is by using gasket remover but I don't like the chemicals.

Just confirming: Is the stubborn dirt I couldn't scraped off the evidence of minor water leak? or just some sealer somebody put there for better seal.
 
Just confirming: Is the stubborn dirt I couldn't scraped off the evidence of minor water leak? or just some sealer somebody put there for better seal.

I think some places where is exposed to the water jacket it's just mineral stains from the water and hard to see but possibly very minor corrosion.

In the places where the gaskets were clamped between two mating surfaces, it appears there is still some gasket remaining. For this it can cause a leak depending on the thickness of the base gasket, some base gaskets are thin like paper thus must be smooth and flat or leaks can occur.

I think it's wise to trust your eyes more than your sense of touch, to determine if a gasket surface is prepared. If you cannot use an abrasive scotchbrite pad at risk of flying debris entering the crankcase (I am concerned about this possibility) you might try the gasket remover to see if all of the stain from the gasket can be removed.

I just want to make sure there are no water leaks into the crankcase, it's difficult to see this type of imperfections in person, besides from photos. Maybe your surfaces are okay already and the gasket is plenty thick enough to compensate for the existing minor imperfections.

I think where you scrapped the stain is gasket material still remaining and it cannot be removed with a razor blade. It's close to acceptable but to be correct there should be no dark stain from the traces of gasket.

I will try to find a photo of a properly prepared surface, but I'm afraid the top of crankcase is difficult to clean by using scotchbrite due to possibility of debris entering crankcase so a chemical gasket remover is safer.
 
Last edited by a moderator:
I think Seadoo specifies the combustion chamber cc volume for this purpose so after assembly and torquing the head you can verify combustion chamber cc volume.

this is the table I just made using 135PSI as a reference for stock 947/951 carb engines:

Edit: wrong chart removed

Mine should be 133.48PSI. So I should be expecting 130PSI at least. :lol:

Edit: the other compression values are simply based on Boyle's law.

Edit: new chart added
compression1.JPG
 
Last edited by a moderator:
For no no base gasket we also used locktite 518 and this one:

http://www.usindustriallubricants.com/perfectseal.html

But since you have a base gasket you can use nothing if the surface looks good to you, or maybe some prematex 2B

I'm sure you can figure it out! :)

This is a good stuff. Non-hardening is always good to compensate any shrinking and expanding, or when shock happens.
Can I just put a thin think layer on the metal by finger? or this will affect the cylinder alignment or height?
 
I will try to find a photo of a properly prepared surface, but I'm afraid the top of crankcase is difficult to clean by using scotchbrite due to possibility of debris entering crankcase so a chemical gasket remover is safer.

Ok, I will get this one:
http://www.canadiantire.ca/en/pdp/permatex-gasket-remover-0382502p.html#.U9LaMfldXNk

You know what, before I got into the 2 stroke engine, I didn't know why Canadian Tire can still survive with all other big building material and tool retailers. Now I know at least one of the reasons. :-D

Do I need to be concerned about the crank case and rods have been opening to the air for several days now?
 
This is a good stuff. Non-hardening is always good to compensate any shrinking and expanding, or when shock happens.
Can I just put a thin think layer on the metal by finger? or this will affect the cylinder alignment or height?

I think you can use a brush to apply this one, like an acid brush for soldering flux or even a model painting brush (wife's make-up brush!), be sure not to leave any threads or bristles!

The clamping force will squeeze any excess out and the voids should be filled.

But it's better IMO to remove all traces of old gasket, b/c I've had this happen before it feels like there's no thickness to the gasket stain and somehow it still leaks until all color of gakset is brushed completely away.

So in my experience to judge if the surface is properly cleaned, there should be no gasket stain remaining, it should all be wiped away by chemical or mechanical polishing. And, this judgement is independent of your sense of touch, purely by the color of the surface.
 
Ok, I will get this one
Do I need to be concerned about the crank case and rods have been opening to the air for several days now?

Looks good, give it a try.

It should be fine but I hope your boat is parked in the garage so squirrels and chipmunks will not be tempted to stash leaves, pine needles or bear their young in the crankcase! :)
 
Looks good, give it a try.

It should be fine but I hope your boat is parked in the garage so squirrels and chipmunks will not be tempted to stash leaves, pine needles or bear their young in the crankcase! :)

Funny you say that! I AM concerned about the flies made it way into the crank case when I say them cruising in the bilge at wing flapping at 5500Hz :-D

I meant is there anything in the bottom end going to grow rust during these days.
 
Yes, I know you are wondering about rust but oxygen and water vapor are always present in some concentration anyway. I think all you can do is maybe spray some oil and lay a towel over top to deter condensation.
 
Status
Not open for further replies.
Back
Top