• This site contains eBay affiliate links for which Sea-Doo Forum may be compensated.

2001 Seadoo Sportster LE. Just got it!

Status
Not open for further replies.
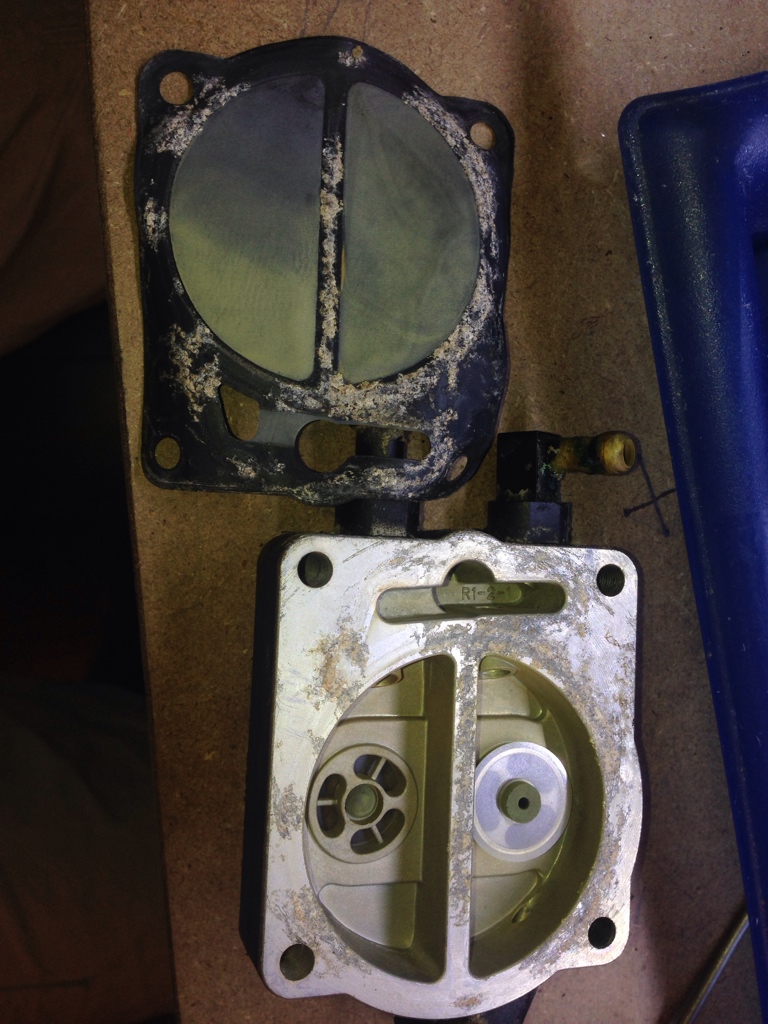
Does this look normal?
612.jpg


Sent from my iPhone using Tapatalk

Looks like aluminum barnacles, some amount of this will happen due to moisture penetration and acids maybe in the rubber but if the damage is minor and this doesn't leak then it's okay. Coat that surface with some oil to maybe slow the growth of barnacles.

Just wondering if there's some amount of oil in the crankcase, there should be a puddle there. Check for me next time you look unless you vacuumed it out already.
 
You can clean those *barnacles* off the aluminum with a green scotch brite pad and some WD-40, easy does it you don't want take away any of the aluminum housing under that mess.
 
Looks like aluminum barnacles, some amount of this will happen due to moisture penetration and acids maybe in the rubber but if the damage is minor and this doesn't leak then it's okay. Coat that surface with some oil to maybe slow the growth of barnacles.

Just wondering if there's some amount of oil in the crankcase, there should be a puddle there. Check for me next time you look unless you vacuumed it out already.

OK, I will clean that as Waterluvr has suggested.
Can I use 3 in 1 oil on the rubber?
Do I need to use some oil on all the seals when assemble them?
 
Seadoo foruming from public library :-D
Let's have a tag line for the month: "Seadoo Anywhere" :cheers:

Hi Sportster.
Are you saying I should see some oil at the arrow pointed area?
I did see some dark liquid there. Not high for sure. But I will a stick to check depth.
7ubysube.jpg

Edit: by looking at the picture again. The dark area is oil. Can you judge from the picture? Is it a pass :-)
 
You can clean those *barnacles* off the aluminum with a green scotch brite pad and some WD-40, easy does it you don't want take away any of the aluminum housing under that mess.

At general question here: Do I need to do a final bath for the carb block to get rid of any WD40 or carb cleaner or 3 In 1 oil, or they are ok to be there.

And I did spray Carb cleaner to the out side of the carb on the black paint. Online reading says it will eat paint.
 
About the two fuel pump mylar check valve disks:

Thanks Sportster. Nice instruction.
Without that little tool, can I still push it in? Or I just leave it alone, it looks OK.

Is this chamber suppose to be dry? Pulse line goes into here?

I am at library (7 year old is learning chess, so that one day he is able to beat me), couldn't look at the block, but Carb is all over my mind :-)
 
No leave the throttle/choke shafts and linkages in place. Now, every opening in that carb has a point or origin and point of exit through the passages where you want the cleaner to flow through.

Wear safety goggles so you don't get it in your eye's but you need to visually see it's flowing out when you insert the straw into an opening and flush it out.

Safety goggles is a must for the first time DIYers.
Because most of the passages are CNCed from 90 degree directions. So the spray doesn't necessary come out from THE OTHER SIDE. I didn't get any on my face, but two big puddles on my LCD panel at the back!
Don't rush, safety first and enjoy the work.
 
Set these all to factory spec, as per your service manual. Make sure your metering springs are the correct color at least, someone may have changed to the wrong ones. Check the numbers stamped on the brass jets to confirm correct calibration, and the metering needle seat.

Found one of your posts with the chart :-)

http://www.seadooforum.com/showthread.php?68149-Carb-Rebuild&p=381140&viewfull=1#post381140

My color is shiny silver, the number stamped on the needle seat is 2.0
So the needle valve size should be 65 grams.
the pop-off pressure is 18 PSI.
Is it correct?

Edit: Found a online manual for GSX-Limited (use 947 engine too). The pop off pressure is min 19PSI max 23PSI.

Edit: Black looks to be the right one?
 
Last edited by a moderator:
You should also check pop pressure to confirm the metering needle calibration is correct, before installing the metering diaphragm onto the fuel chamber.

Should I get a pump to do this job? Do I need any special fittings?
Same pump can do the jet pump pressure test too? (BTW, I bought the fitting for the jet pump already)
 
Thanks Sportster. Nice instruction.
Without that little tool, can I still push it in? Or I just leave it alone, it looks OK.

Is this chamber suppose to be dry? Pulse line goes into here?

I am at library (7 year old is learning chess, so that one day he is able to beat me), couldn't look at the block, but Carb is all over my mind :-)

I usually leave them alone if they aren't cracked, bent or worn on the sealing edge. Mostly they last a very long time and never fail.

To insert the rubber retainer plug you can wrap some waxed dental floss around the end of the plug that goes into the hole (maybe 5~8 turns wrapped around) and hold it against the hole while pulling the dental floss through the hole from the other side. The unwrapping action of the dental floss around the circumference of the retainer plug will pull the rubber piece into the hole. Some oil may help.

Old Indian trick: For the corroded flat surface you can use a fine 1200 wet sandpaper sprayed with WD-40 and taped onto a flat piece of glass plate to "machine" lap the corrosion off and remove high spots or minor warp but this is not ordinarily necessary.

What kind of lubricant did you have in mind, Astroglide? :) http://www.astroglide.com/home.aspx

Be careful not to leave residual dirt/debris inside the carb when using abrasives.

I see a black colored gasket piece on the FP side, there should also be an opaque mylar film diaphragm sheet under that on the pulse chamber side of the FP, not sure if it's there by the photos. This mylar film is the actual diaphragm.

I mention the mylar b/c sometimes I find a rebuilt carb is incorrectly assembled on the FP side in the incorrect order. Maybe yours was correctly assembled, I have no idea or opinion.
 
Found one of your posts with the chart :-)

http://www.seadooforum.com/showthread.php?68149-Carb-Rebuild&p=381140&viewfull=1#post381140

My color is shiny silver, the number stamped on the needle seat is 2.0
So the needle valve size should be 65 grams.
the pop-off pressure is 18 PSI.
Is it correct?

Edit: Found a online manual for GSX-Limited (use 947 engine too). The pop off pressure is min 19PSI max 23PSI.

Edit: Black looks to be the right one?

It's the factory silver spring I recommend, 95 gram, with the 2.0 seat to make our pop spec psi (Reference correct spec, later 951 is not same as early 951 circa 1998, Seadoo was still dialing the tune with white motor).

Some of this is by my memory, too many carb specs to remember:

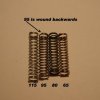
There are two silver springs available for Mikuni side draft BN and if your eyes are really good you MIGHT see the color difference between shiny and dull silver, LOL, but the 95 gram spring is twisted/wound in the opposite direction of the other 3 springs (black 80gr, gold 115gr, silver 65gr). So if your spring is silver, there's a good chance it's original 95gram and the best choice to reach correct pop pressure (pop is airbox dependent, no box or high flow racing boxes need lower pop).

Confirm metering arm height is flush with fuel chamber bottom, dragging a straight edge razor blade across bottom of chamber should barely snag the end of the metering arm. This is dead-nuts perfect.

Currently I have the black 80gram spring in my carbs but I will return to the original 95gram next time b/c 95gram is a good choice, the 80 gram works quite good and doesn't load up the crankcase with fuel during idle but I want to stay closer to factory spec if possible.

To my surprise last weekend I forgot to apply choke on first cold start of day and it fired-up immediately! (One pump of accelerator pump) :)
 
Should I get a pump to do this job? Do I need any special fittings?
Same pump can do the jet pump pressure test too? (BTW, I bought the fitting for the jet pump already)

You can maybe connect the pop-off pump to 5/16 and 1/4 fuel line inlet by making your own adapter from a stolen piece of Jeep! :)

You need to make/measure up to 30psi in a controllable way while watching the gauge, a finely variable orifice may be necessary if you use a 120psi pressure source. You can use a bicycle pump and control the pressure rise accurately while a blow gun valve may not be controllable.

Jet pump only should be pressurized to 10psi, to avoid blowing out the seal.

I live far from town so I have a coffee can full of fittings I've robbed from many jeeps, vans, mercruisers and assorted hoopties over the years, perhaps you can find a vacuum hose fitting assortment for your many pneumatic experiments in the local autoparts store.

The jet pump pressure test fitting is 1/8" male pipe thread.
 
My spring is normal wound. So it is not 95g.
I will check the kit I got to see if it is the opposite way.


Sent from my iPhone using Tapatalk
 
I guess if your kit is specific for BN-46i it should have 95g spring included, but it may be the incorrect black 80gr spring. This is how the wrong spring can be installed, b/c carb kits often have the incorrect spring included.

Anyway, if you have the black spring and silver spring that's wound in the opposite direction from the black one, then it's the correct 95gr spring. Then inspect it to make sure it's not bent, kinked or somehow damaged.

Do not modify these springs.

It's best to adjust the metering arm if any adjustment is necessary, usually adjustment is unnecessary though, except to match the pop of carb A and carb B so they both pop together when running.
 
I will get a 60 psi gauge from lowes at lunch break (full schedule in the morning). It has 1/4" fitting. So I should be able to collect enough parts there to work with my air compressor.


Sent from my iPhone using Tapatalk
 
I guess if your kit is specific for BN-46i it should have 95g spring included, but it may be the incorrect black 80gr spring. This is how the wrong spring can be installed, b/c carb kits often have the incorrect spring included.

Anyway, if you have the black spring and silver spring that's wound in the opposite direction from the black one, then it's the correct 95gr spring. Then inspect it to make sure it's not bent, kinked or somehow damaged.

Do not modify these springs.

It's best to adjust the metering arm if any adjustment is necessary, usually adjustment is unnecessary though, except to match the pop of carb A and carb B so they both pop together when running.

The spring in the kit is exactly same as one of my existing ones. Clock wise wound. Same length.

But by comparison, I found the two springs in my carb are not the same length. The PTO side is shorter.
615.jpg


Sent from my iPhone using Tapatalk
 
Seadoo carb spring color chart updated with new part number

This is the original / early part number list.
115 - Mikuni Reference Number 730-03027
95 - Mikuni Reference Number 730-03027-T
80 - Mikuni Reference Number 730-03033
65 - Mikuni Reference Number 730-03030

What we need in Sportster LE is 730-03033, 95g, and wound opposite than the most of the springs in the world.

Now a new part number appeared in the BN46I kit.
730-03034, 95 Gram for SD BN46I carb only

So this new part must be wound clock wise. So I guess the mystery solved.

But I guess they didn't realize the winding direction will affect the boat steering, no wonder my boat running off to the right a little. :lol:

Edit: corrected the part numbers.
 
Last edited by a moderator:
I hope your machinist actually measured the new pistons first, before boring to final size.

It just occurred to me that every spring in the world is wound in the wrong direction except for the perfect spring. So the RV engine has backwards springs!
 
Last edited by a moderator:
Status
Not open for further replies.
Back
Top