• This site contains eBay affiliate links for which Sea-Doo Forum may be compensated.

RESTO Project Dog House: 1996 Challenger

Status
Not open for further replies.
May have found the source of my fuel delivery issues... PTO carb gasket was not centered and has a one inch section missing. :o
 
wow, how did that happen? did the engine get hurt?
looks like the gasket was only on one of the studs.
tore the carbs down and both were dirty and had rust from water sitting in them
clean now though :)
almost done with 2nd one. will post pics and reinstall later this week
 
looks like the gasket was only on one of the studs.
tore the carbs down and both were dirty and had rust from water sitting in them
clean now though :)
almost done with 2nd one. will post pics and reinstall later this week


wow, how did that happen? anyway, you are using the thicker OEM gaskets yes?
 
wow, how did that happen? anyway, you are using the thicker OEM gaskets yes?
From the imprint on the torn gasket, I can see that I installed it improperly.:facepalm: I only had one side of the gasket on a bolt. the other one missed, and the gasket pivoted down 10 degrees, or so. This put part of the gasket in the carb throat where it looks like the suction tore off part of the gasket. I embarrassed that I didn't notice this before running the engine and didn't see the gasket any time that I looked in the carbs, so I'm guessing that it was sucked in the first time I fired the engine. I've probably got almost 2 hours on the engine now. Hoping that the ingested gasket piece blew through without any issue. I haven't seen any signs that anything is blocked in the exhaust, but haven't torn it down to check. This could also explain some/part of the low speed issues I've been having. Too many potential causes for that right now.:willy_nilly:

-gaskets:
373.jpg


Inside the carbs:
Mag side:
374.jpg

375.jpg

376.jpg

377.jpg

378.jpg


Cleaned and going back together:
379.jpg

380.jpg


PTO side was cleaner, except for the filter, which had a lot more gunk in it:
381.jpg

382.jpg

383.jpg

384.jpg


So, I had not ordered a carb rebuild kit, not knowing exactly what I would find in the carb. I cleaned it all and put it back together. Y'all would have laughed when I did the first pop-off test, as I didn't know it would shoot oil in my face and was looking right at the backside of the needle. Good thing I had my glasses on. :rolleyes:

I've never been in this type of carb before, but it looked pretty bad to me. However, it looked better than I expected after I cleaned it up. Should I order the full carb kit from OSDparts? The SBT kit? Something else?
Or might it be OK as is?
Regardless, i've got to either order a new gasket, or make a new one before it all goes back together. Also want to pull the fuel baffle and check the screen and float before I place the order.

Also, I picked up this hour meter on ebay for about $13 a few months ago and put it in before the ride on Friday.
385.jpg

For now, I just zip tied it to the ski pylon post. It also works as a digital tach, which should come in handy for tuning the carbs. :)
 
Last edited by a moderator:
As for the incorrectly installed gasket, BEEN THERE, DONE THAT. I always run my finger under the carb now to make sure I got the gasket on right. As for the condition of the carbs, WOW. Am I understanding correctly that it actually RAN like that? Holy cow, those look pretty bad. I'm surprised you got anything through the jets at all what with all that rust everywhere. Your rubber parts don't look too bad, they don't seem dry or anything. I can tell by the red button on the diaphragm that you're at least dealing with genuine mikuni stuff. It's always a good idea to get new stuff so that you know what you have, but if it looks good, who knows, maybe it just is. Most of that stuff in there is not susceptible to water damage. I hope you get your boat back online soon so we can compare data points. I'm still chasing gremlins on my Challenger.
 
... As for the condition of the carbs, WOW. Am I understanding correctly that it actually RAN like that? Holy cow, those look pretty bad. I'm surprised you got anything through the jets at all what with all that rust everywhere. ... I hope you get your boat back online soon so we can compare data points. I'm still chasing gremlins on my Challenger.

Yeah. Given that it ran, I was surprised when I saw how bad they were inside as well.
The plan is to have it back together by the weekend so I can get on the water and adjust the carbs.
Hope you get yours sorted out quickly.
 
are those gaskets thin? I would recommend OEM thick seadoo gaskets. I have learned that the thin jetski gaskets wick.

anyways, I see your are slightly different compared to the challenger carbs, I have remote fuel pump and your are attached to the pump it looks like.

since you have them apart, I would invest in new needles and seats and a complete kit. I`ve only heard to use Mikuni kits, have no experience with anything else.

now, if I want to poke at ya, your signature comes to mind! hahahahahaha

I would really rethink about moving forward with this project until you repair the electrical box, that is a dangerous hazard...

good luck...
 
are those gaskets thin? I would recommend OEM thick seadoo gaskets. I have learned that the thin jetski gaskets wick.
They aren't paper thin, but I don't have any others to compare them to.


Since you have them apart, I would invest in new needles and seats and a complete kit. I`ve only heard to use Mikuni kits, have no experience with anything else.
Yeah, I'm thinking I'll get the OSDparts kit, as it is mikuni parts, plus a couple of parts that aren't in the standard kits, but are often needed.


now, if I want to poke at ya, your signature comes to mind! hahahahahaha
Yep. My sig is what it is for a reason. :thumbsup:


I would really rethink about moving forward with this project until you repair the electrical box, that is a dangerous hazard...

good luck...
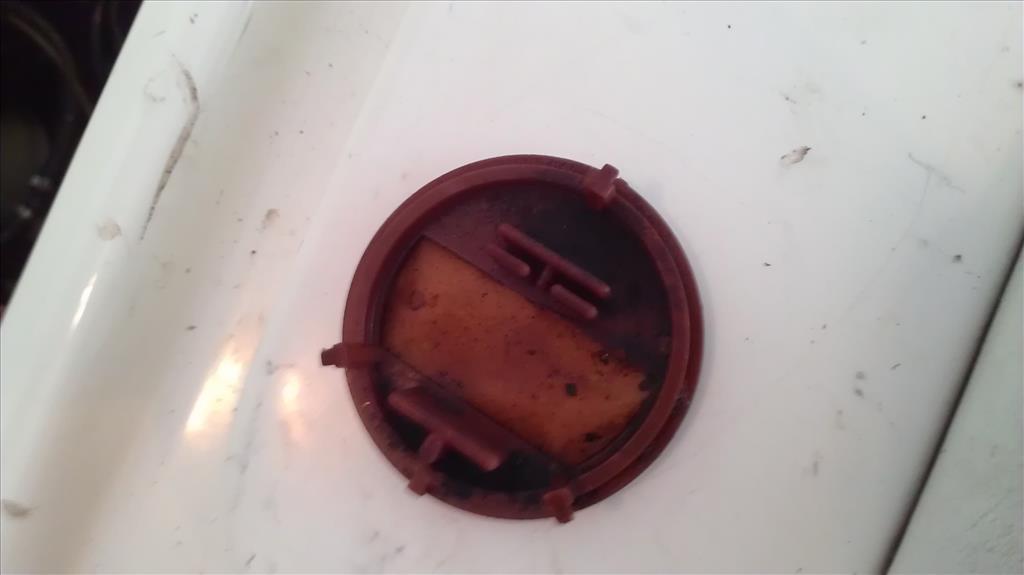
Ok, I've got 2 electrical issues.
1) the fuse block forward of the helm that has the big connector that has a couple of corroded pins. I haven't found a source for a new fuse block yet. I believe my bilge blower is inop because of a bad pin in the connector. If I can't find a replacement panel, I'll bypass the connector on the blower circuit.

2) the melted ignition fuse. I found a good bit of corrosion in the fuse holder and cleaned it up yesterday. Installed a new fuse with dielectric grease. Was planning to monitor this to see if the new fuse shows any signs of heating up. Since the fuse was like that when I got the boat, I don't know if it was a bad fuse, it failed because of heat from the corroded connection, or something else. Not sure how else to proceed on this. Ideas?
 
Just ordered the "OSD Sea Doo Complete Dual Carb Rebuild Package #3" kit, 2 Mikuni internal screw sets from OSDparts, and some purple locktite from Amazon. Hope it all gets here quickly. :)
 
first I will say that I am not familiar with your boat electrics, as My MPEM that controls both engines and electricals are all into on box.
If your fuse box is just that, maybe look into a 12 circuit BlueSea Fuse panel and independently wire everything you need with providing a heavy gauge wire for the power source then branch off what you need. If you are superb at wiring...

I use the 6 circuit panel in my tow rig for all my offroad lighting... with custom mounting bracketry, and all my lighting is independant of the trucks electrical sensitive canbus wiring...lol..

you can get the BlueSea box at Amazon to!
 
Focused on the fuel system this week as I work through the items listed in this thread:
http://www.seadooforum.com/showthre...el-Delivery-Problems-low-revs-bogging-surging
The following steps are from that thread, with my comments added.
Easy, but limited chance of success guide:
1. Clean out spin on fuel filter. Make sure the o-ring is there. Don't use carb cleaner or you will dissolve the filter's fiber mesh.
*rjcress: I did this, but before I read not to use carb cleaner. The filter looks fine, but I ordered a new one along with the carb rebuild kits. Should arrive today.

2. Try running your boat on RES - this would point to a clogged fuel selector valve.
*rjcress: I didn't see a difference in how the engine ran on primary or reserve.

3. Remove the fuel selector valve and clean it out with carb cleaner. Blow it out with compressed air in the ON and RES positions.
*rjcress: Removed, filled the ports with carb cleaner, cycled the valve 20 or so times, blew out the valve in reverse direction of fuel flow. I didn't see anything but carb cleaner blown out, but I forgot to put a paper towel over the ports before i blew them out... it could have blown some stuff out I just didn't notice.
433.jpg


4. Change to new spark plugs. You should have already done that.
*rjcress: yep. already done

5. Pull spark plug wire from boot. Trim 1/4" off the tip of the wire. Reinstall to the boot and ziptie it back on.
*rjcress: did this yesterday

6. Make sure your carbs' high speed adjuster is set to fully closed clockwise (zero). Set low speed adjusters to fully closed clockwise, then turn counterclockwise specific turns to your engine. Use the idle screw to set idle speed only - do not use low speed adjusters to set idle speed.
*rjcress: will do this after the carb rebuild

7. Check all fuel hose connections are tight and that the check valves freely blow one way, but do not the other (one above the fuel tank and one on the side of the hull from the fuel tank):
*rjcress: still need to do this as I reconnect everything.

More complicated, but high chance of success guide:
1. Remove all grey fuel hose (if you still have it) and replace with black automotive fuel hose. The grey stuff breaks down on the inside and clogs the carbs' internal filters. You'll need mostly 1/4" black automotive fuel hose (Coast Guard approved marine grade fuel injected hose is top of the line, but costly). Get 25 feet of it and about 30 stainless steel #04 hose clamps....no zip ties!
*rjcress: I've got nothing but black hose. :o ... in the boat.
Oh, nevermind. :angelsad:


2. Remove the carbs and disassemble for cleaning the internal filters.
*rjcress: Done, but not confident that everything is perfect, so doing a full rebuild tonight.

3. Better yet, plan for rebuilding the carbs
Here are some excellent resources for cleaning/rebuilding the carbs and setting them up properly:
Excellent carb rebuild guide thread by qstorm.
seadoosnipe's carb theory guide thread
Parts finder thanks to SeaDooWarehouse.com
JPX's 1996 HX carb rebuild thread with lots of photos (my own personal experience)
- Make sure your carbs' high speed adjuster is set to fully closed clockwise (zero). Set low speed adjusters to fully closed clockwise, then turn counterclockwise specific turns to your engine. Use the idle screw to set idle speed only - do not use low speed adjusters to set idle speed.
*rjcress: will finish this tonight

4. Clean spin on external filter, clean out fuel selector valve.
*rjcress: cleaned spin on filter, will install a new element today, added an inline filter, and cleaned the fuel selector

5. Pull fuel baffle from the tank and check for any obstructions on the intake screen. If you have lots of junk in the fuel tank, siphon out the gas and suck out the contaminants, then refill with fresh gas. If your fuel gauge doesn't work or always shows empty, check out this link while you have everything in pieces Fix for Fuel gauge empty or light on when tank is full (fuel baffle/sender)
*rjcress: Removed the ski pylon support so I could pull the baffle. Intake screen was discolored and dirty, but didn't appear to be obstructed.
434.jpg


... but I cleaned it with simple green, rinsed, then blew it out with compressed air. After seeing it "clean", I'm glad I cleaned it.
435.jpg


Couldn't see the bottom of the fuel tank to check for contaminants, as it is full and has a strong pre-mix for engine break in, so the fuel is not translucent. Will pull the baffle when the tank is lower and not pre-mixed, if any there are further issues. Verified that the fuel level float floats in a jar of gas
436.jpg


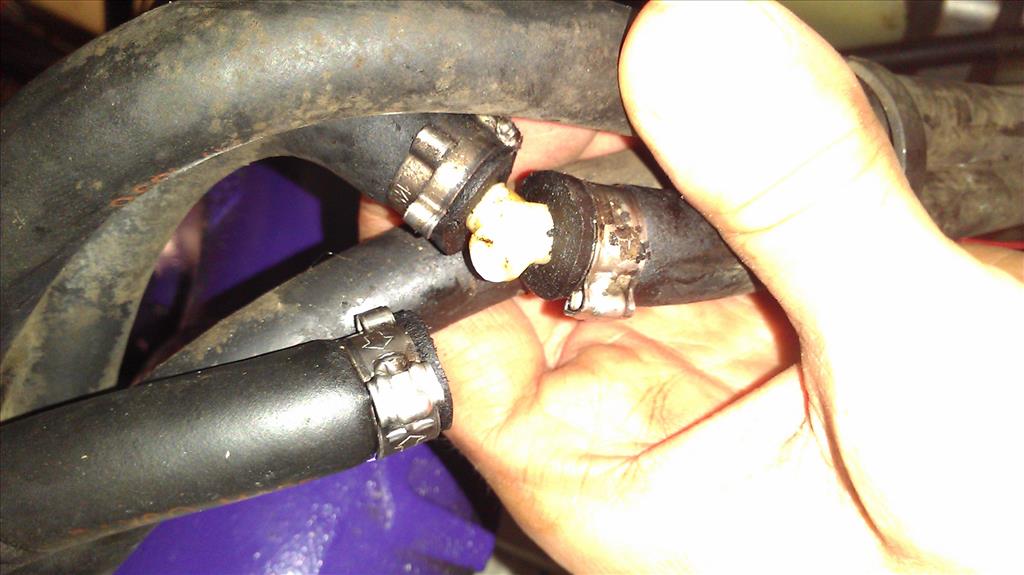
..., cleaned the inside of the baffle and the float, and reinstalled the float, screen and baffle. Sadly, I broke the little "Y" connector that joins the vent and pulse ports on the baffle to the pulse line from the engine.
437.jpg

Will pick up a replacement today. Anyone know if this should be plastic, or if I can use a brass one? Seems that brass would be more durable.


7. Check all fuel hose connections are tight and that the check valves freely blow one way, but do not the other (one above the fuel tank and one on the side of the hull from the fuel tank):
*rjcress: still need to do this as I reconnect everything.

Fingers crossed that I get everything back together without breaking anything else. :)
 
Last edited by a moderator:
Don't forget to check the spin on filter after your first few hours of operation. You might start pulling stuff up from the tank if it has been sitting for a long time in the past. My filter got all sorts of clogged when I first started using the boat after 1+ years of sitting.

 
Don't forget to check the spin on filter after your first few hours of operation. You might start pulling stuff up from the tank if it has been sitting for a long time in the past. My filter got all sorts of clogged when I first started using the boat after 1+ years of sitting.

Great reminder. Thanks. :)

And while I had the compressor out, I set the compressor regulator to 90psi and filled the main and spare tires on the trailer. I was surprised that the listed pressure was 90psi. None of my tire gauges go that high, so I just let the pressure equalize in the tires and the compressor. 2 were pretty close, one was really low.

After the carb rebuild I'll need to tune the carbs... which means the boat has to be in the water. The boat ramps at the local lake can get crowded, and there isn't a good place to tie up while tuning. And of course, the forecast is for a chance of t-storms all weekend (as usual)
438.jpg

So, I'll likely pull the Challenger to Smith Mountain Lake this weekend, so I can pull it up at the covered dock beside the big boat and work on it in-the-water even if it is raining. :)
439.jpg

(Yes, my dog can swim, but wears a life jacket when he is roaming the dock, just in case.)
 
If you need a wiring diagram on the fuse block my manual has one. By the way the Challenger is looking good:thumbsup:
 
I would go ahead and order needles and seats to go with the carb kits. Ask me how I know!!:facepalm:

Get a new fuel selector valve instead of trying to clean the old one. It is not worth cleaning. Ask me how I know!!:facepalm:
 
If you need a wiring diagram on the fuse block my manual has one. By the way the Challenger is looking good:thumbsup:

Thanks! Yes, please.
It may be in my manual and I'm just brain-farting and missing it... but I haven't found it yet.
I'll pm you my email address. :)
 
I would go ahead and order needles and seats to go with the carb kits. Ask me how I know!!:facepalm:

Get a new fuel selector valve instead of trying to clean the old one. It is not worth cleaning. Ask me how I know!!:facepalm:

I ordered the kit from OSDParts.com because it included the needles and seats. :)

On the fuel selector, I didn't see any difference in going from "on" to "res", which I gather is the most common tell-tale sign. I also didn't get any gunk out of it. However, I've never opened one up. I only saw one screw on mine, and I didn't take that screw out. I'll see if it comes apart to do a more thorough cleaning, as the carb cleaner and compressed air didn't produce any gunk. I wonder if a pipe cleaner would work? I'll grab one out of the kid's craft cabinet and see if it dissolves in gas... if not, I'll try it.
Anyhow, I know that I just rambled about cleaning it, when you said it isn't worth the trouble. You are probably right. I just don't have time to get a new one before heading to the lake tomorrow evening... so taking a shot at cleaning the existing one is my best option. I don't have a SD dealer close by at home, but there is one at the lake. If it appears to be giving me problems I can see if they have one Saturday.
 
Last edited by a moderator:
I ordered the kit from OSDParts.com because it included the needles and seats. :)

On the fuel selector, I didn't see any difference in going from "on" to "res", which I gather is the most common tell-tale sign. I also didn't get any gunk out of it. However, I've never opened one up. I only saw one screw on mine, and I didn't take that screw out. I'll see if it comes apart to do a more thorough cleaning, as the carb cleaner and compressed air didn't produce any gunk. I wonder if a pipe cleaner would work? I'll grab one out of the kid's craft cabinet and see if it dissolves in gas... if not, I'll try it.
Anyhow, I know that I just rambled about cleaning it, when you said it isn't worth the trouble. You are probably right. I just don't have time to get a new one before heading to the lake tomorrow evening... so taking a shot at cleaning the existing one is my best option. I don't have a SD dealer close by at home, but there is one at the lake. If it appears to be giving me problems I can see if they have one Saturday.

There is a rubber grommet inside the selector valve. It gets old and worn then somehow gets out of position and won't let the fuel flow unrestricted, but when you blow on the valve it feels like everything is good...until you blow on a new one and feel the difference.
 
There is a rubber grommet inside the selector valve. It gets old and worn then somehow gets out of position and won't let the fuel flow unrestricted, but when you blow on the valve it feels like everything is good...until you blow on a new one and feel the difference.

And THAT is the info I was missing. Thanks!
 
Rebuilt the carbs today... one before work, one at lunch. Installed them after work.
This time I made sure the gaskets are in the right place.
Remounted the fuel selector, changed the inline oil filter, reprimed the oil line, dropped in the new stock fuel filter.

I love to post pictures... but nothing really picture worthy today.

Only things left on the fuel system are:
- get and install a 1/4" fuel line Y connector, since I broke the one connecting the vent and pulse lines coming out of the fuel baffle
- get the bilge blower working... likely just bypassing the fuse block connector and going straight to the fused switch
- reinstall the spark arrestor and air box
- reconnect the ski pylon
- reconnect the battery
Then i should be able to test and see if it fires.
I've likely got it set overly rich right now, but I'd rather start rich and lean it out vs running too lean and cooking the engine.

The plan is to tow it to the lake Friday evening so I can tune the carbs at the dock beside the big boat. Hoping to get out and play some between storms this weekend. :)
 
Last edited by a moderator:
Grrrrr.... dropped off the kids at school this morning, then went straight to AutoZone for the fuel line Y connector. They only had one type, and it was thin plastic. Broke when I tried to install it. Looks like I've got to find a boat store with something or I'm stuck on the trailer this weekend.

On a positive note, I was able to bypass the fuse block connector and got my bilge blower working.
 
Status
Not open for further replies.
Back
Top