• This site contains eBay affiliate links for which Sea-Doo Forum may be compensated.

2001 RX Reboot Project – MPEM related question

Status
Not open for further replies.
No, do not remove that bolt. It holds the starter together and does not connect to the engine in any way.

Salt water skis are never fun to wrench on. Good luck my friend.
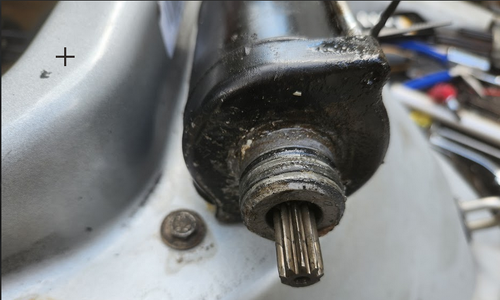
I soaked it in some Deep Creep, went back out there and used a pry bar wiggling it from every angle possible. The last few taps were with a small hammer. But it's out.

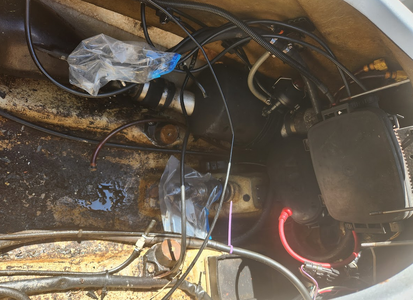
21? years on salt water. It doesn't look that bad compared to others I've seen:
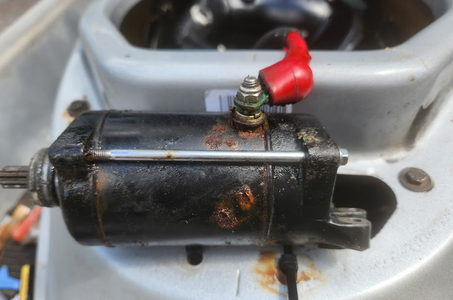
1679938088242.png

1679938130750.png

After testing, it still works.

Gotta love CRC 6-56

Also found I have Prox flame arrestors. How do I clean these? I assume carb/choke cleaner can damage the rubber and plastic.
 
Last edited:
That doesn't look like the original starter to me but what do I know. LOL They are usually painted the color of the engine. Glad you got it out of there. :) Good Job !!
 
TY.

Let me put it this way. As far as I know it's the original. I bought the ski new. I've been the only owner. I never changed it, and I never paid a shop to replace it. I don't know how it would have gotten changed unless at some point the shop who worked on the engine swapped it out and didn't charge me (not very likely because they charged me for each bolt they replaced).

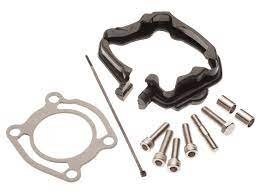
I picked up a remanned engine today and the external gasket kit. I'll start pulling the old one tomorrow if I feel well enough.

Traffic today was stressful and my stomach got all out of whack.
I didn't look back through this thread but if you haven't already, make sure you rebuild your entire fuel system before starting that new engine. Dont run the open FA unless you are comfortable tuning and dialing in your carbs as well.
 
I didn't look back through this thread but if you haven't already, make sure you rebuild your entire fuel system before starting that new engine. Dont run the open FA unless you are comfortable tuning and dialing in your carbs as well.
Shouldn't the carbs already be tuned to the FA's? I'm not touching the set screws. My intentions were to just clean the carbs and re-install the flame arrestors. They're ProK flamearrestors. I would think removing them and putting an airbox back on would require tuning, not simply cleaning and reinstallation.
 
Another question....

The instructions for engine removal / installation do not include any mention of engine alignment with an engine alignment tool; however, the instructions also have me leaving the pump on and simply pushing the engine forward off the drive shaft. If I bolt the pump back on, mark the shims / motor mounts and install the new engine should I be okay, or do I still need to align the engine?
 
Shouldn't the carbs already be tuned to the FA's? I'm not touching the set screws. My intentions were to just clean the carbs and re-install the flame arrestors. They're ProK flamearrestors. I would think removing them and putting an airbox back on would require tuning, not simply cleaning and reinstallation.
😬 No offense, but that comment alone tells you should return the ski to stock and set the carbs to factory spec.
 
Another question....

The instructions for engine removal / installation do not include any mention of engine alignment with an engine alignment tool; however, the instructions also have me leaving the pump on and simply pushing the engine forward off the drive shaft. If I bolt the pump back on, mark the shims / motor mounts and install the new engine should I be okay, or do I still need to align the engine?
Always align the engine with the proper tool.
 
😬 No offense, but that comment alone tells you should return the ski to stock and set the carbs to factory spec.
Always align the engine with the proper tool.
I'm looking for an engine tool for a 951, and it doesn't seem to have one. The instructions have me slip the engine forward so the shaft stays in place. If the shaft remains in place, and I slip the new engine back onto the shaft, what would affect alignment?
 
Always align the engine with the proper tool.
Thank you for your vote of confidence; however, unless I buy brand new carbs (which I'm not going to do), it would be impossible to return it to factory. The needles were changed out, and some other mods were made to them for a performance kit.

If I take the time to read more on "tuning carbs" I think perhaps I can handle turning a couple of set screws in 1/4 or 1/2 turn to get the optimum RPM at idle...1500RPM? And it is certainly much easier to do without an airbox on over the carbs, and the set screws easily accessible.

Flame arrestors basically give the carbs more air, make the engine run leaner. When I removed the fuel and choke lines, I left them set at what they were.
 
What was modified on the carbs?
Typically it is just new jets and needles and seats and pop-off springs. All of those can just be put back to stock.

Yes, whenever the engine is out you have to align it, especially if it is a completely new engine from a different ski. Leaving the pump and driveshaft in has nothing to do with engine alignment and is more difficult to remove the engine. Stupid that they tell you to do it that way, let me guess...SBT?
 
What bolt holes would you all recommend to use an engine puller to get the engine out? I can't lift 75lbs out of this with my back and weak hands but I do have an engine puller and chains :)
 
The 951 Exhaust Manifold has a built-in Lifting Lug.

Probably need to remove the Pipe Chamber before attempting to lift the Engine.

Take out the Pipe Chamber in one piece.

If you split the Pipe Chamber, you will rue the day :p
 
The 951 Exhaust Manifold has a built-in Lifting Lug.

Probably need to remove the Pipe Chamber before attempting to lift the Engine.

Take out the Pipe Chamber in one piece.

If you split the Pipe Chamber, you will rue the day :p
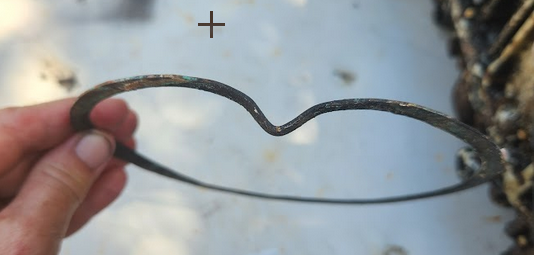
Already did that because 1) it was too heavy and awkward to manuever out. However, glad I did because I found a metal gasket in there that was bent for some reason. More pictures of that later 2) I need to inspect the lower chamber once i get the engine out because the lower bolt was just free turning in place and the mount seems to have come of the lower pipe for some reason.

The back circlip is become a real PIA. I have no idea why the floating ring will not move unless is it somehow rusted to the circlip. I sprayed a bunch of PB blaster and deep creep in there and the floating ring will still not budge. Ive tapped on it with a small hammer.

As a result of not being able to remove the circlip to pull the drive shaft, I decided to try and remove the engine the way the instructions said to. So, following the removal instructions which indicate I'm supposed to be able to remove engine without removing drive shaft. I have the engine disconnected from the 3 motor mounts. However, the engine will not move itself off the drive shaft and my upper body strength sucks. So I took a 6" wide 2 x 4, place it against the back lip of the fiberglass and attempted to use a 4 ton piston jack to push the engine off the back with the wood in the middle and the jack against the PTO. Still wouldn't move forward.
 
Did you reinstall the pump?
You will not get the stainless hat off the driveshaft enough to remove the c-clip without the pump to push against.
 
Did you reinstall the pump?
You will not get the stainless hat off the driveshaft enough to remove the c-clip without the pump to push against.
Yes, I did. I even retightened the pump down, and the stainless hat would not come off. I was able to get the engine out by having a friend pull and pull and pull towards the front of the ski.

The boot behind it pushes down, but the hat will not move. I thought perhaps this hat was seized on the circlip, but it's not. I stuck a screw driver in the little indent while the engine was still on teh drive shaft and the pump was still in, and I was able to turn the hat around on the drive shaft. So it may be stuck to the circlip, and the circlip and hat may be moving, but both are not stuck to the drive shaft.

At this point, I'm going to leave the drive shaft in. Both splines are in good shape, and were well greased. It's just the underneath portion that is exposed to water while underway that is all rusty.
 
The 951 Exhaust Manifold has a built-in Lifting Lug.

Probably need to remove the Pipe Chamber before attempting to lift the Engine.

Take out the Pipe Chamber in one piece.

If you split the Pipe Chamber, you will rue the day :p
I believe I already responded to this, but I"m not sure where it's at. I did split the pipe chamber. There's a metal gasket in there that I found seems bent:

1680201894890.png

That goes here:

1680201932146.png

Not sure how it fit on the edge, because as is it fits on the inside of the chamber, not along the lip.

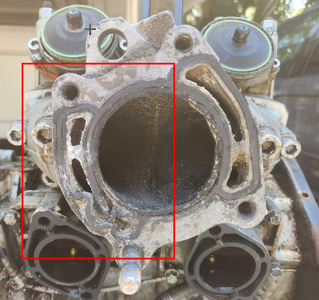
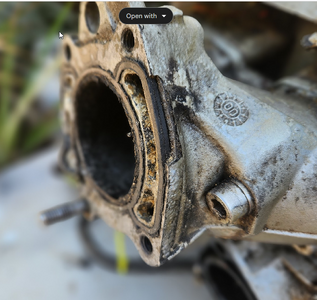
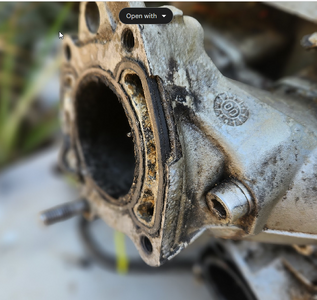
Regardless, I ordered a new gasket. I also noticed damage on the other side here (also other damage to the exhaust manifold below):

1680202002010.png

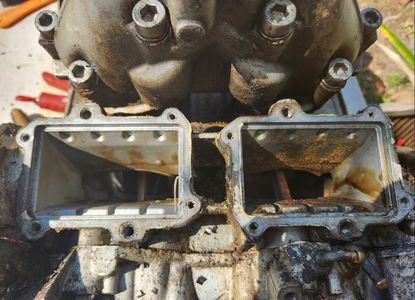
It also is giving me the chance to vaccuum out the sand that was in the lower chamber. Combo of the gasket and the manifold head might be why the rave valves were so gooped up with salt.

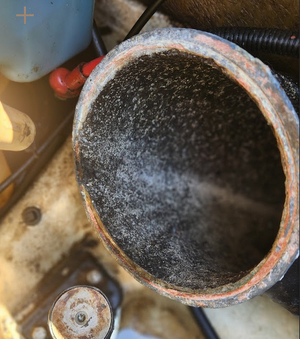
Since I now have the engine removed, I'm doing cleanup from the goop at the bottom which accumulated over 21 years. I'ld rather have oily goop than rusted out engine and motor mounts.

1680202233252.png

Motor mounts are all good.

However, again, it looks like I'll have to replace the exhaust manifold since it's missing a chunk of metal:

1680200822598.png
 

Attachments

  • 1680201883726.png
    1680201883726.png
    1 MB · Views: 1
Last edited:
I believe I already responded to this, but I"m not sure where it's at. I did split the pipe chamber. There's a metal gasket in there that I found seems bent:

View attachment 61656

That goes here:

View attachment 61657

Not sure how it fit on the edge, because as is it fits on the inside of the chamber, not along the lip.

Regardless, I ordered a new gasket. I also noticed damage on the other side here (also other damage to the exhaust manifold below):

View attachment 61658

It also is giving me the chance to vaccuum out the sand that was in the lower chamber. Combo of the gasket and the manifold head might be why the rave valves were so gooped up with salt.

Since I now have the engine removed, I'm doing cleanup from the goop at the bottom which accumulated over 21 years. I'ld rather have oily goop than rusted out engine and motor mounts.

View attachment 61659

Motor mounts are all good.

However, again, it looks like I'll have to replace the exhaust manifold since it's missing a chunk of metal:

View attachment 61654
Which might be the cause of this:

1680206226508.png
 
Yes, that is the smoking gun and cause of your failure.
The pipe leaks and sprays water into the carbs which is exacerbated by your Prok flame arrestors (remember when I spoke about water ingestion).

It is such and issue on the 951 that Seadoo actually made a "Diaper" for it and is why you need all the rubber flaps and boots on the intake too.


download (1).jpg
 
Yes, that is the smoking gun and cause of your failure.


The pipe leaks and sprays water into the carbs which is exacerbated by your Prok flame arrestors (remember when I spoke about water ingestion).


It is such and issue on the 951 that Seadoo actually made a "Diaper" for it and is why you need all the rubber flaps and boots on the intake too.

my ski had that rubber piece on it. I'm guessing that chunk of metal came off the manifold causing salt water blow by. I'm going to see if I can get it welded locally. my neighbors do fabrication. otherwise new exhaust manifold.


I have that rubber "diaper" its called a recovery envelope. It was installed before I started pulling this engine out. I was also given a new one with the outer gasket kit.

I'm sitting here trying to figure out where all these o-rings within the external kit go, the only parts I remember having rubber o-rings was the starter (which uses 2, not one). I don't even think the oil pump had an o-ring behind it.

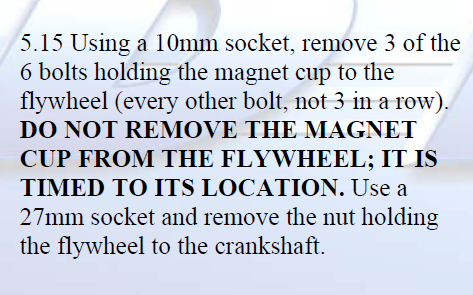
I'm trying to figure out what these instructions are telling me not to screw up so I don't screw up the timing (no picture for this one):

1680297065037.png
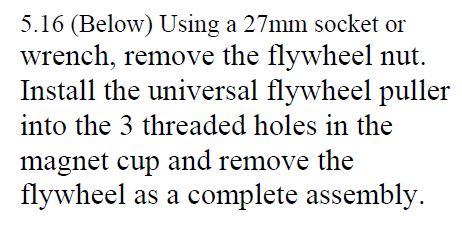
Then

1680297101670.png
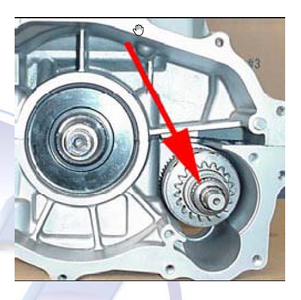
The picture shown is this (which is of the bendix not what is described above):

1680297180957.png

So the magnet cup sits within / on top of the flywheel, and is attached to the flywheel with the 6 bolts around the outside. Removing 3 allows for a universal puller to be used, but still retains the magnetic spacing / connection to the flywheel at the appropriate spot but allows enough room to get at the flywheel retaining nut and install the puller so back the flywheel and magnet cup off in one piece?
 
Last edited:
I have that rubber "diaper" its called a recovery envelope. It was installed before I started pulling this engine out. I was also given a new one with the outer gasket kit.

I'm sitting here trying to figure out where all these o-rings within the external kit go, the only parts I remember having rubber o-rings was the starter (which uses 2, not one). I don't even think the oil pump had an o-ring behind it.

I'm trying to figure out what these instructions are telling me not to screw up so I don't screw up the timing (no picture for this one):

View attachment 61664
Then

View attachment 61665
The picture shown is this (which is of the bendix not what is described above):

View attachment 61666

So the magnet cup sits within / on top of the flywheel, and is attached to the flywheel with the 6 bolts around the outside. Removing 3 allows for a universal puller to be used, but still retains the magnetic spacing / connection to the flywheel at the appropriate spot but allows enough room to get at the flywheel retaining nut and install the puller so back the flywheel and magnet cup off in one piece?
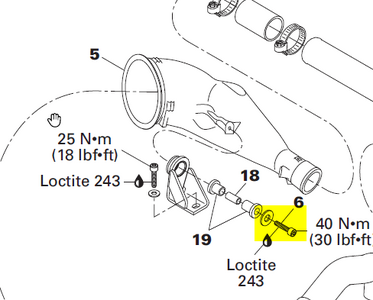
My lower exhaust was not attached to the bolt on the bottom. I did not have to remove a bolt, so when I pulled the engine, I finally pulled the bracket when it was out of the hull:

1680298994293.png
 
I have that rubber "diaper" its called a recovery envelope. It was installed before I started pulling this engine out. I was also given a new one with the outer gasket kit.

I'm sitting here trying to figure out where all these o-rings within the external kit go, the only parts I remember having rubber o-rings was the starter (which uses 2, not one). I don't even think the oil pump had an o-ring behind it.

I'm trying to figure out what these instructions are telling me not to screw up so I don't screw up the timing (no picture for this one):

View attachment 61664
Then

View attachment 61665
The picture shown is this (which is of the bendix not what is described above):

View attachment 61666

So the magnet cup sits within / on top of the flywheel, and is attached to the flywheel with the 6 bolts around the outside. Removing 3 allows for a universal puller to be used, but still retains the magnetic spacing / connection to the flywheel at the appropriate spot but allows enough room to get at the flywheel retaining nut and install the puller so back the flywheel and magnet cup off in one piece?

Yes, of the 6 bolts, you remove 3 and the puller they use goes in these 3 holes.
The reason they don't want you to remove all 6 and the MAG cup is because it is not indexed and if you get it reinstalled wrong the ignition timing will be off.
 
Yes, of the 6 bolts, you remove 3 and the puller they use goes in these 3 holes.
The reason they don't want you to remove all 6 and the MAG cup is because it is not indexed and if you get it reinstalled wrong the ignition timing will be off.
That is exactly what i was trying to explain. Thank you.
 
So far this morning I have purchased a new/used oil pump assembly, an exhaust manifold, and a PTO coupler since it was cheaper to buy a new PTO coupler than spend the time backing out the zerk fitting and the cost of the zerk fitting itself, and I was very careful to get pics of the splines to make sure they were not damaged.
 
Status
Not open for further replies.
Back
Top