• This site contains eBay affiliate links for which Sea-Doo Forum may be compensated.

1995 HX Project

Status
Not open for further replies.
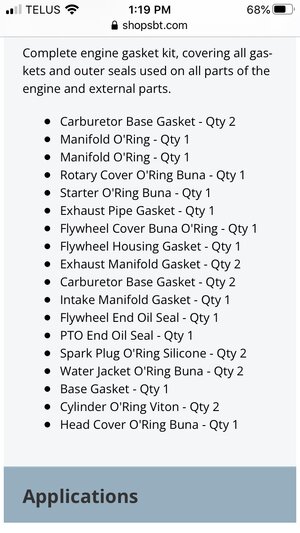
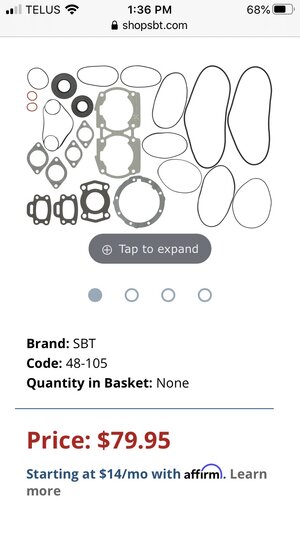
Anyone have any feed back using gasket kits from SBT? For 79.95 it comes with 18 gaskets including the PTO and flywheel oil seals which go for 19.49 and 18.99 on seadoo warehouse. Also found a basket kit from OSD that includes a tube of loctite 518 for 69.95 but it doesn’t say what all gaskets come with it.93179325-EF49-4462-A46F-5B94070BF8C0.jpeg
 
I personally don't like SBT gaskets or seals. They seem hard and cheap.
For seals, longest life will be OEM.
I have been using WSM gaskets for 30 years.
I don't like 518 for the cases and even seadoo stopped specifying it but it is a personal opinion. I use ThreeBond 1194 which is the same as Permatex MotoSeal, HondaBond and YamaBond.
 
I have a tube of Threebond 1184, will that work ok? I am just getting another tube of 518 as I see it calls for it on some of the threads and I like to use a very small amount on my base gaskets. So the WSM gaskets are OEM? Where is the best place to get those from? All parts on seadoo warehouse will be OEM correct? That’s to bad the gasket kit from SBT wasn’t of good quality as it came with every gasket for the entire engine.
 
This manual is driving me nuts, page 04-03-03 shows the diagram of the crankcase with arrows clearly pointing to the threads of the bolts that hold the 2 halves together showing loctite 515 on the threads then I go to page 13-04-05 in the technical data section and it says to use loctite 242 (blue) on the threads. Both areas of the manual show to use a dab of grease just under the head which I alway do anyways to get an accurate torque. I usually use loctite 242 on threads, what do you recommend the 242 or 515/518 on the threads of the crankcase?
 
Yes, sorry my brain still calls it 1194.
Yes I use the 518/515, grease and thread lock in the places the manual shows for the nuts and bolts. Just use the newest manual that shows the 720 engine.
WSM is not OEM but good quality. You can get the complete set with seals from WSM but I still like OEM crank seals. PWC Muscle that runs the site here is a WSM dealer too.
For the OEM crank seals seadoowarehouse is OEM.
 
Thank you Miki, i will get the WSM gaskets and OEM oil seals. Just have to run my son to his girlfriends and then I’m going to get the carb parts sorted out. Want to order Mikuni genuine parts, I know you had mentioned the back to OEM kit from OSD but it’s not genuine Mikuni. That ok? You have had good luck with them? I’m going to check and see what comes with the genuine Mikuni kit and what comes with the back OEM kit and get this all ordered. I’ve already ordered a few things but want to get it all ordered. Been doing a little research on the springs and needle jets. From what I’m reading probably using a 115 gram spring and 2.0 needle jet but not 100% sure.
 
Thank you Miki, i will get the WSM gaskets and OEM oil seals. Just have to run my son to his girlfriends and then I’m going to get the carb parts sorted out. Want to order Mikuni genuine parts, I know you had mentioned the back to OEM kit from OSD but it’s not genuine Mikuni. That ok? You have had good luck with them? I’m going to check and see what comes with the genuine Mikuni kit and what comes with the back OEM kit and get this all ordered. I’ve already ordered a few things but want to get it all ordered. Been doing a little research on the springs and needle jets. From what I’m reading probably using a 115 gram spring and 2.0 needle jet but not 100% sure.
Yes. OSD is Genuine Mikuni, always has been.
Nope not even close. 1995 HX uses 1.2 needles and seats and 80 gram "black" springs.

OSD Back To OEM Sea Doo Dual Carb Rebuild Kit (1995-1997 717) [OSD1272] - $134.99
 
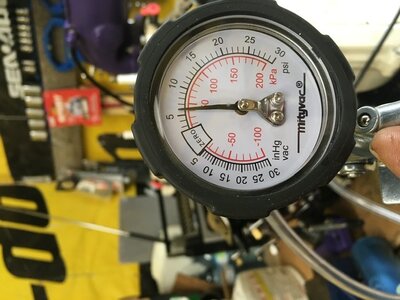
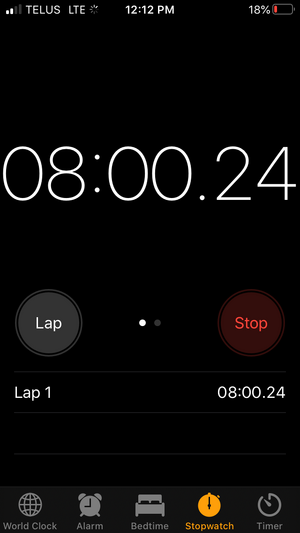
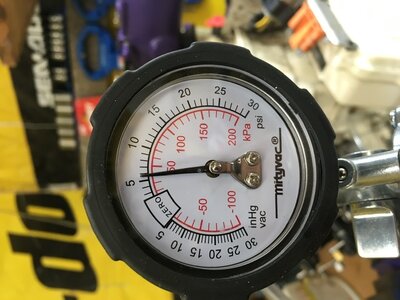
Well I decided to take one last look at this engine before ordering new gaskets and oil seals and thankfully I did. Went to re torque the bolts holding tuned pipe to exhaust manifold for my block off and the one bolt was fairly loose, tightened it back up applied 6 pounds of air pressure, waited 8 minutes and no drop on air pressure. Maybe dropped a quarter of a pound in the 8 minutes.
 
After 8 minutes, very happy as this machine has fairly low hours and I wanted to keep this project as cheap as possible while doing what needs to be done only.396BD176-EA86-43ED-9CBB-CDA3BD838993.png
 

Attachments

  • E8A213B7-C12B-4C4B-8C1D-E1BB30A44B9F.jpeg
    E8A213B7-C12B-4C4B-8C1D-E1BB30A44B9F.jpeg
    94.3 KB · Views: 4
Pretty much I’m hoping , the rev cavity held up indefinitely, crank ends held very well. Trying to pressurize the cooling system now. I’ve had to use the manual for the 2002 GTI as my HX manual had no directions on leakdown testing. From what I’m reading you loop the 2 cooling lines on the pto end together, block off the engine drain hose and pressurize through the cooling line on the mag end of the head. Not sure if I’m doing this properly as there is no description in the manual for where to apply the pressure only a picture and I can’t get a for sure from the picture even after exploding the view as there is an arrow in the way. So far I’m not having any luck pressurizing the cooling system but when I tested the crankcase with pressure it held without blocking any of the cooling lines so I’m thinking that tells me the cooling system is ok? Any advice on how to pressurize cooling system?
 
Really no reason to pressure test the cooling system. All you are worried about is the inside of the engine which held pressure.
 
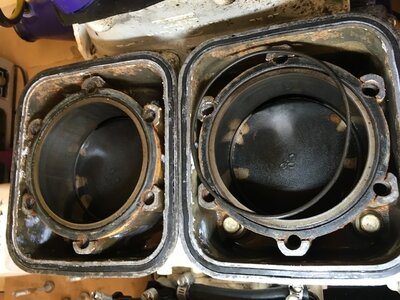
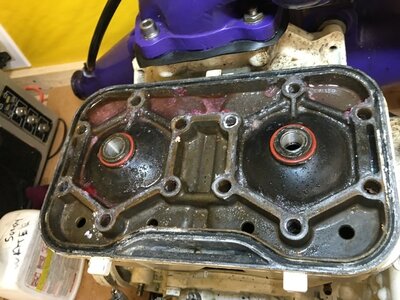
A3F60057-0986-4D83-8053-74C982C811F4.jpegI took the cylinder cover off just to see the condition of the o rings and maybe the reason I’m not able to pressurize the cooling system, I had winterized the engine with biodegradable antifreeze when I purchased it, I also took the plugs out and fogged the cylinders. Cylinder bores look ok which makes sense as compression was good too. I picked out the inner o ring from the top of the cylinder and it felt a little rough. Also notice irregular carbon deposits on the top of the pistons? Not sure what this means? I know the machine was running some horride green oil so probably not burning to clean due to improper oil? I’ve seen the difference proper oil makes for carbon deposits and it’s substantial. A fair bit of sediment and rust in the cooling jackets, not sure if that’s an issue or not? I mean they do run an open loop cooling system. I think I Should clean up where the o rings go and order new ones at a minimum especially after taking the one out, it’s not going back in properly and it has a rough texture In spots. What’s a good way to clean up the female threads in the cylinders? Just carb cleaner, brass or nylon bottle brush and some compressed air with the bores blocked off with rags?
 
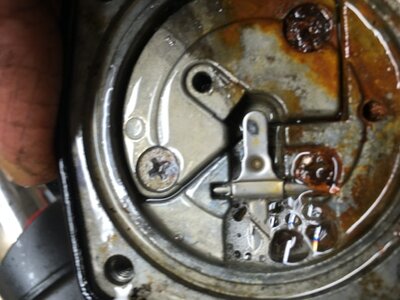
392DF11C-D5EB-4EC2-946F-7C659D65FF17.jpegI’m just playing around here. Never done a pop off pressure test before. Trying to look at Miki’s thread but it won’t load fully when I’m in my shop so I can’t see pictures. Is this the correct nipple to attach pump for pressure to?Supposed to. E attached to the inlet port.This is the mag carb so thread says to block outlet and return ports, do I have right ones blocked? I pushed down lightly on the needle arm and sprayed WD-40 into the seat. When I pressurize I’m getting bubbles from around the screwfor The seat retaining plate. I’m pretty sure that’s where the bubbles are coming from. What would cause this?
 
F88526A9-2877-48FF-A0E6-CAE63DA60970.jpegHere’s a pretty decent picture of the bubbles. Main concern is if I have the pump on the correct nipple and correct nipples blocked. I have ordered back to OEM carb kit so just trying to learn right
 
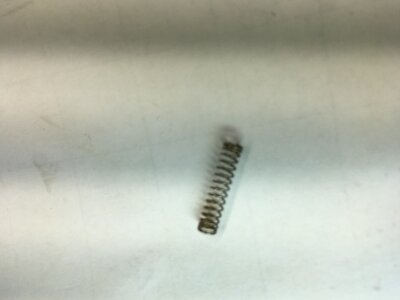
21C337AD-2688-4154-B28B-A70359B9C8DA.jpegIt has the gold spring that I believe is 115 gram, not sure how to measure it but I bet the needle and seat are larger than the specified 1.2 Anyways it will all be back to OEM once the rebuild kit comes in from OSD with the black 80 gram spring and 1.2 needle and seat.Pretty sure my pop off is supposed to be between 40 and 56 psi, my mityvac only goes to 30 psi. Should I get set up for the higher pressure needed to test pop off or just put the parts in, maybe pressurize it to make sure it’s holding pressure and call it a day?
 
Also, I Took everything apart and cleaned it and could not get the bubbles to stop coming when I pressurized it. At first before I took it apart I swear the bubbles were coming from around the screw and/or retaining plate that holds seat down but then after cleaning it, it looked like it was bubbling from the seat area. Now I’m scared it will do the same after my rebuild kit comes in. It was rusty just like the one in your thread. That machine has an Uxbridge small engine racing sticker on it, even though the spring and probably needle and seat were not correct everything else pointed to it having genuine Mikuni parts in it. Is it possible that it had some after market parts on it before and the spring, needle and seat were changed to accommodate the after market parts? Just asking, I have no idea what I’m even talking about
 
View attachment 61350I took the cylinder cover off just to see the condition of the o rings and maybe the reason I’m not able to pressurize the cooling system, I had winterized the engine with biodegradable antifreeze when I purchased it, I also took the plugs out and fogged the cylinders. Cylinder bores look ok which makes sense as compression was good too. I picked out the inner o ring from the top of the cylinder and it felt a little rough. Also notice irregular carbon deposits on the top of the pistons? Not sure what this means? I know the machine was running some horride green oil so probably not burning to clean due to improper oil? I’ve seen the difference proper oil makes for carbon deposits and it’s substantial. A fair bit of sediment and rust in the cooling jackets, not sure if that’s an issue or not? I mean they do run an open loop cooling system. I think I Should clean up where the o rings go and order new ones at a minimum especially after taking the one out, it’s not going back in properly and it has a rough texture In spots. What’s a good way to clean up the female threads in the cylinders? Just carb cleaner, brass or nylon bottle brush and some compressed air with the bores blocked off with rags?

Looks a little lean but not too bad.
Yes, replace the o-rings.

Use a thread chaser to clean the threads, not a tap.
 
View attachment 61354I’m just playing around here. Never done a pop off pressure test before. Trying to look at Miki’s thread but it won’t load fully when I’m in my shop so I can’t see pictures. Is this the correct nipple to attach pump for pressure to?Supposed to. E attached to the inlet port.This is the mag carb so thread says to block outlet and return ports, do I have right ones blocked? I pushed down lightly on the needle arm and sprayed WD-40 into the seat. When I pressurize I’m getting bubbles from around the screwfor The seat retaining plate. I’m pretty sure that’s where the bubbles are coming from. What would cause this?
You put pressure to the inlet hose and block the outlet, you don't mess with the pulse line.

The bubbles is from a bad seat o-ring.
 
View attachment 61356It has the gold spring that I believe is 115 gram, not sure how to measure it but I bet the needle and seat are larger than the specified 1.2 Anyways it will all be back to OEM once the rebuild kit comes in from OSD with the black 80 gram spring and 1.2 needle and seat.Pretty sure my pop off is supposed to be between 40 and 56 psi, my mityvac only goes to 30 psi. Should I get set up for the higher pressure needed to test pop off or just put the parts in, maybe pressurize it to make sure it’s holding pressure and call it a day?
That looks like the correct 80 gram spring, they were more dull green before switching to actual black.
 
Status
Not open for further replies.
Back
Top