• This site contains eBay affiliate links for which Sea-Doo Forum may be compensated.

What I did to my 4-tec boat today...

Status
Not open for further replies.
Completed my spring checklist over the last 3 weeks. Some easy. Some not so easy. Ready for summer now.

My list is not usually this extensive each spring, but this time I did something new - I want through the boat and trailer and just snapped a picture of everything I thought needed work (either a repair, maintenance, or improvement). Then, I reviewed the photos and made a parts list and a checklist. Ended up with a longer list than I had planned, but really happy with the state of the boat now.


  • Replace Steering cable
  • Pump rebuilds
  • Replace Bimini top & Cover repair
  • Check engine light
  • Brake/Hub replacement on trailer
  • Replace Anchor light
  • Remove stuck ski pylon
  • Replace trailer lights
  • Replace license plate bracket
  • Check and replace sacrificial anodes
  • Clean bilge/fuel tank
  • Run deck drain to bilge
  • Replace rubber ladder retainer
  • Add new registration decals
  • Fix front starboard compartment drainage
  • Install blue LEDs in deck courtesy lights
  • Replace bow/anchor light switch
  • Drain plug light upgrade
  • replace console 12V power outlet w/ dual USB outlet
  • Figure out stereo/Install bluetooth adapter
  • Replace bow navigation lights w/ LED
  • Fix blower hose
  • Test bilge pump
  • Support rpm gauge wires with tie wrap
  • Check reverse bucket lock mechanism
  • Lock in cup holders
  • Fix Starboard console brow
  • Install spring to hold glove compartment lid open
 
That's quite the list.

I hope our new "to us" boat is ready to go-just put in new fuel with some conditioner and then get some time on the water learning the features. The previous owner had it serviced and winterized at the dealership in the late fall. All I have done was clean and detail the interior and going to start to shine up the hull later this week. Damn NHL playoff games keep occupying my time in the evenings lately.

Cant wait till get it on the water in 2 weeks for the long weekend. We still have ice on our lakes here up north!!


Only thing I have trouble with right now is puling out the ski-pylon. I can twist it now but trying to pull up it doesn't want to let go.

Let me know how the drain-plug light works out.

For the license plate bracket I am just cutting some rubber mudflap from a truck and bolt that to the trailer and boat the license plate to it.( I just had a plate stolen off a utility trailer so now I am setting up 2 plates). I have done this on my utility trailers in the past. The previous owner's plate was all bent up from backing into the water. IMO dumb place to mount the plate on the trailer, but that's industry for you.

Next year thinking of placing Seadeck, maybe LED lighting and install water LED lights mounted on the transom.
 
Only thing I have trouble with right now is puling out the ski-pylon. I can twist it now but trying to pull up it doesn't want to let go.

There are 2 ball pins that help to hold it in place. When you lift up on it, try to find these pins and push on them. It should lift right out.
 
We purchased our boat last fall and used it about a month, it had been sitting for a couple years unused and covered up outside. We bought it sight unseen (photos only) with 29 hours on it, even with some issues it was well worth the trip to get it. I have had Sea Doo jet skis for 15 years or so I wasn't worried about the purchase, I knew I could tackle any problems what come up. I also figured we would have to put some additional money into it when we got it but wasn't sure for what we budgeted $1000.

That said here is what we had to do:
Last fall we had lots of different codes coming up and I replaced a couple sensors based on the codes it seemed to be another issues(s)-- After lots of research I found:
- Oil was WAY overfilled more so on the starboard engine (this one kept giving oil sensor codes)
- Weak/bad battery, this seemed to be a big cause of random codes when starting the boat (we were told the battery was new and I did not follow up on it, took their word for it)
- Spark plugs appeared to be original on a 2010????
- Ignition switch was flaky and would turn off while cruising at speed
Once the above problems were corrected the codes quit and I have never had one since and it runs like a Sea Doo should....

Additional work this winter:
- Serious cleaning!!
- On board 'dash computer' wouldn't work, the dash buttons were disconnected because of poorly supported wires
- New on board charger
- New cover - we were told there was nothing wrong with the one that it came with, not the case!
- New Stereo
- New ladder rear retaining strap
- New ignition switch
- Trailer brakes filled bled and now working
- Replaced trailer breakaway cable as it was missing
- New Horn
- Replace trailer lights with LEDs
- Install blue LEDs in deck courtesy lights-- COOL!
- Resized various drain holes in storage compartments to ease draining

A couple things we still need:
- New trailer tires
- Replace steering cable soon.... but it seems to be loosening up now that we are using it.
- SeaDek the swim platform
- needs one new starter button as it has a bad led light ring and is annoying!

So far we couldn't be happier with the purchase, price was great we are not at the 1K extra we budgeted in yet but once we replace the trailer tires we will be as they are the next must do issue.

It should be noted I have always had very good luck with my Sea Doos over the years, I have had 5 Sea Doo jet skis and now a boat, if cared for properly I think this boat will be the same for us trouble free!
 
I was all ready to haul mine up north.New axel ,springs/bolts and bunks on last year I think.haha
Put new Goodyear marathons on ,I better go check to make sure there's new valve stems.geez
I then go to my trailer guy and say hi is it road worthy? He gets a hammer out and says I need a new rear crossmember. Rusty by the bottom where the running lights is mounted on this Karivan trailer.
So now I'm stuck with a yard ornament haha.I did however over the winter put new valves in .No more hollow ones.New hoses.About 3k of parts and 500 for axel 'springs and bolts.Hey guess what,lol,I still have list of things to do.....One thing at a time! Haha
 
There are 2 ball pins that help to hold it in place. When you lift up on it, try to find these pins and push on them. It should lift right out.

Still having hell of a time trying to remove the ski pylon. I can twist it around and maybe pull it up 2-3mm but that's it. Think I am going to pass out pulling on the pylon.I cannot see the 2 ball pins at all. Previous owner probably left it in all the time and now that I own the boat I want to remove it use it only when needed.

Any other tips?

You're so close. I'll try to get the pylon out of our boat later and shoot a quick video, but it's quite simple. When you pull it up and it stops, that's when you have to compress the little ball pins to remove it. I've had people tell me to simply pull straight up on it, but I've never had luck getting it out that way. We just used our pylon 2 weeks ago and installation and removal were a breeze by pressing the ball pins.

Here's the ball pins I'm referring to:

pylon.jpg
 
The previous owners of my boat never used the pylon, it was still in the plastic. It goes in / out easily. The springs or balls are stuck. If you can get it high enough to see the lubrication hole you can spray some breakfree or similar in there. if not, stuff an old towel etc under it (in the engine compartment) and spray around the pylon while turning to try to get some in there. It will take time but it will come out.

If your flexible you could put a wooden dowel etc underneath and tap with a hammer to help.
 
I used a small pry bar to get under the lip of the pylon for leverage, then twisted while pulling up. This was after spraying a lot of silicone lube into the pylon holder. Finally came loose and popped up.

Should not be that difficult.
 
You're so close. I'll try to get the pylon out of our boat later and shoot a quick video, but it's quite simple. When you pull it up and it stops, that's when you have to compress the little ball pins to remove it. I've had people tell me to simply pull straight up on it, but I've never had luck getting it out that way. We just used our pylon 2 weeks ago and installation and removal were a breeze by pressing the ball pins.

Here's the ball pins I'm referring to:

View attachment 39937

I must be at the top of the ball pins when I pull up on the pylon. As mentioned, I will keep working at it.

Thanks again everyone.
 
You're so close. I'll try to get the pylon out of our boat later and shoot a quick video, but it's quite simple. When you pull it up and it stops, that's when you have to compress the little ball pins to remove it. I've had people tell me to simply pull straight up on it, but I've never had luck getting it out that way. We just used our pylon 2 weeks ago and installation and removal were a breeze by pressing the ball pins.

Here's the ball pins I'm referring to:

View attachment 39937

JPass, are you compressing the ball pins from the engine compartment? Not sure how I would compress them topside.
 
through the engine compartment you can get to the bottom of the pylon and using a dowel or second hammer you can put in the mount you can tap the bottom of the pylon while someone is pulling up.
 
Spare Tire and carrier

Installed my spare tire carrier and spare tire today. Did also jack my trailer up and made sure the spare tire fit. Even though it's an identical size tire ST185/80D13 it seems to be larger but did fit.
IMG_2313.JPG
 
Last edited by a moderator:
bluetooth adapter

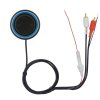
Over the weekend I installed a bluetooth adapter for the clarion radio.
IMG_2312.JPGIMG_2306.JPGIMG_2305.JPG51nQU7TvOvL._SL1000_.jpg

Update (8/19/2017) - Fuse holder on this was garbage and stopped staying together. Ended up cutting it out and replacing it with a heavier duty waterproof fuse holder.
 
Last edited by a moderator:
Blue LED's for dash gauges and courtesy lights

Last weekend installed blue LED's.
IMG_2271.JPGIMG_2275.JPGIMG_2274.JPGIMG_2270.JPG

Dash gauges were easy to do as it was plug and play without having to take apart the dash or gauges. However the fuel gauge doesn't have an easily accessible bulb. Has anyone taken their fuel gauge apart to replace the bulb?

Update (8/19/2017) - Removed the fuel gauge today to take apart and see if I could replace the bulb. Turns out this thing does have an easy to remove bulb. It's a smaller twist lock like the other gauges but recessed and twisted out with a flat head screw driver. This one looks to be a T3 or T4.2 so Ill be able to replace it with a blue one.

31fK6ItyBwL.jpg
 
Last edited by a moderator:
Picked up a 1 year old used optima blue top 31m agm battery for 150 dollars. Battery tested good with my battery tester so hopefully will be getting it installed as a 2nd battery within next few weeks.
 
Picked up a 1 year old used optima blue top 31m agm battery for 150 dollars. Battery tested good with my battery tester so hopefully will be getting it installed as a 2nd battery within next few weeks.

I'm a big fan of Battery Doctor combiners to charge both when #1 is full and then having the combiner switch for emergency. I think I paid $70-80 plus some heavy cables. Still retain OEM switch for off/on so I don't have to deal with the on/off/on and rotate charging as we did on old fishing boats.
 
Last edited by a moderator:
Got the optima battery in as a 2nd battery with a perko switch. Even though I like the perko switch i later found out that guest has a similar model which is the same manufacturer of the original on/off switch that was in the boat. I would have preferred that color over the red but its already a done deal. I also don't think I like the strap. Just doesn't get tight enough to secure the battery. Think I have enough clearance inside the battery box to put some metal posts in to secure the battery so it doesn't move around.


IMG_2368.JPG
IMG_2399.JPG
IMG_2400.JPG

So apparently I didn't pay attention to the perko switch after i installed it. Most of the red got covered up.

IMG_2403.JPG

Also after looking at several websites on the battery box I got I realized the strap is used to hold the cover on the box, not the battery down. No wonder it was loose and didn't hold the battery down. So picked up an optima 31 battery tray to install in the box. I had to cut the optima tray down as it didn't fit in the battery box. Removed the plastic screw holes along one of the sides and then the other side i completely removed the side/edge and screw holes. Had to then end up putting screws through the tray (since i removed all the screw holes). Those were places along the edges where the battery doesn't sit as well as under the removable optima battery end pieces (blocks with round edges with cut outs to hold the odd round optima battery). This allowed the battery to sit flush and is now secured in placed with a very nice battery strap.

IMG_2406.JPG
 
Last edited by a moderator:
changed rockers switches from green LEDs to blue LEDs

Since I Switched most of my gauges to blue (still have to try and do the fuel gauge <update 8/19/2017 - Fuel gauge has a t3 or t4.2 twist out bulb that is recessed and removable with a flat head screwdriver> and depth finder <update 8/21/2017 - removed depth finder gauge and no way to take it apart, completely sealed) I decided to switch the rocker switches over to blue as well., Left the horn switch red.
The blue LED worked really nice with the 2 blue rocker switches (water and fountain). Those babies have a nice dark blue glow to them you can see them during the day. Perhaps a bit too bright at night though. The green rocker switches when switched over to blue led produce more of a cyan-green color. Waiting for my new rocker switch covers to come in so they will all be the same blue color.

With only the blue switches switched to blue LED. Wanted to test color before I replaced all the green leds.
IMG_2394.JPG
All blue LED's
DSCN0029.jpg
With flash on so you can see how the blue LEDs with the green covers look more cyan-green than blue.
The bright blue rocker switch glows blue in daylight. Where as the green ones look more green during the day.
DSCN0031.jpg
 
Last edited by a moderator:
Status
Not open for further replies.
Back
Top