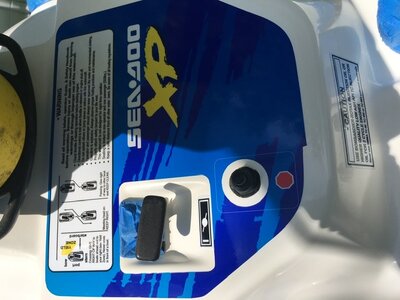
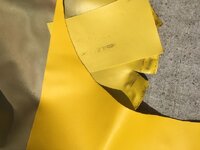
Good day everyone, this morning I took the small oil lines off while I had the carbs off, I just wasn’t positive that the oil injection pump was working, put new small oil lines on, drained out the oil tank ( I was bad and just added the xps oil to what was there before) changed the oil filter and here’s what struck me, the oil past the filter was perfect blue. When I had mixed the xps oil in with the oil that was in it the oil turned almost black so I don’t think oil was getting past the oil filter before, put the rebuilt carbs back on, set the idle, bled the oil pump, pulled the oil pump lever fully open when I started it and the small oil lines filled up I’d say within 4 seconds. Once my wife gets back from doing groceries I will water test it again,
-
This site contains eBay affiliate links for which Sea-Doo Forum may be compensated.
You are using an out of date browser. It may not display this or other websites correctly.
You should upgrade or use an alternative browser.
You should upgrade or use an alternative browser.
95 XP project
- Thread starter burtshaver2021
- Start date
Any trick to turn the idle screw without removing the air box?
OEM Seadoo, the aftermarket ones are not tight.View attachment 63647My lanyard popped off while I was driving, I knew it wasn’t holding the best. Anyone know of a good replacement that fits nicely? If not I was thinking I would just line the inside of the cap with a single layer of duct tape
https://www.amazon.com/OEM-SeaDoo-Lanyard-Safety-278001431/dp/B001KJ56F4
I will do some research on my own but wanted to see what you guys thought about the VTS, it doesn’t work. Is the first step to take the motor out and see if it’s working? From the reading I’ve done it’s usually the module. Also a fuse I can check too but I think I read that just continuously replacing the fuse can damage the MPEM? If it does end up being the module I’m thinking the 451m relay would be my best bet, I’ve seen other posts about repairing the OEM module By scraping away the epoxy and then replacing diodes and resistors and such but that repair seems beyond my capabilities. It looks like the 451 relay ties in nicely with the existing wiring. I can find most information on my own but if someone knows off hand 1. Where is the module? Is it in the VTS housing or is it in the grey box?
I had the 95 XP out today, I love that machine. I’ve been trying to do a power slide, well I’ve been working up to it anyways. Today when I did it, it was like the machine lost its edge or something ( it’s the first time that’s happened) and it went right around super fast like it was out of the water for a second, went around 180 degrees and then caught again and I was going backwards. Thought I was going for a dip for sure but kept it upright. The machine is working flawlessly, I took the old oil out, changed the oil filter, changed the small oil lines, they filled back up so I ran it today for the first time on injection oil only. This one I will be keeping, unless I get one I like better of course . This winter I will recover the seat and buff the gelcoat out.
It probably would have looked pretty pathetic on video, but it was exciting from where I was sitting lol.well done - wish you had a video of that that slide.
Thank you thoughwell done - wish you had a video of that that slide.
peril99
Member
So the 95 xp is $$$ after I did the fuel lines, carb rebuilds - carb filters were scary bad inside - (that was the really crapped up pic I posted). It actually ran/ idled better after the carb tune. The 95 tops our right about 40-45.) My son tries to sink it ever time he rides (at least that's what it looks like.)
The 97 is a wip - - starts / idles well, but there is the slightest bit of hesitation with the throttle right when it starts up until it warms up - and I can really feel the changeover between the low / high jets when I ride it and the top end wasn't feeling right. (I burned almost a quart of syntetic 2 stroke oil in 60 minutes - while the oil pump was running full open with the busted cable. I'm gonna clean up the spark plugs and do the oil pump fix in the next week or so).
I'm sure that oil didn't help anything at the top range of the throttle - could really feel it stop working at 70% open, the oil didn't help.
I never did the rave valves either - and they don't look too bad to clean up - so will do those next and recheck the carb tune. The fact that it starts up so well is a huge improvement.
My ratios of working on vs riding jet skis is not very good.
Sounds like you have a couple keepers, yea my 95 Xp tops out right around 45 as well. You might want to try cleaning the rave valves before doing anything else, if they are dirty they could be robbing you on the higher rpm’s. Glad to hear they are working out well for youSo the 95 xp is $$$ after I did the fuel lines, carb rebuilds - carb filters were scary bad inside - (that was the really crapped up pic I posted). It actually ran/ idled better after the carb tune. The 95 tops our right about 40-45.) My son tries to sink it ever time he rides (at least that's what it looks like.)
The 97 is a wip - - starts / idles well, but there is the slightest bit of hesitation with the throttle right when it starts up until it warms up - and I can really feel the changeover between the low / high jets when I ride it and the top end wasn't feeling right. (I burned almost a quart of syntetic 2 stroke oil in 60 minutes - while the oil pump was running full open with the busted cable. I'm gonna clean up the spark plugs and do the oil pump fix in the next week or so).
I'm sure that oil didn't help anything at the top range of the throttle - could really feel it stop working at 70% open, the oil didn't help.
I never did the rave valves either - and they don't look too bad to clean up - so will do those next and recheck the carb tune. The fact that it starts up so well is a huge improvement.
My ratios of working on vs riding jet skis is not very good.
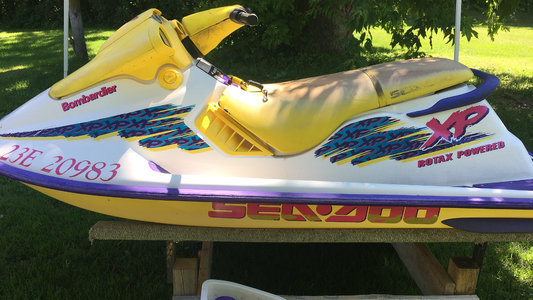
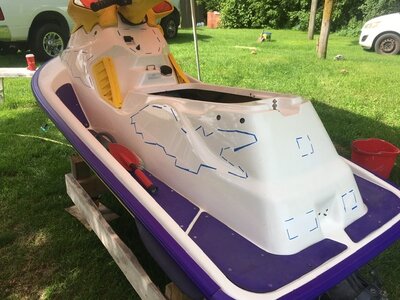
Doing the same process to my 95XP that I did to my 99 GSXRFI, decals are off, started wet sanding with 1000 grit, going to finish with 2000 or maybe a bit finer, Meguires 91, then 49, then 45, then new decals from KRP, then Meguires Flagship wax. Also got some vinyl in from Marine fabrics .com . Still have to pick that up at my us address. The 1000 grit isn’t going to get all the ghosting out, but it gets it good enough that you would have to look awfully hard to notice, went down to 320 grit wet sand on my HX and although I got all the ghosting out on it, I doubt I would ever go that course again, way way to much work. Probably not this year, but eventually I have a 451M relay to try and fix the vts and I have a spare hood to practice some techniques on, so far the bartenders friend soft scrub has worked very well, but I would like to give wet sanding and the boiled linseed oil/paint thinner method as well. No heat gun here, never tried the heat gun, but seen lots of nasty pictures of how they look after a year
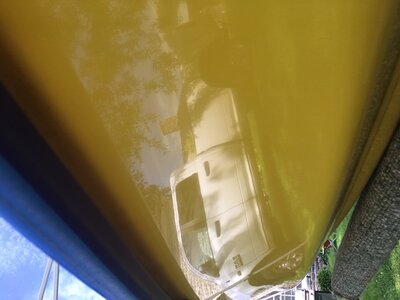 She’s shining up well, I had skipped the 49 and went from the 91 straight to the 45 but thenchanged my mind lol. Did the 49 and 45 again. I didn’t realize it but there is some pretty good cutting action with the 49. Learned my lesson, I will never skip a step again. Almost ready to start putting the new graphics on
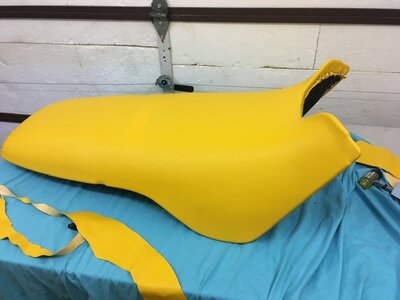
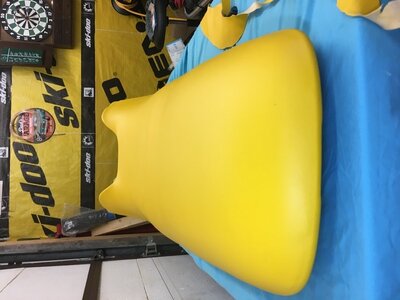

Put a new seat cover on today, I almost wrecked my vinyl going around the horn, I had cut in a relief cut and dam near cut it in to far. Also filled one small spot in the foam with white silicon, I will know for next time to use clear silicone or beige. I had to take the seat cover off and use some of my kids craft paint to paint the white silicone beige. You could notice where the white was. Maybe tomorrow I will put the hardware back on the seat including the seat strap. And then I need to get some vinyl paint spray, the only brand that seems to have purple is SEM, anyone use the SEM before?
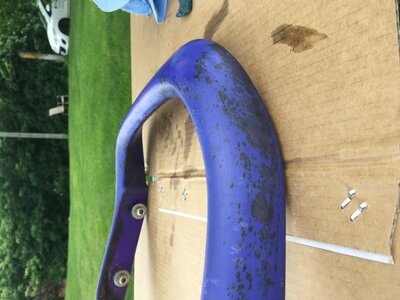
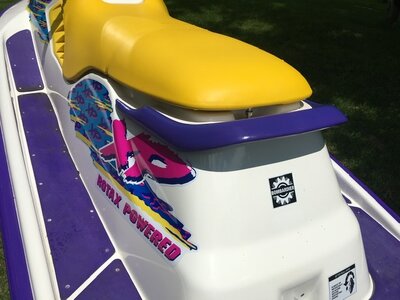
Cleaned up the grab bar today, tried barkeepers friend soft scrub, didn’t touch it, mixed up a 50/50 mixture of paint thinner and boiled linseed oil, I wasn’t impressed, it took it off but was a ton of scrubbing, what worked best for me was the Coleman’s campfire fuel and a scothbrite, been using that for awhile now, once I was done with the scotchbrite i followed up with the Coleman’s ( Naptha) and a clean microfibre rag to smooth it out nice as the scotchbrite roughs it up, and then back to black trim restorer.
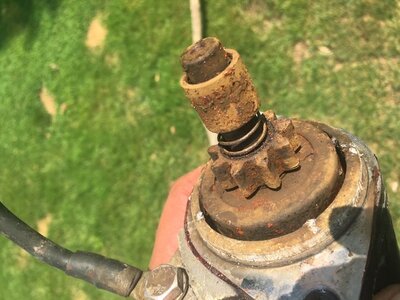

Of course after putting all the effort into wet sanding, polishing it out, new graphics, new seat cover, restoring the grab handle, it would not start. Changed out the starter with a Denso starter I had here on another 95XP and now it starts like instantaneously when you touch the start button, I mean like instantly. I had rebuilt the carbs on this and went through the fuel system, love it when they start and perform perfectly the way they are supposed to


I got the new seat cover stenciled, I used SEM vinyl paint, really liked it, covered in about 4 coats compared to about 8 coats when I used the dupli Color on the GTI, also used SEM vinyl prep this time, and some stencils I had made by a local shop. I had a little bleed under the stencil but thinking I should have used a hair dryer and pressed down the perimeter of the stencil,, it was a little cooler here when I did it last night. Next up for this girl is to get the variable trim working whether it be installing a manual trim from a 92 XP or using the 451m module I have so I can get started at learning to do cat walk, lol, I will be 49 in September, I will look like a fool out there. Oh well.
Thank you Grim. I would say the quality of the vinyl is identical to the vinyl from diyseatskins.com , both are supposed to be .9mm thick but measure .6 to .7 thick, I’ve since gotten another yellow vinyl that is even closer to the OEM colour and is supposed to be 1.10mm thick, I haven’t measured it yet but it does feel thicker. I will post some pics later todayThat seat looks great...nice job. What's your first impression of the quality now that you have it installed. Let us know how the vinyl holds up.
Similar threads
- Replies
- 4
- Views
- 520
- Replies
- 1
- Views
- 454


