• This site contains eBay affiliate links for which Sea-Doo Forum may be compensated.

RESTO My 96 speedster restoration

Status
Not open for further replies.
[MENTION=81030]cncsignman[/MENTION] you talk about all the hours you used to work and called your boat Working Overtime ... I live in Winnipeg and there is a local band from here that had a huge hit in the 60's that I think should be your theme song. It's called taking care of business which sounds like what you've always done at work and at play. The chorus goes Taking care of business ...I've been Working Overtime ... Perrrrrfect ...here's the link https://youtu.be/NCIUf8eYPqA
 
That's looking great!! Love the carbon fiber seat covers. I used the krylon fusion yellow and satin black for the hood, OS handles, rub rail and levers. Painted the hood and sanded between coats. Did not use a clear coat but might be a good idea. Took mine out yesterday for the first time on the big water for the day. Had a blast!! I'm sure yours will look awesome! Keep posting and let me know if I can help with anything else.
 
[MENTION=81030]cncsignman[/MENTION] you talk about all the hours you used to work and called your boat Working Overtime ... I live in Winnipeg and there is a local band from here that had a huge hit in the 60's that I think should be your theme song. It's called taking care of business which sounds like what you've always done at work and at play. The chorus goes Taking care of business ...I've been Working Overtime ... Perrrrrfect ...here's the link https://youtu.be/NCIUf8eYPqA

Oh yes! I know the song very well. Love BTO. Need to add that to my boating play list. May be my new theme song!! lol
 
Well some awesome news ... had shop hook my 1997 speedster and engines only had 135 hours on them .... 20 of which I put on last year !!! Having them do some overdue maintenence... carbon rings and some other stuff. Boat ran like a top last year ...will be even better this year !!!!
 
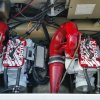
Always like following your build, hell of a job. Its taking me months just to get engines in and right. Been chasing electrical ghost's since but will be putting it in the river this week. I have to repair , prep, and paint so I keep going back to your build pictures for inspiration. Thanks 056.jpg293.jpg401.jpg574.jpg
 
Always like following your build, hell of a job. Its taking me months just to get engines in and right. Been chasing electrical ghost's since but will be putting it in the river this week. I have to repair , prep, and paint so I keep going back to your build pictures for inspiration. Thanks View attachment 35193View attachment 35194View attachment 35195View attachment 35196

Thanks for the good comments! Yours is looking great! I like the red on the engines. Fortunately I didn't have to do any engine work on mine. Hope I can make it through the summer with no problems. Had mine out again Sunday and it's still running great!
 
That's looking great!! Love the carbon fiber seat covers. I used the krylon fusion yellow and satin black for the hood, OS handles, rub rail and levers. Painted the hood and sanded between coats. Did not use a clear coat but might be a good idea. Took mine out yesterday for the first time on the big water for the day. Had a blast!! I'm sure yours will look awesome! Keep posting and let me know if I can help with anything else.

Boat is looking good man! How did your OS handles turn out after painting? I just ordered 6-7 new ones. But now I'm thinking I should have just painted them....
 
Great job with the guages. You had mentioned that you worked in a Graphics shop, would you be ale to share th files for the guage stickers?
 
CONGRATULATIONS!!! I'm trying to do the same with mine, and then I saw what you've done..... I'm doing it in blue camo I will post some photos once I get the Hydro turf mats in a couple of days. Meanwhile I was wondering if you could share the templates for the dashboard and the front side of the boat?? Thanks!
 
I know this is an old thread but was wondering how the Fusion paint was holding up on the rub rails? Thinking about it myself but I was afraid it would just peel/chunk off.
 
I know this is an old thread but was wondering how the Fusion paint was holding up on the rub rails? Thinking about it myself but I was afraid it would just peel/chunk off.

It didn't hold up as well as I thought. Even after sanding it and wiping it down with lacquer thinner before painting several coats, it came off in places. Mostly came off where it rubbed against a dock. Might test with primer then paint and see how it does.
 
Hey bowhunter,

I was worried about this same thing but didn't want to go through the hassle of removing the entire rail (rivets and all) but finding a solution to the rubbing off on the dock problem (because I had tried just krylon fusion paint and primer before and it rubbed off). I ended up removing just the outer part of the rail (with a wide flathead). masking the boat off and re painting the inner portion of the rail. and then purchasing a separate (outer rail) for not that much money (as opposed to the whole kit).

This would prevent me from getting an entirely new rail kit and having to remove rivets and all, tap into the fiberglass with drywall screws, worry about leaking problems etc. They sell white as well, but here's a link to the black 50' version: http://greatlakesskipper.com/taco-metals-v12-4144bka50-black-1-3-16-x-1-2-inch-flexible-pvc-boat-precut-rub-rail-insert-molding-50-ft

50 foot would be all you need with a sportster or speedster.

So in conclusion, I removed the outer rail, painted the entire inner rail with black krylon fusion paint and primer (just make sure you clean the surface completely with rubbing alcohol and let dry) and after I let it dry for 24-48 hours I slid the inner rail in with the help of a flathead. Some say you need to use a heat gun to make the rail more pliable but if you just let the boat sit in the sun for a while that's just as good. Hell even a little muscle would do the trick. It's pretty rigid but its just rubber. You will have a bit of excess just cut that off, put the cap back on screw that in and you'll be good.

Hope this has been helpful. It's been two years since I've done it and I only got one nick on the inner portion of the rail. Once its all said and done and you have the outer part of the rail in place only about 1/4 of an inch of the inner rail is exposed. And i just sharpied it in.

attachment.php

attachment.php

attachment.php
 
Last edited by a moderator:
Hello my name is Robert Thompson love your restoration doing one of my own looking for the graphics you used and all details would appreciate information you can get back to me at rwtmanu@gmail.com
 
If I remember right, he said he worked for a vinyl graphics shop and made them himself. I could be wrong but I swear that’s what he said
 
Status
Not open for further replies.
Back
Top