Well, I added a 2nd battery last year but have had tons of requests on pics and a write up of how I did it. The reason I wanted to add a 2nd battery, is I have built up a rockin audio system, which is in another thread. I wanted to be able to sit on on the water with the boat off for a while and still know the boat could start to get me home.
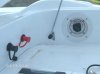
There are a few different ways to make it work. This is just the way I did it and it works well for me. I wanted the ability to always have a charged battery waiting when I am done playing with the audio system. I decided to use a Perko combo switch. Switch 8501. It is a direct replacement for the factory switch in the 98-99 Speedsters. You can find it for 30 to 40 bucks.
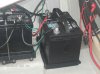
The first step was gathering the other stuff I needed. First of all, I bought a 24 series deep cell battery. A few people on here say not to add a deep cell and a starting battery, but I consulted a seadoo mechanic and he didnt see a problem with it. I figured a deep cell would fit my needs perfectly. I just went with a wally world battery and havent had a single problem and it was like 70 bucks. Next time though, I will buy a die hard because they rock and I have a part time job at Sears, so I get a discount.
Next I bought the battery tray. I originally planned on a nice one with the supports on the side and a nice tray on the bottom with a brace that covers the top. I used a piece of marine wood painted and bolted the tray to it. After trying to get it in, I figured it was too big and bulky and could not get it to work. I then bought a simple plastic tray with a nylon strap and buckle to secure the battery. Runs about 15 bucks.
Here is a link to one similar.
http://cgi.ebay.com/ebaymotors/T-H-...1997126QQptZBoatQ5fPartsQ5fAccessoriesQ5fGear
Then I bought the wires in a kit. I actually found a power inverter kit from wal mart that had the perfect size wires. They were 4 gauge and tinned, which is rated for marine use. Only sets ya back 30 bucks. They had terminals crimped on one end. for the other end, I bought the bolt on ends on ebay, the same kind I used on the audio system. They were like 10 bucks for 2.
http://www.walmart.com/ip/Cobra-Power-Inverter-Battery-Connection-Cables/11020920
The only other thing needed was some wire loom I had left from the audio system and a tube of the heaviest duty liquid nail.
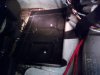
The first time I unbolted the oil tank for this installation. I found the need to make some changes in how I ran the wires, and found an easier way the 2nd time. If you look down on the side of the boat in front of the oil tank, you see the black box that the spark plug wires attach to. There is a single bolt holding it down. Remove it and you can pull the box up and out of the way. Leave the wires attached. Next step it to take the new tray and squirt a half tube of liquid nail onto the underside of it. Make sure to outline the tray then just criss cross and squirt all around it. I cleaned the area where it would sit just by using a rag and alcohol. Test fit before you add the liquid nail. Now slide the tray in. Make sure you have the strap lined up correctly on the underside. I used masking tape to hold it in place. Sit something heavy on the tray and let it sit.
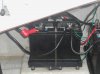
Now pull the switch out. Replace it with the new one. Put all the common wires on the common post. Run the starting battery to position 1. Attach the new power line to position 2. Run that power cable along with the ground cable in loom across the boat and wire tie it up as you go. By this time the tray should be set up.
Put the new battery down in the tray. Connect the power cable to the positive post. Attach the negative wire to the negative post. Pull the strap tight. Replace the previously unbolted box.
Go back to the other side of the boat. Connect the negative cablefrom the new battery to the top of battery 1.
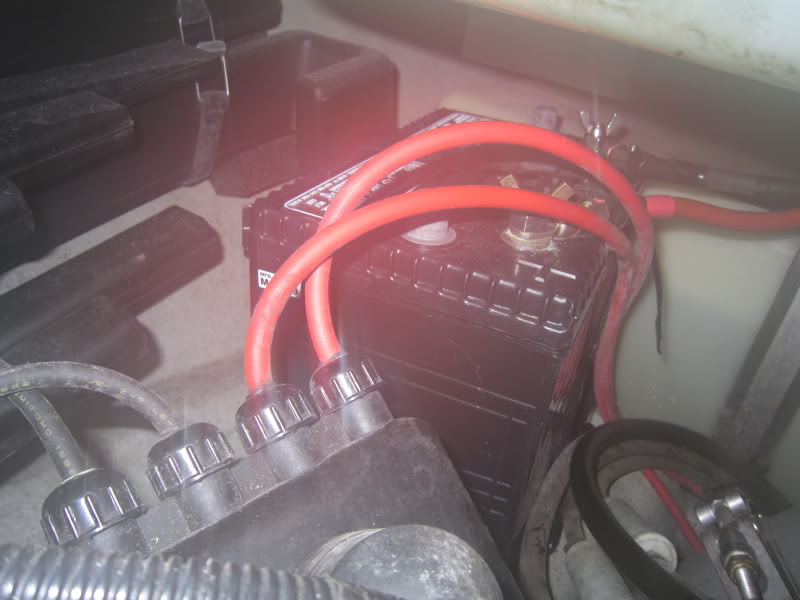
You are now done. I have used it this way for over a year with no problems. Here are some pics. They were hard to take but may help. Total time about and hour and around $200 gets it done.

This is the box that needs moved.


There are a few different ways to make it work. This is just the way I did it and it works well for me. I wanted the ability to always have a charged battery waiting when I am done playing with the audio system. I decided to use a Perko combo switch. Switch 8501. It is a direct replacement for the factory switch in the 98-99 Speedsters. You can find it for 30 to 40 bucks.
The first step was gathering the other stuff I needed. First of all, I bought a 24 series deep cell battery. A few people on here say not to add a deep cell and a starting battery, but I consulted a seadoo mechanic and he didnt see a problem with it. I figured a deep cell would fit my needs perfectly. I just went with a wally world battery and havent had a single problem and it was like 70 bucks. Next time though, I will buy a die hard because they rock and I have a part time job at Sears, so I get a discount.
Next I bought the battery tray. I originally planned on a nice one with the supports on the side and a nice tray on the bottom with a brace that covers the top. I used a piece of marine wood painted and bolted the tray to it. After trying to get it in, I figured it was too big and bulky and could not get it to work. I then bought a simple plastic tray with a nylon strap and buckle to secure the battery. Runs about 15 bucks.
Here is a link to one similar.
http://cgi.ebay.com/ebaymotors/T-H-...1997126QQptZBoatQ5fPartsQ5fAccessoriesQ5fGear
Then I bought the wires in a kit. I actually found a power inverter kit from wal mart that had the perfect size wires. They were 4 gauge and tinned, which is rated for marine use. Only sets ya back 30 bucks. They had terminals crimped on one end. for the other end, I bought the bolt on ends on ebay, the same kind I used on the audio system. They were like 10 bucks for 2.
http://www.walmart.com/ip/Cobra-Power-Inverter-Battery-Connection-Cables/11020920
The only other thing needed was some wire loom I had left from the audio system and a tube of the heaviest duty liquid nail.
The first time I unbolted the oil tank for this installation. I found the need to make some changes in how I ran the wires, and found an easier way the 2nd time. If you look down on the side of the boat in front of the oil tank, you see the black box that the spark plug wires attach to. There is a single bolt holding it down. Remove it and you can pull the box up and out of the way. Leave the wires attached. Next step it to take the new tray and squirt a half tube of liquid nail onto the underside of it. Make sure to outline the tray then just criss cross and squirt all around it. I cleaned the area where it would sit just by using a rag and alcohol. Test fit before you add the liquid nail. Now slide the tray in. Make sure you have the strap lined up correctly on the underside. I used masking tape to hold it in place. Sit something heavy on the tray and let it sit.
Now pull the switch out. Replace it with the new one. Put all the common wires on the common post. Run the starting battery to position 1. Attach the new power line to position 2. Run that power cable along with the ground cable in loom across the boat and wire tie it up as you go. By this time the tray should be set up.
Put the new battery down in the tray. Connect the power cable to the positive post. Attach the negative wire to the negative post. Pull the strap tight. Replace the previously unbolted box.
Go back to the other side of the boat. Connect the negative cablefrom the new battery to the top of battery 1.
You are now done. I have used it this way for over a year with no problems. Here are some pics. They were hard to take but may help. Total time about and hour and around $200 gets it done.
This is the box that needs moved.
Last edited by a moderator:
")