• This site contains eBay affiliate links for which Sea-Doo Forum may be compensated.

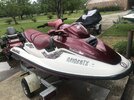
1998 GTX Limited Mini Resto

Status
Not open for further replies.

etemplet

Moderator
Moderator
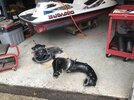
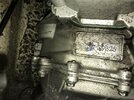
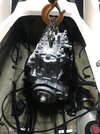
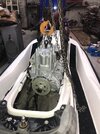
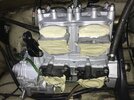
I haven't posted one of these in a while so figured we all might learn a few things, I know I will. I did some work on this ski a couple years ago. Wrist Pin clip came out and wiped out a cylinder. I did the top end only and many other items. A few weeks later I ended up pulling the engine because I didn't know enough to suspect the bendix . LOL Interesting as i replaced a hella-damaged bendix bearing in the engine case. So, ski was good. Not sure what happened but the crank seems to be bad. So when @mikidymac makes a statement about not doing the top end only on the 951's it would be a good idea to consider that course. It wasn't my ski or my decision but looking at the engine was this a replacement engine? Does that look like a SBT engine marking? When the piston clip was missing there were snap rings in there... hmmmm.... I'm not sure that's a stock method of hold the pins in place.

I have a rebuild 951 in the shop so I'm gonna swap it out pretty quick. KUDOS to whoever said the exhaust can be removed in a single piece on the GTX. I had to try it and YES it can be done !! Always something new to learn. I'm gonna split it for the install but... hey... that's cool info.


I'm am gonna revert back to the injection pump. I just find it easier to put the gas where the gas goes on these skis. That's a hell of a lot of premixing.

I'm looking at the Shaft seal and wondering if I can go to the bellows type without any problems. I'm also wondering if the bellows type is better. :) I'm comfortabe either way. Here I go... touchdowns everyone !!
 

Attachments

  • 1998 GTX 951 Engine Removal (2).JPG
    1998 GTX 951 Engine Removal (2).JPG
    368.4 KB · Views: 57
  • 1998 GTX 951 Engine Removal (9).JPG
    1998 GTX 951 Engine Removal (9).JPG
    339.7 KB · Views: 39
  • 1998 GTX Limited Returns (4).JPG
    1998 GTX Limited Returns (4).JPG
    489 KB · Views: 39
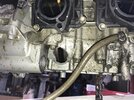
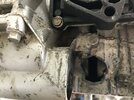
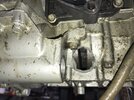
Interesting venitalationport. Ouch.
 

Attachments

  • GTX 951 hole in engine casing (1).JPG
    GTX 951 hole in engine casing (1).JPG
    486.2 KB · Views: 38
  • GTX 951 hole in engine casing (2).JPG
    GTX 951 hole in engine casing (2).JPG
    293.6 KB · Views: 34
  • GTX 951 hole in engine casing (3).JPG
    GTX 951 hole in engine casing (3).JPG
    451.7 KB · Views: 39
A member suggested once about reusing the gray pulse line hose. I like the idea but it's too brittle on the end for me and if I cut that part off I don't think it will reach. LOL I'd like to get some of that gray line Anyone know what it is called?
 
Yes, that is an SBT engine and pretty common on their early engines. I can’t say if they are better now or not. I have friends with 3 SBT 787’s with bad engines that let go last year, they were probably 6 years old but really low hours.
 
I just put a new carbon seal kit (stainless hat, carbon ring, and rubber boot) on the wife's 1996 GTX last weekend because it was very worn and leaking bad last year (it might have been original). New one is working great so far. My 1995 XP 800 has the old carrier bearing style and I replaced that when I restored it, but I can't comment on which works better in the long run since I only got 1 season on the 1995 XP
 
Yes, that is an SBT engine and pretty common on their early engines. I can’t say if they are better now or not. I have friends with 3 SBT 787’s with bad engines that let go last year, they were probably 6 years old but really low hours.
I didn't know much about them when I fixed that ski. The freakin wrist pin wore slots into the cylinder bore. Talk about a crap build. I'll never use "snap rings" on wrist pins. Unless they just left one out. Crappy build for sure then.
 
I have seen cheap piston kits come with the snap rings and I know so did SBT at one point. Never use them for this very reason, only the wire ones. And make sure the gap is either pointing directly up or down.
 
I contacted the owner of the ski and he said that SBT engine was bout 2010. I've been doing friendly neighbor stuff today and helping family so the Big Dog is sitting. Gonna GIT SUM tomorrow. :D
 
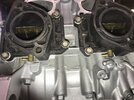
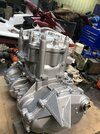
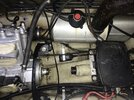
I'm going back with the injection system as it was removed on this ski. The last GTX 951 I did, I didn't like the injection lines being so close to the carburetor Throttle Disc. I'm gonna see what I can do about securing the lines and insuring they are not too close to moving or hot parts. I know the ski came with little brackets that fit on the Reed Vavle covers. I'll do something like that.
 

Attachments

  • 1998 GTX Engine Assemble 6-9-21 (1).JPG
    1998 GTX Engine Assemble 6-9-21 (1).JPG
    506.4 KB · Views: 23
  • 1998 GTX Engine Assemble 6-9-21 (2).JPG
    1998 GTX Engine Assemble 6-9-21 (2).JPG
    416.4 KB · Views: 24
I think from the factory they had sleeves over the oil line although maybe I am just imagining things.

Yes, #35 is a protector sleeve.
Image.gif
 
Last edited:
I had to order a oil pump Drive, then a specific oil pump for the 1998 GTX Limited and then the oil pump cable. LOL Slowed me down by a couple weeks. Got the engine in place now. I gotta install the pump and drive shaft to determine if the new style water seal is gonna work. I think it will but I'm gonna check the thrust on the shaft before I do the alignment. I'm getting my butt in gear on this one.
 

Attachments

  • Engine Install 1998 GTX Limited (3).JPEG
    Engine Install 1998 GTX Limited (3).JPEG
    265 KB · Views: 19
  • Engine Install 1998 GTX Limited (2).JPEG
    Engine Install 1998 GTX Limited (2).JPEG
    298.7 KB · Views: 18
  • Engine Install 1998 GTX Limited (4).JPEG
    Engine Install 1998 GTX Limited (4).JPEG
    328.2 KB · Views: 21
  • Engine Install 1998 GTX Limited (5).JPEG
    Engine Install 1998 GTX Limited (5).JPEG
    345.6 KB · Views: 22
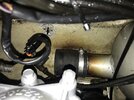
I gotta look into why this exhaust got hot. Rubber isn't melted but I'm not sure when this happened. I'm thiking this is old damage but I'll give the whole cooling system a good once or twice over.
 

Attachments

  • Hot Exhaust 1998 GTX Limited.JPEG
    Hot Exhaust 1998 GTX Limited.JPEG
    278 KB · Views: 25
Chaps mah azz.... I thought I ordered exhaust manitold gaskets. I got 5 of everything else... I'll soon have 6 extra gaskets for this ski as well. I spend almost two hours cleaning up and looking around. My parts are getting better organized anyway. I'm finding more stuff... LOL :D
 
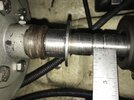
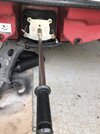
Boy O Boy the more you work on these skis the more stuff you find wrong. Always a mechanical puzzle, sleuthing, and figuring out "why" others did what they did. The "root causes" must be found and eliminated. Like an engine failure you have to figure out "why" or the next engine will do the same thing. On this GTX Limited it had that old style cartridge water seal. I found the drive shaft moved at least 1/2" or more back and forth (thrust). The cartridge was corroded badly so I found a shaft in my pile off a 1997 GTX. I installed that shaft with the pump in place and took measurements. I put it in the lathe and trimmed a bit off the PTO end and put a new clip groove in the correct place so the water seal would have enough compression to seal. I like working on these things because I'm always solving problems and making the skis nice. Then the pump was crap.... LOL I had a spare and fixed that one up. :) So nice to have a lathe at home. I spend a lot of time scraping and sanding the oxidation on the wet parts then the paint to make it pretty. :D I'm not fast but I enjoy the end result. :D
 

Attachments

  • GTX Limited Drive Shaft Groove Measure  (2).JPEG
    GTX Limited Drive Shaft Groove Measure (2).JPEG
    158.1 KB · Views: 21
  • GTX Limited Drive Train (1).JPEG
    GTX Limited Drive Train (1).JPEG
    335.8 KB · Views: 21
  • GTX Painted Jet Pump Nozzle (3).JPEG
    GTX Painted Jet Pump Nozzle (3).JPEG
    238.5 KB · Views: 26
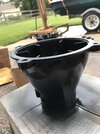
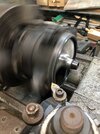
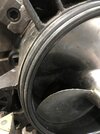
Boy O Boy, trying to keep the resto moving along and inexpensive as usual, the jet pump was damaged and needed a total rebuild. I found a pump in my pile that looked good to me. The pump was in good shape so I flushed the housing thoroughly, new seal, new wear ring, assembled, oiled and ready to go but... didn't fit. Go figure. I tried both gaskets... nope nada. A tad frustrated I went inside and figured 4 days for pump parts then I thought, If I can fit that pump in the lathe I can machine the gasket end. LOL Sucker fit without disassembling anything and now... she's ready to go. BAM !!! Got that Did !! :D
 

Attachments

  • Machine Jet pump Lathe (4).JPEG
    Machine Jet pump Lathe (4).JPEG
    304.4 KB · Views: 24
  • Machine Jet pump Lathe (3).JPEG
    Machine Jet pump Lathe (3).JPEG
    243.3 KB · Views: 32
Last edited:
I don't know where the pump came from but it coulda been off a 1999 XP or a 2003 XP DI as I scrapped one each of those. It was a straight fit on the ride plate mount.
 
I found a pump in my pile that looked good to me.

How big of a pile of spare parts do you have? I mess up some nut holders on a pump assembly and I’m stuck til the dealer gets parts delivered.

If I can fit that pump in the lathe I can machine the gasket end.

Looking good. I can’t tell from the pics but I assume you’re using a four jaw chuck?. Even with a four jaw chuck how did you get the end you were machining to run concentric?
 
Looking good. I can’t tell from the pics but I assume you’re using a four jaw chuck?. Even with a four jaw chuck how did you get the end you were machining to run concentric?

The big issue for me was the cone fitting into the hole in the chuck. :) Truing up the pump for machining was routine. Push or tap the housing to get the face to run true then using the chuck jaws center up the pump. Gotta go back and forth a number of times to get everything just right then see what it looks like when spinning. A trick or two to make this a much easier job. You don't chuck with the whole jaw just a small portion that way you can cock the pump as needed so the surfaces you need lined up running true. Castings are rarely concentric or parallel. You can't do this with a 3 jaw chuck.
 
Last edited:
What kinda lead time are you looking at?

The nut holders should be in today (Tuesday) or tomorrow at the latest.

I wasn’t trying to get free parts from your pile - I was just amazed that your pile was extensive enough to find a suitable pump. That is freaking amazing!

So how big is the pile-o-parts you have? Where does one find a pile-o-parts?
 
The big issue for me was the cone fitting into the hole in the chuck. :) Truing up the pump for machining was routine. Push or tap the housing to get the face to run true then using the chuck jaws center up the pump. Gotta go back and forth a number of times to get everything just right then see what it looks like when spinning. A trick or two to make this a much easier job. You don't chuck with the whole jaw just a small portion that way you can cock the pump as needed so the surfaces you need lined up running true. Castings are rarely concentric or parallel. You can't do this with a 3 jaw chuck.

Yeah, fitting the nose cone into the chuck would require a pretty large spindle bore.

Did you use an indicator or just eyeball the runout?
 
Status
Not open for further replies.
Back
Top