RX951
New Member
Well, I have had a gremlin on my 1998 GTI fuel system that has had me stumped for about 4 days now (electrical).
I did some troubloeshooting and found that the fuel sending unit baffle had a blown fuse on the internal circuit board.
This is a common problem on Sea-Doo's.
Another common problem I ruled out was the fuel float getting fuel in it making it not float, but it was o.k.
I was able to get access to a blueprint of the circuit board on the Sea-Doo fuel baffles and found there was a fuse that is on the circuit board to protect the board from surges.
I know this is not RXP or RXT related, but I want to post pics on what I did to fix it and the repair I done to the fuel baffle by using the plastic welding process.
This repair saved me over 150.00.
The repair of welding plastic can be done on almost anything with the right tip on the soldering iron and patience.
For this repair below, I used a plastic zip-tie to help seal the seam.
A white Zip-tie would have matched better, but this is what I had on hand.
For any of you that own sea-doo's and have the fuel guage stop reading, this is very common problem that occurs.
Top 3 problems are:
* fuel float full of fuel (very common)
* blown F1 fuse on circuit board (very common)
* bad connector on the sending unit plug (rare)
* bad guage (possible)
Once the repair was completed, I was able to obtain an OHM reading of 0.01 - 88.8 (empty-full).
The bar graph on my meter also showed the graduation chage from empty to full as I tipped the baffle from up/down to simulate a fuel level change.
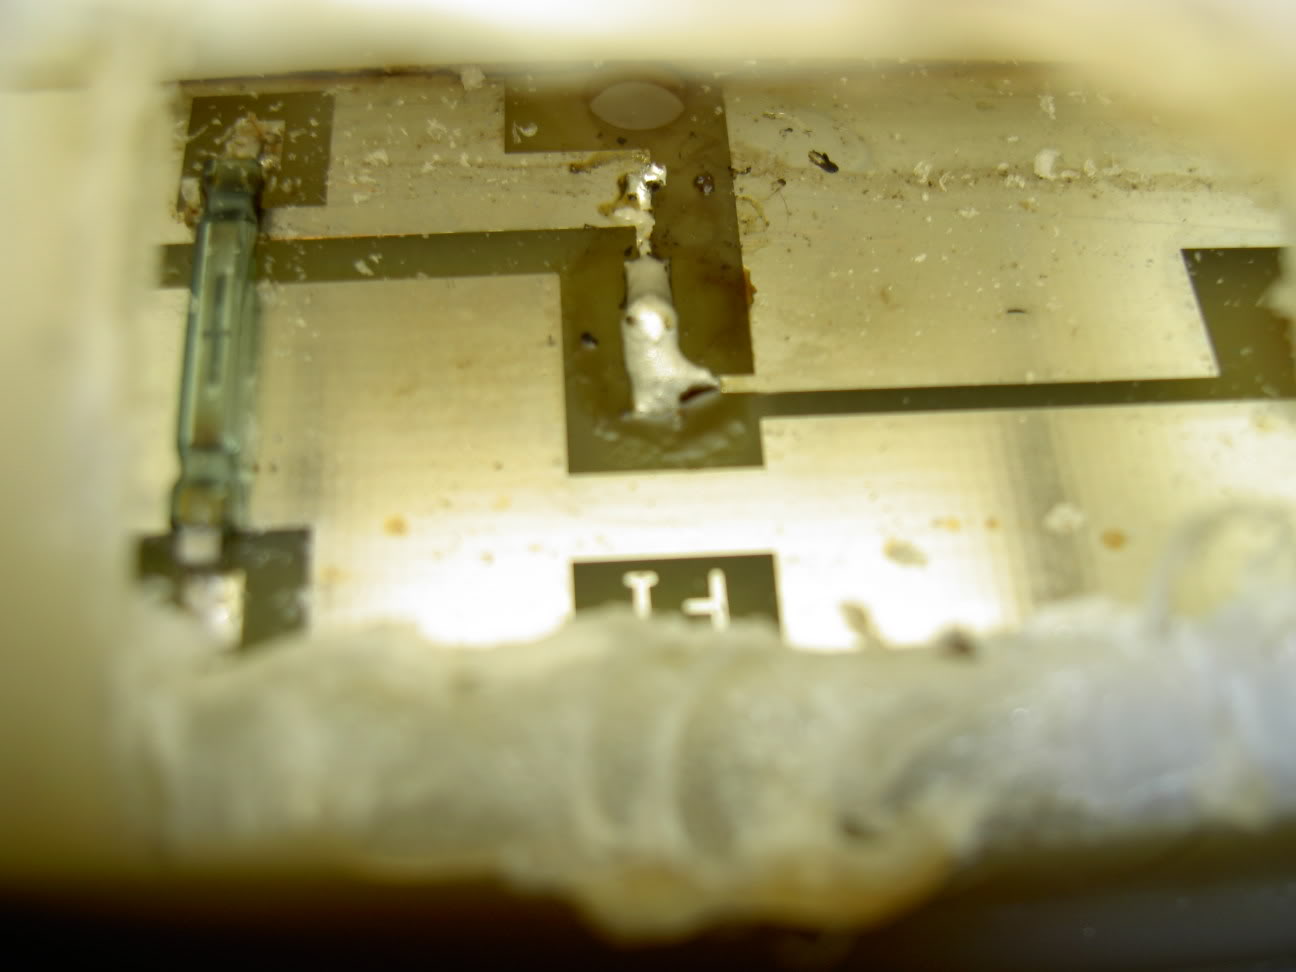
First pic here, I used a Weller Soldering Iron to cut open a hole to get an internal view of the circuit board and the location of the F1 fuse near the top.

Found the fuse and removed it by unsoldering it from its location.
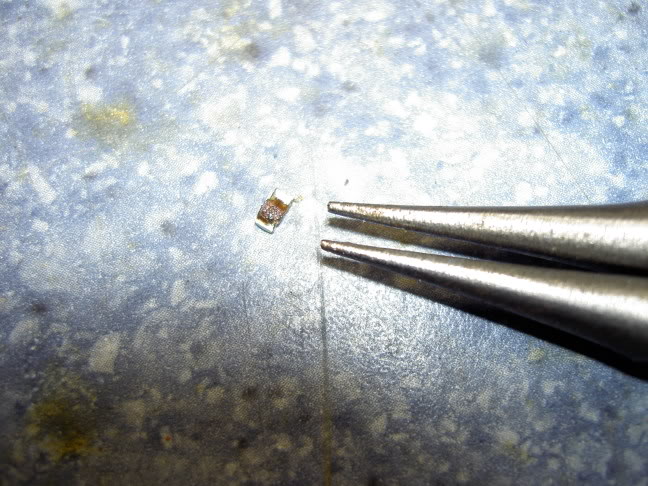
I then filled in the gap with solder where the F1 fuse use to be.
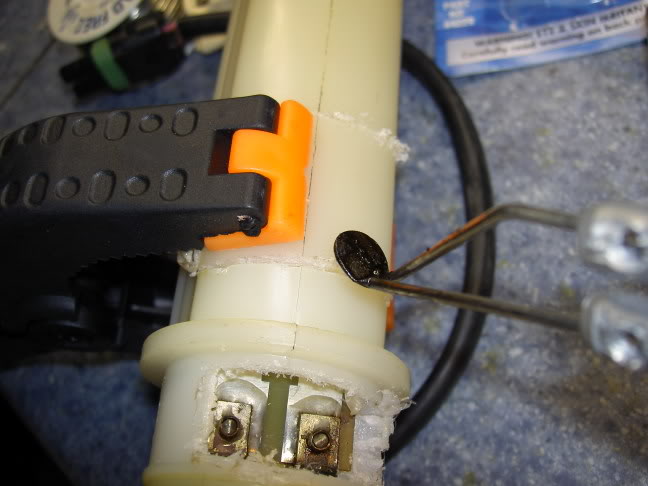
I then use a clamp and proceed to close the flap I opened and begin the solder process.
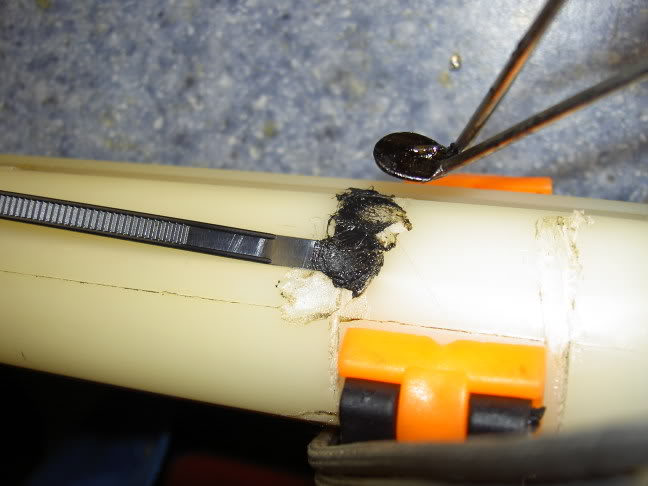
I begin to solder by using a Weller Soldering Iron with a plastic smearing/welding tip. This is included in all Weller Irons. I've this iron for over 15 years and this tip has come in handy several times for plastic repair.
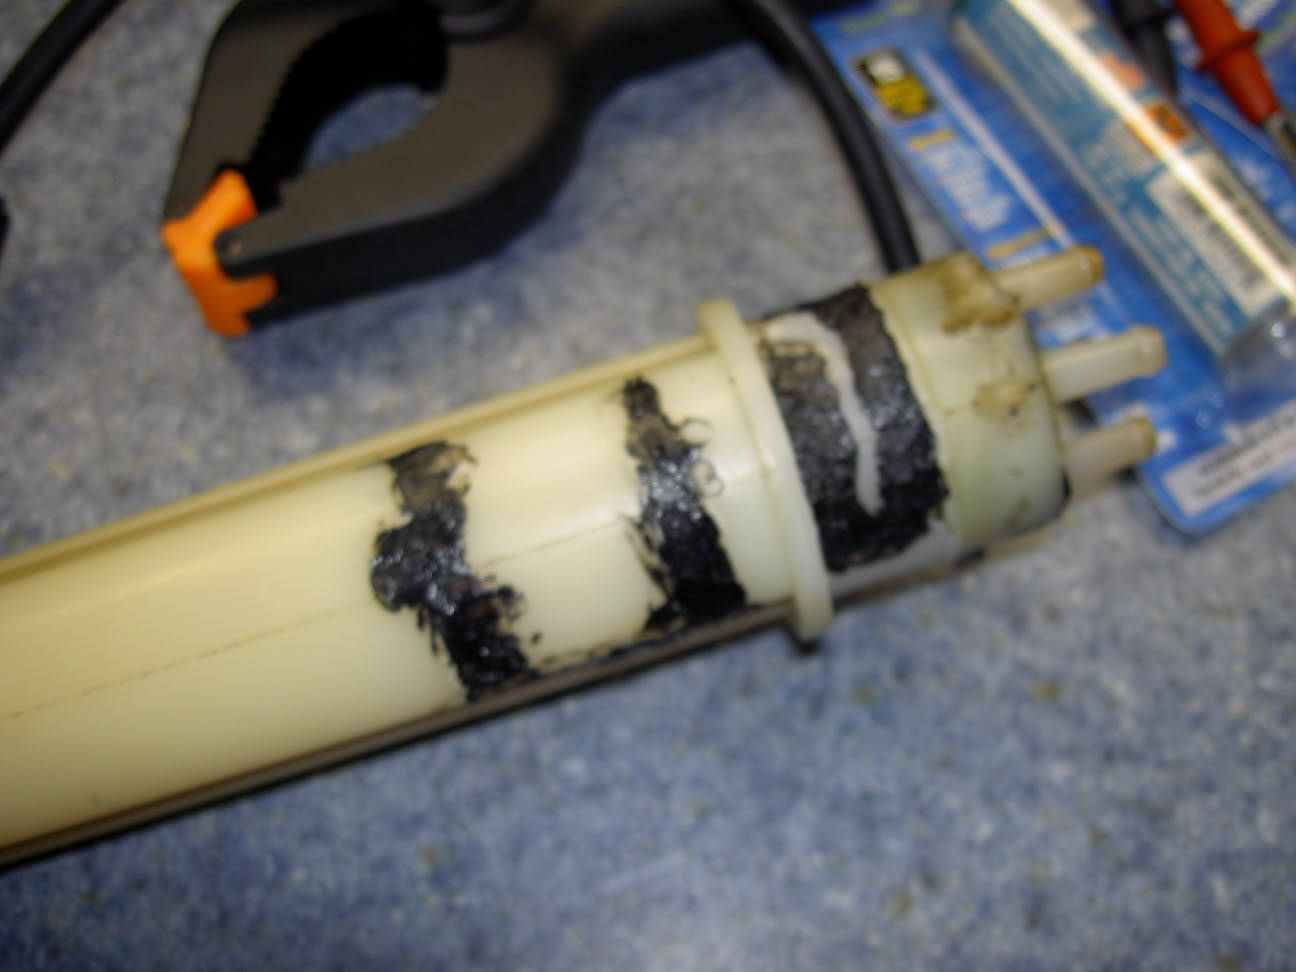
I used the plastic of the tube to begin the fusing process. I added more plastic by using a Zip-Tie to add more material to help cloe in the seam. Zip-Ties are perfect for making plastic repair weld jobs. It melts at the right rate and is straight like a welding rod for laying in place as you smear it over the seam.
Here is the final job completed. I used 1 8" Zip Tie to complete this job.
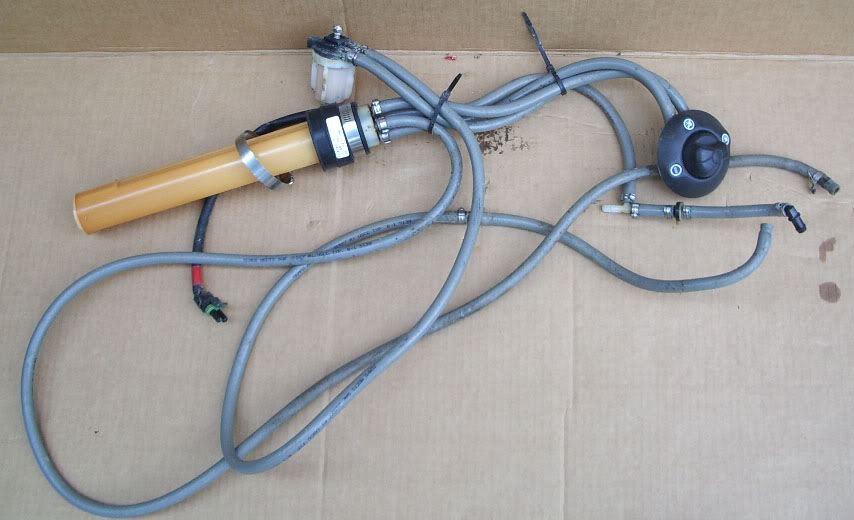
Here is what the complete fuel supply assembly looks like.
I did some troubloeshooting and found that the fuel sending unit baffle had a blown fuse on the internal circuit board.
This is a common problem on Sea-Doo's.
Another common problem I ruled out was the fuel float getting fuel in it making it not float, but it was o.k.
I was able to get access to a blueprint of the circuit board on the Sea-Doo fuel baffles and found there was a fuse that is on the circuit board to protect the board from surges.
I know this is not RXP or RXT related, but I want to post pics on what I did to fix it and the repair I done to the fuel baffle by using the plastic welding process.
This repair saved me over 150.00.
The repair of welding plastic can be done on almost anything with the right tip on the soldering iron and patience.
For this repair below, I used a plastic zip-tie to help seal the seam.
A white Zip-tie would have matched better, but this is what I had on hand.
For any of you that own sea-doo's and have the fuel guage stop reading, this is very common problem that occurs.
Top 3 problems are:
* fuel float full of fuel (very common)
* blown F1 fuse on circuit board (very common)
* bad connector on the sending unit plug (rare)
* bad guage (possible)
Once the repair was completed, I was able to obtain an OHM reading of 0.01 - 88.8 (empty-full).
The bar graph on my meter also showed the graduation chage from empty to full as I tipped the baffle from up/down to simulate a fuel level change.
First pic here, I used a Weller Soldering Iron to cut open a hole to get an internal view of the circuit board and the location of the F1 fuse near the top.
Found the fuse and removed it by unsoldering it from its location.
I then filled in the gap with solder where the F1 fuse use to be.
I then use a clamp and proceed to close the flap I opened and begin the solder process.
I begin to solder by using a Weller Soldering Iron with a plastic smearing/welding tip. This is included in all Weller Irons. I've this iron for over 15 years and this tip has come in handy several times for plastic repair.
I used the plastic of the tube to begin the fusing process. I added more plastic by using a Zip-Tie to add more material to help cloe in the seam. Zip-Ties are perfect for making plastic repair weld jobs. It melts at the right rate and is straight like a welding rod for laying in place as you smear it over the seam.
Here is the final job completed. I used 1 8" Zip Tie to complete this job.
Here is what the complete fuel supply assembly looks like.
Last edited by a moderator: