98 Challenger Project

Note: This site contains eBay affiliate links for which SeaDooForum.com may be compensated

burtshaver2021

Premium Member
Premium Member
4D491804-2E3A-4210-ADA9-697710BC5FFF.jpeg5A762670-D47E-467F-90C5-5D808BFC1E7B.jpeg
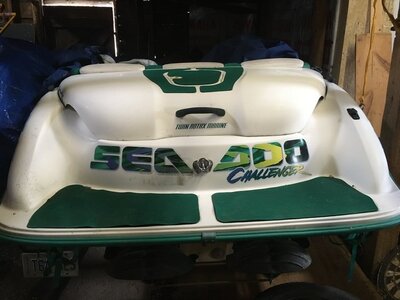
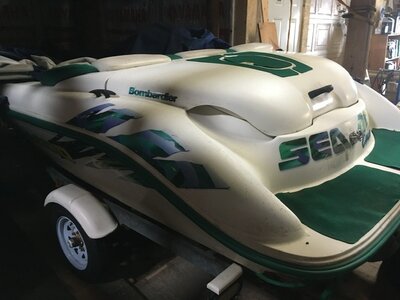
So I’ve been following along with @etemplet 96 Speedster restoration and his thread has spiked my excitement to start my own Seadoo boat project. I purchased this boat last fall so it’s time I start putting some work into it. I haven’t been this excited about a project since my HX project. We have a black Lab Daisy that will be 2 this September, for her first birthday I got steps for our pool so she could go swimming with us. For her second birthday September 5th it sure would be nice to have this Challenger on the water so Daisy and i can spend some together on it. If they are good I might even take the wife and kids out for a drive🤣. So anyways, when I put the key on the Dess post I get 2 beeps, port side engine is seized solid, starboard 717 turns by hand. I’m sure I will end up takin hx both these engines out for one reason or another but I want to start by seeing if I can put a battery in and see if the starboard engine will turn over with the starter. The engine bay exhaust fan works, well at least I hear it come on when I flip the switch. Reverse gate cable is broke. It’s going to be a long drawn out project for me as just like everyone else I have plenty of other obligations with a family, and I want to keep it enjoyable so progress will be ultra slow. I will look and see if I can find a manual tonight. I will be using this thread to document my progress. Thank goodness I did with the HX project because I lost everything from my laptop while doing the HX project so the pictures I posted to my thread where the only pictures I have of that project. Again progress will be slow and very painful for anyone helping me out on here as I’m a novice and don’t always catch on quickly but definitely will be needing help so any is greatly appreciated😀
 
Need More pictures of the exterior. :)
I have a good source on the reverse cable. Came in sooner than expected too.
Get a couple cans of PB Blaster and hose down everything with it. I hope your is not like down south where the parts corrode together. I was able to free up the adjusters on the jet pumps. Those cables are easy to damage while fighting to get the nuts loosened. Be gentle. :)

I'm interested in the single battery mount. I'd like to do that with the Speedster.
We are lucky that way for corrosion. All fresh water boats in this area so much much easier to get things apart. No rush on the reverse cable, It will be quite some time till I’m worrying about that but I’m sure I will be needing one. The PB blaster, do you mean for internal engine parts? Or all the nuts and bolts on the exterior? See, I told you this would be painful
 
01DF9B5D-0506-4470-9C0F-050F8809EDCC.jpeg
A little bit of progress today, I found the manual here on seadooforum. Went out to the barn to work on it, well I’m not really doing any work on it yet, really just spending time with it, looking at it, getting to know it, Lol and hoping that it will just miraculously work. So if you remember fro my original post the port engine was seized and the starboard engine would turn by hand. Today I hooked the battery up again, originally wasn’t getting the 2 beeps like I was before but eventually noticed there was another ground wire that I had t hooked to the battery, once I hooked that ground up I got the 2 beeps again😊. Just for the hell of it I tried rolling that port engine over with the starter and by god it broke free and rolled over, it spit out a pinkish water like substance, I had poured some XPS oil in the cylinders last year when I purchased it, so it was likely a mixture of oil and water. Sprayed more storage oil and rolled it over. Kept spraying oil and rolling till I thought I got most of it out. Did a compression test and 120 on the pto side and 180 on the mag side, I figured those numbers weren’t accurate due to the oil I had put in there. Put some gas oil mix in the cylinders 3 times, at first a little sputtering and by The 3rd time it ran for about 3 seconds. I noticed it had shot more sludge out the exhaust. Did another compression test and as I suspected the mag side was now 150 pounds and the pto side was 40 pounds 😪. Another observation I made, the oil
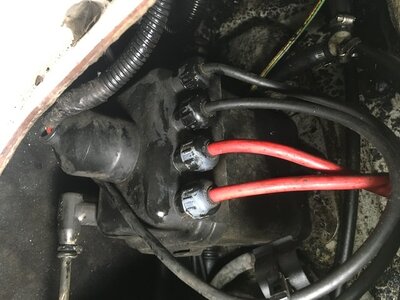
tank is nearly empty, don’t like that but being the mag cylinder has 150 pounds compression I don’t think they ran it right out of oil. There wasn’t a terrible amount of oil and water coming out the cylinders so I don’t think it leaked into the crankcase. Anyways, on to the starboard engine, it rolls over by hand but it won’t crank with the starter. Any ideas where to look first? I can hear the solenoid clicking which is a good sign but they can click and still be bad correct? I posted a picture, will I find the solenoid in this box? Maybe try crossing the posts with a screw driver? This boat only has 1 MPEM and I’m extremely thankful it’s ok.
 
Build both the engines, new cranks and all that fixins. Good news that the electrics are working properly !! Good Luck !!
 
Well another smooth move on my part, couldn’t get that starboard engine to crank over with the starter so today I took the tuned pipe off so I could access the starter, checked the solenoid connections, tried crossing solenoid posts, ohmed the ground and pier wires, they were all good right at 0. Cleaned them up and decided to give it another try before taking the starter out. Found a fifth positive cable hiding in the plastic battery terminal cover, 😂. Hooke it up and starboard engine cranks over. Imagine that🙄. 140 pto and 150 Mag in that engine. I’m actually contemplating leaving the engines in the engine bay for now and doing a leak down test right there. If both engines hold pressure I could then do the top end on the port engine also without taking them out. Only downfall to leaving them in, is I wouldn’t be able to do as good of a job cleaning everything up and painting. Also wouldn’t be checking some things like driveshaft bumpers etc,
 
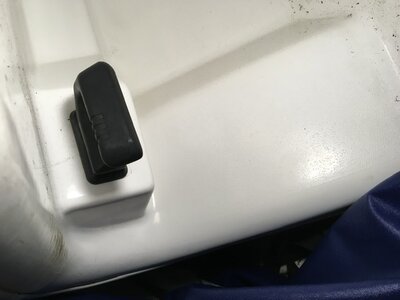
244C650A-4B37-4C3B-AC2D-2E80D17AD6FE.jpegAnyone tell me what this handle is for on the 99 Challenger? I have the shop manual but can’t find an operators manual for it.
 
Thank you, I guess that does exist. Anyone know where I can get an owners manual for this boat? I have the shop manual

That's about the best Idea someone gave me in a while. LOL A manual... go figure. :D On the Speedster I had the engines running in the driveway and they wouldn't accelerate just bog then I remembered something about neutral. :D I might opt for a manual too.
 
That looks like the handle from the intake grate weed removal system.

I remember one of the drawbacks on my Son's 96' Speedster was the plastic Ice Bags it would suck up every now and then. Not being a boater that was my first introduction of careless fishermen that used the bays and lakes for their garbage dump. That aside I really like the Yamaha Exciter for the lever pull grate., that way you don't have to swim under the boat and remove debris. Not that it bothered us much but lots of gators where we played. :D
 
F45DCDCD-1E75-4438-A859-3AE03500436F.jpeg
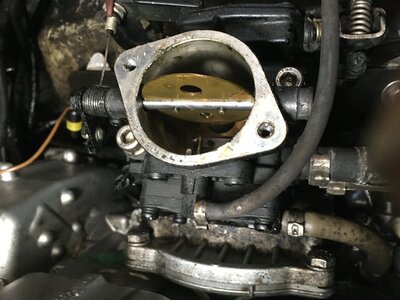
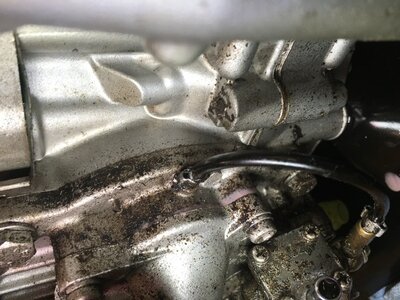
Poking away a little on this today, once the air box was off I seen the carb. I’m not familiar with this one, I’ve rebuilt 2 sbn 38 dual carbs on the HX and the 95 XP, I was expecting to see the same set up here with dual carbs but no. That small hose, is that going to an accelerator pump? I don’t think Seadoo source has the specs for 98 Challenger carb. I will have a look through the shop manual tonight but I don’t trust the manual for needle and seat size, any suggestions on what’s different here, what’s the same or any suggestions at all to help me rebuild these carbs will be appreciated.
 
9050EF3B-6865-4DDE-8D64-13F8F5D51FD7.jpeg
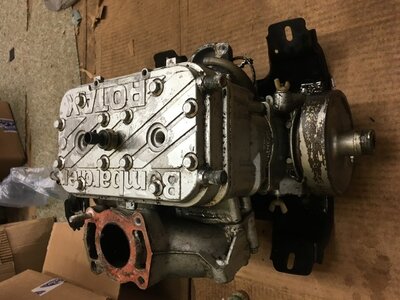
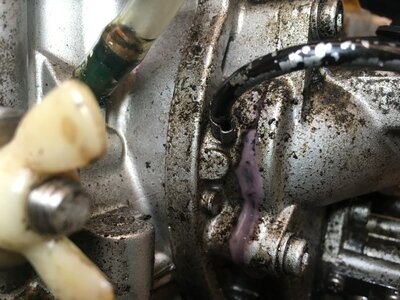
I got around to taking the port engine out today, last owner was using a purple oil, I thought I remembered using purple oil so I checked my fluids and sure enough I had some purple motomaster 3 stroke oil for air cooled engines that I use in my weed eater and chainsaw. That will all get cleaned out, just have to decide if I’m going to stick with the xps full synthetic that I’ve been saying in all my machines or consider something different. I found the carb rebuild kit for this from OSD marine, they say 1 turn out on the low and 0 turns in the high, 1.5 needle and an option for a diaphragm on the accelerator pump, I’ve never had a machine with an accelerator pump before so I’m not sure what I change on it? But when I gave it throttle it did pump gas out? So I guess it’s working? Looking forward to tomorrow, going to do a leak down test on this port engine before I take the cylinders off to measure the bores. I should really know where I stand with this engine tomorrow, can’t wait😀. I better go out and turn the heat on in my shop so I can get accurate measurements tomorrow
 
How cold is it where you are located?
You don't need the high $$ oil on those engines. Get Mystic or Lucas for a lot cheaper. I wouldn't even other running full synthetic. The Lucas blend is good stuff.
I wouldn't mess with the accelerator pump if it was working properly. If you replace the hoses on the carbs be careful as there may be a small orifice (bronze) in the accelerator pump feed line . Don't lose it.
 
A small orfice (hole?) yo mean the line from the accelerator pump that goes to the little squirter in the carb body. If I take that line off there’s something I could lose? Any idea what size ID that line would be? I notice the fuel lines are enormous on this although the ID on the fuel lines doesn’t look to be much bigger, I will measure the ID of the fuel lines but are they 1/4” ID
 
It’s going down to 44 tonight, not cold at all but room temperature should be around 68 for good measurements
 
I'm a machinist by trade. Whatever temperature it is... it is. Take the measurements and don't worry about it. :) Good Luck !!

Just a note, I live in the deep south but we have our cold days as well. :) Just remember the mics are the same temperature as the part... pretty much.
 
Last edited:
EA7722BB-21E4-42BA-A8B4-73642E4160BE.jpeg64C21834-C710-4B8A-987A-9DCB8CC5B378.jpeg
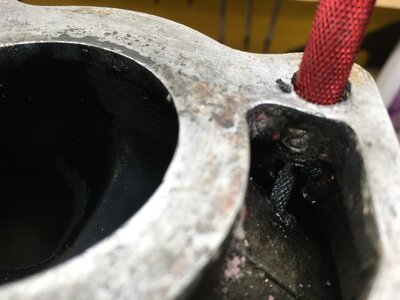
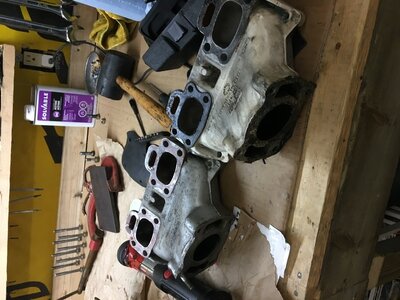
Man, I wish I could work on something that’s never been molested. What the hell are people thinking when they work on these, the tuned pipe to exhaust manifold had 3 different bolts plus the correct nut😂, the one bolt was way to long and had been threaded right through into the water jacket. It just seems when people work on these, that they have no tools to do anything correctly and absolutely no common sense, don’t find the proper bolt and just jam in whatever is lying around and run it🤢.. Anyways on the positive side I had an extra manifold around so I got it off and the rotary valve cavity has held pressure so inner seals are good. The manifold I took off the 95XP doesn’t have a stud though, threads look ok, to get the stud out of the old manifold can I use 2 nuts, 1 as a jam nut, apply heat and turn that stud out? If I can get it out, I will clean up the threads on both pieces, clean with parts cleaner and then use the 2 Nuts again to torque the stud into my spare manifold with some red loctite. I figure 18 foot pounds would be good.
 
View attachment 65280View attachment 65281
Man, I wish I could work on something that’s never been molested. What the hell are people thinking when they work on these, the tuned pipe to exhaust manifold had 3 different bolts plus the correct nut😂, the one bolt was way to long and had been threaded right through into the water jacket. It just seems when people work on these, that they have no tools to do anything correctly and absolutely no common sense, don’t find the proper bolt and just jam in whatever is lying around and run it🤢.. Anyways on the positive side I had an extra manifold around so I got it off and the rotary valve cavity has held pressure so inner seals are good. The manifold I took off the 95XP doesn’t have a stud though, threads look ok, to get the stud out of the old manifold can I use 2 nuts, 1 as a jam nut, apply heat and turn that stud out? If I can get it out, I will clean up the threads on both pieces, clean with parts cleaner and then use the 2 Nuts again to torque the stud into my spare manifold with some red loctite. I figure 18 foot pounds would be good.

They are ALL molested and about to crash and burn. Some already crashed, burned and left for scrap. :) Gotta build them up all the way to make them hella reliable. :)
What color are you painting it. It's all gotta match. :D :D

As for that Stud, you can buy all thread stainless steel if you need to but that stud will come out. Glad you're getting after it. :)
I got the stud in the new manifold, I used the one off the 95XP manifold, it had threaded out of the manifold when I was taking it off with the nut still in the stud. That’s all good now. I went ahead and ordered some nice aluminum block off plates for the 717 and ordered a set for the 787RFI at the same time. Saved in shipping so I thought it best just to get them at the same time. Tired of using the inner tube sandwiched between exhaust and carb so these plates will be nice to have. As for the colour, I was thinking about that, right now I’m leaning towards staying with what is there and painting silver for the motors and intakes and white for the tuned pipes. Kind of boring but I thought if any where to ever chip off, it wouldn’t look so bad then. I may paint the cylinder cover while it’s off and not paint the bolt heads for it. I like that look. Might run the bolt heads on the brass wheel and then give them a little buff, but getting way ahead of myself lol. Lots to do before I worry about that.
 
I got the stud in the new manifold, I used the one off the 95XP manifold, it had threaded out of the manifold when I was taking it off with the nut still in the stud. That’s all good now. I went ahead and ordered some nice aluminum block off plates for the 717 and ordered a set for the 787RFI at the same time. Saved in shipping so I thought it best just to get them at the same time. Tired of using the inner tube sandwiched between exhaust and carb so these plates will be nice to have. As for the colour, I was thinking about that, right now I’m leaning towards staying with what is there and painting silver for the motors and intakes and white for the tuned pipes. Kind of boring but I thought if any where to ever chip off, it wouldn’t look so bad then. I may paint the cylinder cover while it’s off and not paint the bolt heads for it. I like that look. Might run the bolt heads on the brass wheel and then give them a little buff, but getting way ahead of myself lol. Lots to do before I worry about that.

GO FOR THE BLING !!!
 
7B69E401-FD7A-4848-88E7-77E507270992.jpegD7F1EE6F-C7E5-4617-AEB1-0CBA9EE9E7B2.jpegB9D6CBE8-2988-4C92-89EF-6B2DF03E30EF.jpeg
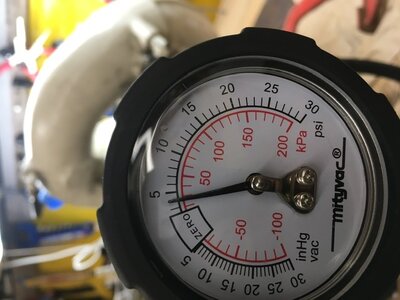
I call it good news so far today, I put that new exhaust manifold on, made myself a new gasket out of old inner tube, sandwiched it with the tuned pipe, was optimistic as I was pumping and the pressure into crankcase was building, I got to about 4 pounds and noticed some oil seeping out between the intake manifold and the rotors valve cover ( not sure if I have the correct parts terms ) was still able to pump the pressure up to 5 pounds, noticed it leaking on both the pto and mag side where the intake manifold bolts to rotary valve housing just beneath where the small oil lines go in. It dropped from 5 pounds to 4 pounds in 45 seconds and then after 5 minutes I let the remaining pound or 2 of pressure out. Went ahead and pressurized the cooling system and it held 4 pounds indefinitely. I think I want to get a new gasket where it’s leaking and install and re test for leaks before I take the cylinders off. I’ve never had the cylinders off a Seadoo engine before, only snowmobile engines, I can’t see that there would be any pitfalls taking this intake manifold off? But if there is let me know please. I’m going to look through the manual just in case.
 
1004730A-2BF6-40E5-8B48-9912999ADFE9.jpeg
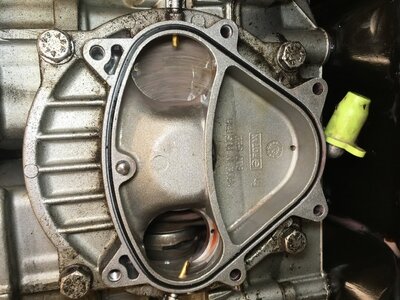
Took the intake manifold off, actually an oring there, I was expecting a gasket so that’s a pleasant surprise. I was going to wait to take the cylinder cover and cylinders off till I got this new oring but with seeing the air leak past this intake manifold and still only losing a pound in 45 seconds I’m going to say that the crank seals are good and go ahead and take the cylinders off so I can measure everything and see what all I need to order. Can’t wait😀 to see what kind of shape there in, I’m not expecting it to be good with only 40 pounds of compression on the pto side but I’m being hopeful. Any liquid I could use to clean out the crankcase that wouldn’t hurt the crank seals? I’m not going to split the case unless I need to and so far with good inner seals, outer seals and rotary valve cavity holding pressure I don’t see a need to. I would like to just tip the motor almost upside down and spray something in, and then blow it out with compressed air lightly? Or should I just squirt some 2 stroke oil in, and then blow that out best I can?
 
D6C9776A-FB03-4AF1-90FE-D79373F65712.jpeg38E5480B-ABFD-4EC1-8404-160CD47BFDBE.jpegEBDB79CC-E46A-444A-BDB4-D5EDC0663773.jpeg
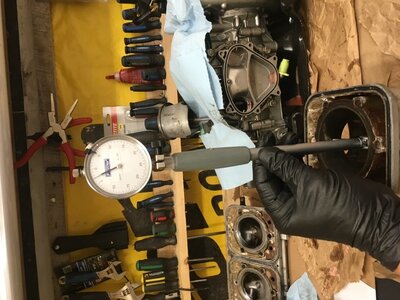
I got around to taking some measurements today of this port engine, a little back story, this engine had originally given me decent compression readings but then after cranking it Over a few times have me horrible readings on pto side and good readings mag side. Took the cylinders off yesterday and noticed a few things, 1 some type of goop in the cooling ports, consistency pudding, maybe a little thinner with pink through it, also noticed tja the rings on the pto piston were shoved into the ring groove and I had trouble getting them out. Definitely some moisture in there at one time. So today I got some measurements and here they are
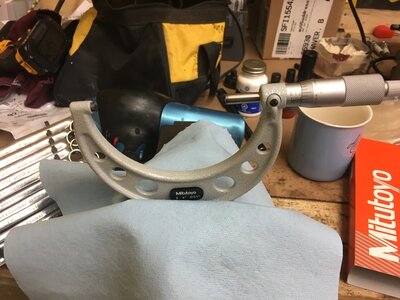
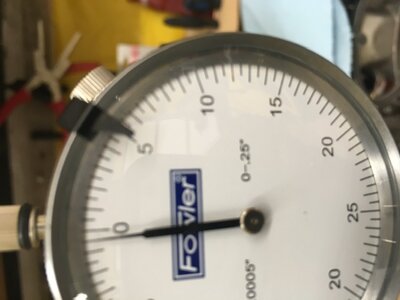
PTO ring end gap rectangular ring was .054 L ring .090 wear limit is .039 so no good, out of spec. Piston groove clearance, I couldn’t get a .0015 feeler gauge in , new is .001 to .003 so a pass. Cylinder taper top thrust measurement 3.231 bottom thrust measurement 3.2285 so taper from top to bottom on thrust side is .0025 difference spec for max taper is .004 so well within spec. Wrist PIN direction measures 3.230 5/8 from top and 3.2295 1 1/2 from bottom so taper from top to bottom has a difference in the wrist pin direction of .0005 IN SPEC. Out of round measurements at top is thrust 3.232 pin 3.230 out of round at top by .001 cylinder out of round spec is .003 so IN SPEC out of round at bottom is also .001

Mag Cylinder taper from top to bottom on the thrust side is .0015 and .0011 on the wrist pin side. Max taper allowed is .004 so well IN SPEC.
Mag cylinder is out of round by .0005 at the top and .0001 out of round at the bottom. Again spec is allowed to be .003 out of round so amazingly IN SPEC.😊
To summarize all measurement are well within spec and I see not feel any grooves. Pistons are marked with 81.90 on top, so still standard pistons, Im good to go ahead and have them honed😊
I’ve never honed a cylinder before, should I purchase a hone and do this myself? It take it somewhere to be done? I tried calling Hurricane Performance in Prescott but they are gone to the races till Monday. If I do it myself what home should I use, and what is the procedure? I will look at some video’s but advice would be appreciated from those that have done it. I’m going to measure the pistons when I get a minute, am I crazy thinking of using the existing pistons if they measure good and piston to piston wall clearance is good? And just buy new rings as I think the whole problem with low compression was that the rings on the PTO piston stuck in the groove. Or should I just buy new standard pistons and rings no matter what the measurements are? Real happy with how this is going so far, I thought I might find carnage in that PTO cylinder but I guess I got lucky again.🤣 What would you do?
 
Back
Top