Lake Sailor
Active Member
Hey folks. Haven't posted or even visited in a while, my riding season generally ends in September, nothing much to post about.
Doing some minor stuff over the winter, got to thinking about that leaking oil tank, sure be nice if it didn't leak.
You could maybe plastic-weld it, plastic fab companies do it, HF sells a tool, or maybe use a soldering gun and wire ties like people do with fuel baffles.
I thought about buying a good spare, separate the halves and replace the factory gasket with some form-in-place silicone. What I didn't like about this is it looked like it might be hard to get the tank apart without damaging it.
After more thought I decided what I'd really like to do is just paint some epoxy or something over the leaking seam. Even better, fiberglass it. This is about a zero-risk repair, worst that could happen is, it'd still leak.
The problem with any repair is getting anything to bond to these tanks, they are made of High Density PolyEthylene, a material that is notoriously difficult to bond to. Difficult, but not impossible.
I actually discovered this method when the washer fluid tank in my pickup sprung a leak. Like a Seadoo oil tank, they are $100 or more new. So, I thought I'd share.
The tank in the old GTI has probably leaked since it was new. Somebody tried a repair, at the factory is my guess, but it didn't take. This stuff peeled off no problem. That HDPE again.
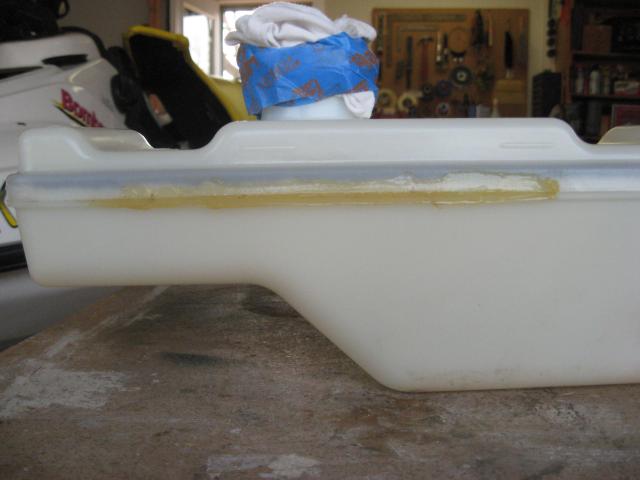
First thing to do is get the tank cleaned up. Can't have oil seeping out of the seams while trying to do the repair. I slushed the tank out with green cleaner and rinsed it with hot water. Repeated this several times, you can kind of tell by looking at the cleaner how it's going.
After deciding I had got all I was going to get this way I slushed it out a couple of times with denatured alcohol. This gets any residual oil, plus the alcohol dissolves any water trapped in the seams or whatever. When done with this I'd say the tank was about like-new clean. You can also, if you're thrifty like I am, save the cleaner for really dirty jobs, like cleaning the carbon outta the tuned pipe")
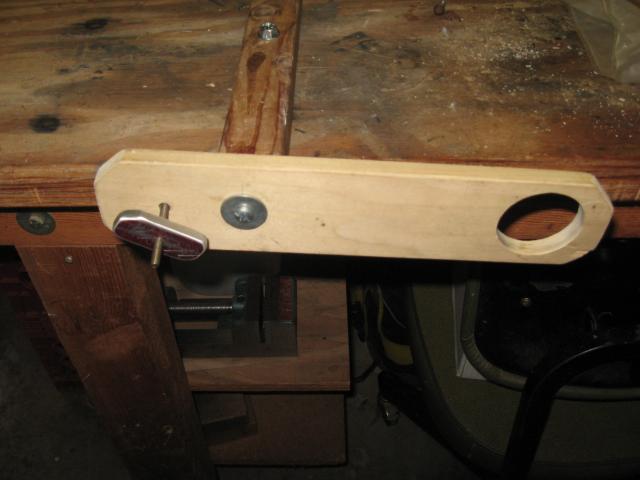
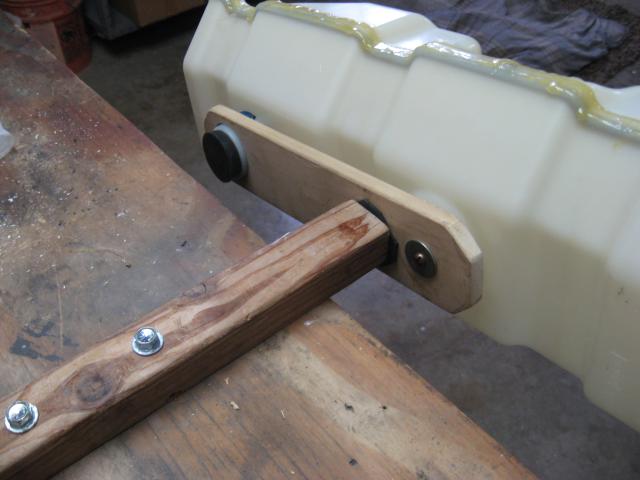
I made a simple tool to mount the tank to my workbench so that I could position the tank while working on it. Wanted to do the lay-up flat. Also I couldn't lay it on the seams I was repairing.
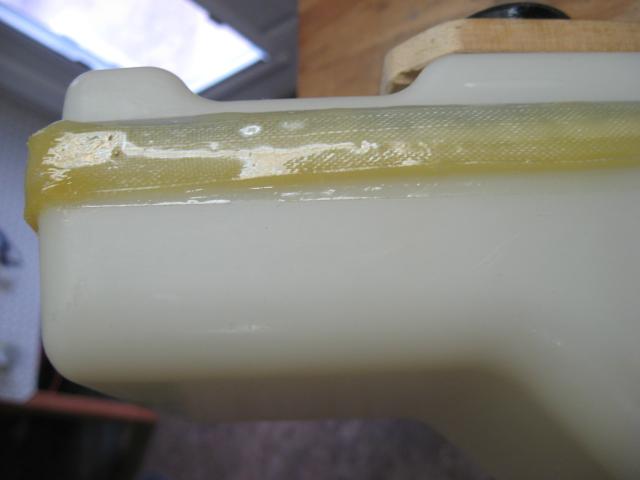
I used Gflex epoxy from West Systems, this epoxy is formulated for hard-to-bond materials and I reinforced the seam with 1/2 inch wide fiberglass tape, from ACP Composites.
Now for the magic. The real trick to getting a bond on HDPE is, after all the cleaning and sanding to flame-treat the surface. You do this by passing the flame of a propane torch over the surface you want to bond. You do not melt it. You hardly even get it hot. Just passing the flame over it changes the surface so that it can be bonded to. I actually had masked off either side of the seam for easier clean up and the flame didn't do anything to the tape, it wasn't on it long enough. Only thing is, after the flame treatment, you gotta get the glue on pretty quick, like a half hour.
I did a small test layup, without any surface treatment, just to see how it went and all. One small problem is that the fiberglass tape wouldn't really conform to the lower side of the seam where it rolls under. This may not really be needed, but I wanted as much bond area on the bottom tank half as I could get. What the layup showed me is that I could just let the tape hang over and fill it from the back side.
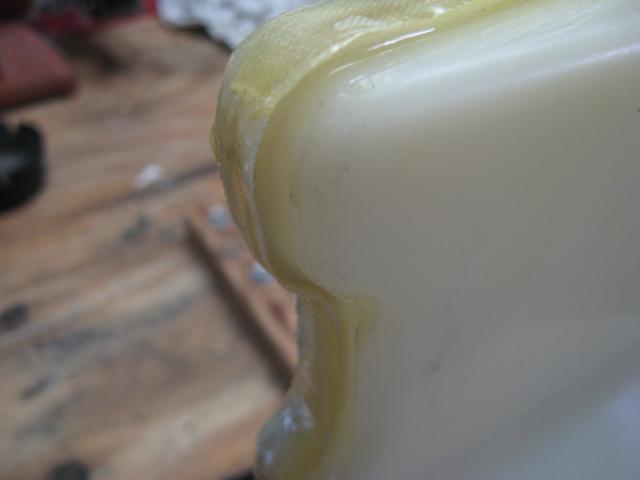
Since I hadn't done any surface prep, this just peeled right off once it was cured.
So then, just prepped the surface, did the layup and backfill and let it cure. I pressure tested the tank after the epoxy was cured ehough to handle. It'll hold 2 psi all day now.
After a few days more curing, I'll sand the rough edges off, throw the tank back in and fill 'er up for a change
Doing some minor stuff over the winter, got to thinking about that leaking oil tank, sure be nice if it didn't leak.
You could maybe plastic-weld it, plastic fab companies do it, HF sells a tool, or maybe use a soldering gun and wire ties like people do with fuel baffles.
I thought about buying a good spare, separate the halves and replace the factory gasket with some form-in-place silicone. What I didn't like about this is it looked like it might be hard to get the tank apart without damaging it.
After more thought I decided what I'd really like to do is just paint some epoxy or something over the leaking seam. Even better, fiberglass it. This is about a zero-risk repair, worst that could happen is, it'd still leak.
The problem with any repair is getting anything to bond to these tanks, they are made of High Density PolyEthylene, a material that is notoriously difficult to bond to. Difficult, but not impossible.
I actually discovered this method when the washer fluid tank in my pickup sprung a leak. Like a Seadoo oil tank, they are $100 or more new. So, I thought I'd share.
The tank in the old GTI has probably leaked since it was new. Somebody tried a repair, at the factory is my guess, but it didn't take. This stuff peeled off no problem. That HDPE again.

First thing to do is get the tank cleaned up. Can't have oil seeping out of the seams while trying to do the repair. I slushed the tank out with green cleaner and rinsed it with hot water. Repeated this several times, you can kind of tell by looking at the cleaner how it's going.
After deciding I had got all I was going to get this way I slushed it out a couple of times with denatured alcohol. This gets any residual oil, plus the alcohol dissolves any water trapped in the seams or whatever. When done with this I'd say the tank was about like-new clean. You can also, if you're thrifty like I am, save the cleaner for really dirty jobs, like cleaning the carbon outta the tuned pipe
I made a simple tool to mount the tank to my workbench so that I could position the tank while working on it. Wanted to do the lay-up flat. Also I couldn't lay it on the seams I was repairing.


I used Gflex epoxy from West Systems, this epoxy is formulated for hard-to-bond materials and I reinforced the seam with 1/2 inch wide fiberglass tape, from ACP Composites.
Now for the magic. The real trick to getting a bond on HDPE is, after all the cleaning and sanding to flame-treat the surface. You do this by passing the flame of a propane torch over the surface you want to bond. You do not melt it. You hardly even get it hot. Just passing the flame over it changes the surface so that it can be bonded to. I actually had masked off either side of the seam for easier clean up and the flame didn't do anything to the tape, it wasn't on it long enough. Only thing is, after the flame treatment, you gotta get the glue on pretty quick, like a half hour.
I did a small test layup, without any surface treatment, just to see how it went and all. One small problem is that the fiberglass tape wouldn't really conform to the lower side of the seam where it rolls under. This may not really be needed, but I wanted as much bond area on the bottom tank half as I could get. What the layup showed me is that I could just let the tape hang over and fill it from the back side.

Since I hadn't done any surface prep, this just peeled right off once it was cured.
So then, just prepped the surface, did the layup and backfill and let it cure. I pressure tested the tank after the epoxy was cured ehough to handle. It'll hold 2 psi all day now.

After a few days more curing, I'll sand the rough edges off, throw the tank back in and fill 'er up for a change