


GadgetRick
New Member
So, picked up my 2012 Wake Pro 215 the other day (first ski). Rode it over the weekend. Lots of fun! Holy cow this has a lot of power! Put about 4 hours on it over a day and a half of riding.
Anyway, had some questions (cosmetic):
-The ski obviously sat in the sun a bit too long here in FL. Slight oxidation on some of the plastic. Not bad but I'd like to brighten it all back up. What do you suggest for this? I know there are some good things I've used on cars before but wondering if there is something different I should use for the marine environment.
-The rubber skid mats are a bit worn and starting to peel a bit. I plan on replacing them once they get a little worse (or in the Fall when it's not so hot). What do you suggest I replace them with?
-Is there a way of connecting some type of quick connector to the inlet valve for flushing the exhaust I can leave on there? I saw the SD one in the manual--and got one with a flush kit--but they're kinda flimsy plastic and I worry about breaking it. Or should I just suck it up and not try to be lazy?
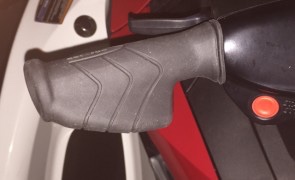
-The buttons on the handlbars (for Sport and Cruise Modes) need to be replaced. Is there anywhere around here I can find the procedure for doing this? I'm reasonably-handy.
-Are there better grips you might suggest? These are ok but not terribly-tacky and wondering if there is something more comfortable. And looking for a procedure for replacing them.
Thanks a bunch. Looking forward to enjoying this thing for quite some time.
Anyway, had some questions (cosmetic):
-The ski obviously sat in the sun a bit too long here in FL. Slight oxidation on some of the plastic. Not bad but I'd like to brighten it all back up. What do you suggest for this? I know there are some good things I've used on cars before but wondering if there is something different I should use for the marine environment.
-The rubber skid mats are a bit worn and starting to peel a bit. I plan on replacing them once they get a little worse (or in the Fall when it's not so hot). What do you suggest I replace them with?
-Is there a way of connecting some type of quick connector to the inlet valve for flushing the exhaust I can leave on there? I saw the SD one in the manual--and got one with a flush kit--but they're kinda flimsy plastic and I worry about breaking it. Or should I just suck it up and not try to be lazy?
-The buttons on the handlbars (for Sport and Cruise Modes) need to be replaced. Is there anywhere around here I can find the procedure for doing this? I'm reasonably-handy.
-Are there better grips you might suggest? These are ok but not terribly-tacky and wondering if there is something more comfortable. And looking for a procedure for replacing them.
Thanks a bunch. Looking forward to enjoying this thing for quite some time.
")
