1996 Speedster Cable Replacement And Major Cavitation Problem

SDC_MI

Member
Hi all,

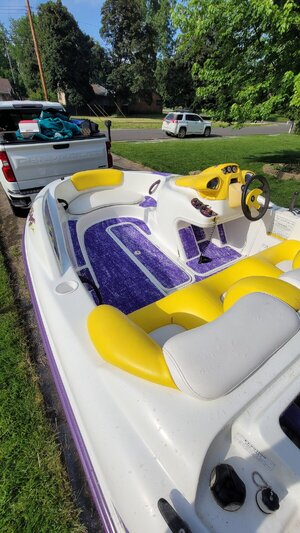
I have a 1996 Speedster that I bought 1.5 years ago. It is super clean and the motors run well. I purchased from the kids of the original owners and as far as I was told it was always dealer serviced and well maintained. Most everything on the boat is in great shape with expected wear and tear.

Last season I was experiencing terrible cavitation. It was nearly undriveable. I had to work really hard to get it up on plane. It seemed like after riding around for a while it would get slightly better and I could cruise the lake. I knew there was work to be done.

Fast-forward to this year. I started the season by pulling the jet drives and replacing carbon seals and wear rings. The carbon seals didn't look bad, but I had no idea of the age. They didn't have the metal circlips installed, but instead relied on O-Rings to retain them. I believe this was the factory configuration but someone can correct me if I'm wrong. I replaced both with Titan 757 kits which I thought were supposed to be decent. I did install the circlips. I also replaced wear rings but used cheaper parts from Amazon. I know, shame on me, I should have purchased OEM (or WSM I believe also has decent ones). The wear rings installed easily and clearance looks tight and even though I didn't measure with a feeler gauge.

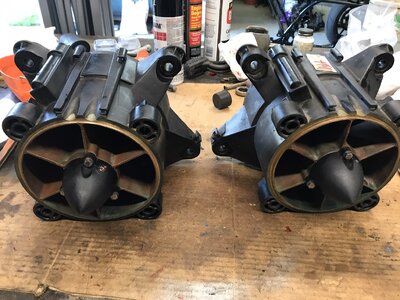
I wish I would have taken pictures but I didn't. The vanes in both nozzles are damaged. One is worse than the other but both have large chunks of vanes missing. I tried to smooth them out with a file the best I could. I added the foam seals around the jet pump housing when reinstalling and also added some RTV. I put new o-rings and oil in the caps. I did notice that one impeller had far more end-play than the other but both felt smooth up against the thrust bearings.

Fast forward to being back on the lake..... Cavitation is significantly reduced but still present. It still takes some effort to get off idle. Once moving the thing runs great. I am happier than I was, but still disappointed that I haven't gotten over the issue completely. Do you guys think the broken vanes could be causing this cavitation? Or maybe the budget wear rings?
UPDATE: Just had it out on the lake today (a few weeks later from above tests). I cannot even get it on plane. All it does is cavitate. It is the most frustrating thing in the world. I feel like I have replaced all parts that could cause cavitation and it is still horrible. I get that I used cheap wear rings but they fit right and clearance is tight. The impellers look great. I cannot find any reason for this.

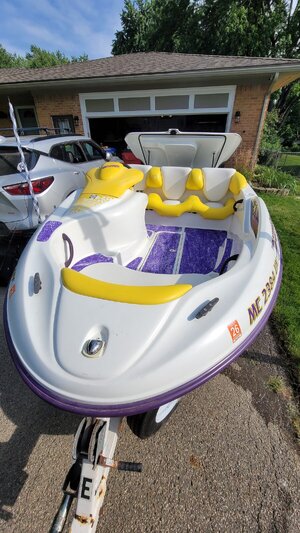
Overall I really like this boat and I want to keep it around for years to come. There are some issues that I still need to resolve and I'm looking for advice. Please let me know your thoughts on what I've stated so far/the issues below. Thanks in advance!
  1. Cavitation
    1. Replaced carbon seals
    2. Replace wear rings
    3. Damaged vanes
    4. Still Cavitatiing. I just got it back in the water today and I can't even get it up on plane. Just cavitates constantly with both motors. I had it in the water a few weeks ago and was at least able to get it going with some effort. Now it won't get up and go at all.
  2. Cables
    1. Throttle cables
      1. Both throttles initially had resistance to move. Not really difficult to operate but more resistance than I would expect.
      2. After some usage and attempted spray with lube the port engine feels much smoother and returns when released. The starboard still has resistance and stays in whatever position you let it go in.
      3. These are not balanced. The starboard throttle needs to be about 1.5" farther forward for same rpm. I think I can just adjust this but haven't attempted yet
    2. Shifter cable
      1. Shifter is way more difficult to operate than it should be. I have lubed the nozzle ends but not with much improvement
    3. Steering cables
      1. Steering feels reasonable on shore. Not great but not difficult
      2. When running around the lake it is difficult to turn. Makes one-handed operation tough. My wife or boys would not be able to steer and operate throttles effectively.
    4. What is the best course of action? With some research I can see that I could dump a fair bit of money into cable replacement, especially the steering cables. I wouldn't want to buy cheap cables and have to replace them in a few years. I also don't want to invest 20% of what I paid for the boat into replacing cables if I can avoid it. I am considering doing the trick with hose/clamps/air pressure to lube them. But is this just buying a little bit of time when ultimately they need to be replaced? What cables do you recommend? The only steering cables I can really find are $200/ea.
  3. Fuel Gauge: I replaced the float in the tank. I know I have to check resistance still, but is it common for the gauge itself to go bad? Gauge still reads empty.
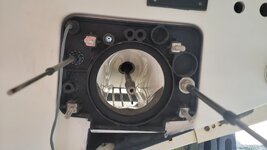
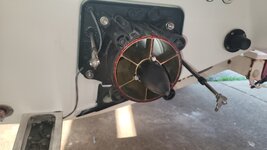
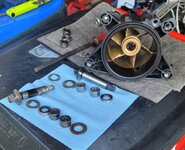
Otherwise I have been super happy with the boat. I have been forced to downsize the fleet but this boat I intend to keep. It's just too much fun. I am thinking about finding a couple bronze nozzles to rebuild with WSM wear rings and new bearings for next season to see if that helps cavitation. I added Hydro-Turf this year which has been great. I can't think of anything else I need to do beside the above issues. Please let me know thoughts. 20240524_175704.jpg20240524_175737.jpg20240524_175745.jpg
 
Cavitation first. It's pulling air from somewhere. How much pressure is on the carbon seal? Needs to be a decent amount. You should be able to pull the carbon away from the mating ring (what some people call the stainless hat) but not too easily.

You said you installed new neoprene seals on the jet pumps. If they are in place and making good contact all around and sealing that part is OK.

Are you sure it is cavitation or could it be a bad drive shaft, PTO coupling, or impeller.

Is this happing with both engines are just one?

I just finished restoring a Speedster and there isn't anything I didn't work on. Just a note, I sent my fuel baffle off to a guy that repairs them for $50. You can cut into it yourself and get it working.

For the cables, I'd disconnect them one at a time or both and see how the wheel is turning. As far as spending money goes, you're doing it yourself so you are saving enough. YOu need to decide if you want to own a boat or not. :D :D They all cost money. Good Luck !!
 
I had some damaged vanes on jet pumps and if it affected performance I sure didn't notice. Do your pumps have brass vanes? I hated have to do TWO of everything and expecially FOUR carbs. :D


Speedster  Carbs & Jet pump (1).JPEG
 
Thanks for the compliment! The carbon seals have good pressure. It was tough to install them due to that pressure.

It definitely seems to be cavitation. It is in both motors. Driveshafts rolled smoothly on a smooth surface. Everything seemed to be in quite good condition.

Again it drives me nuts that I feel I addressed the culprits properly and I'm still seeing horrible cavitation.

My pumps have plastic vanes. I thought about changing to brass/bronze (can't remember which they actually are). From what I read they are slightly less efficient but more durable.
 
Both engines same problem.... very strange.

I set the throttles so they would stay in position. There is a torque adjustment and.... a lot of other adjustments in the assembly below. LOL Also I'm concerned that you have a disparity in position of such magnitude. That shouldn't happen. Need to look at the throttle cables and make the adjustments. Get that working spot on. You have some items to address. Good Luck !!
 
I had some damaged vanes on jet pumps and if it affected performance I sure didn't notice. Do your pumps have brass vanes? I hated have to do TWO of everything and expecially FOUR carbs. :D


View attachment 65878


My pumps have plastic vanes. Both sides have chunks missing. I smoothed the transitions but some vanes have what I would estimate of up to 1 square inch of vane missing. That has to cause some amount of side effect.

I got the boat up on a hoist today. Again the impeller looks reasonably tight to the wear ring. It's not super tight like .005" but it also doesn't look excessive. Is this gap more critical on the boats due to the extra weight?

There were weeds wrapped around the impeller shaft on both sides so I cut those off. Still no difference. Both motors hit about 4k rpm then cavitate and straight to the limiter. I even tried rolling off the throttle and getting a boost by my wake but it wasn't enough.

The crazy thing is I was able to use the boat a few weeks ago. It struggled then too but I was able to get it on plane and cruise the lake and have a blast. I covered it on the trailer then put it back in on this trip and it's way worse for some reason.
 
I'd pull the jet pumps and take a look at the neoprene gaskets. I definitely do not use RTV or anything but the Neoprene gasket to seal the pumps.

Here is my little adventure of late. I had a cavitation isssue on my right engine on a Speedster I recently restored. I fought the alignments on both engines and attributed the problems with Seadoo Quality Control. The issue I had was the jet pump mount landings not being "square" with the sealing surface. I'm a machinist by trade and have egregious experience troubleshooting and fixing everything under the sun (not toys, the big stuff :D ) I placed a straight edge across the mounts and there was a pretty big difference in the height (enought to cause cavitation) . I made adjustments, remounted the pump and the cavitation was gone. That might be your problem but not everyone fixes this the way I did.

The problem is that the pump mounting pads (the squares on the bolts) are not even across the gasket sealing surface. Since I happen to have a lathe.. I removed and machined the bolt to get them at an equal distance. One of the mount bolts was not even tight inside the bilge. What an adventure.


Jet Pump Mount bolts.JPEG
 
Last edited:
My pumps have plastic vanes. Both sides have chunks missing. I smoothed the transitions but some vanes have what I would estimate of up to 1 square inch of vane missing. That has to cause some amount of side effect.

I had a 587 that was very bad. All of the leading edges were damaged at least 1/2" back and with larger chunks missing. Unless you and some type of event between now and the time it was working fine I'd look elsewhere. I have some 140 jet pumps and jet pump housings in good shape I'll sell for a really good price. Too bad you don't live near me. :D We'd fix it. Good luck !!
 
So I was able to get the boat up on plane for one rip around the lake with a lot of effort. I came back in to grab the kids but when going back out I could not get it to move again. I yanked it out of the lake. I can't find anything visually wrong. I did check the carbon seals. There was a bit of grease that got on them, I'm assuming from the shaft splines/o-rings on reassembly. I cleaned them with acetone. It's hard to see the surfaces well but they are smooth and make solid contact. There seems to be plenty of pressure applied by the bellows. Not a drip of water comes through them while sitting in the lake.

I've done countless hours of research and seen some really bad looking wear rings on running machines. I would be really surprised if the "cheap" replacement wear rings I installed are bad enough to create this much cavitation. I will be ordering OEM rings but I really want to replace the housings when I install them since mine are damaged.

One other thing that crossed my mind is the water feed for the motors. If I understand correctly the small hole on the pressure side of the impeller feeds back above the housing and to the motors. There are o-rings at this location but I have see talks of adding silicone here. I DID NOT add any additional silicone. There is barely any water coming out the ports near my tow hook. I don't think this has anything to do with the cavitation but I should definitely be getting a decent amount of flow through those ports, correct? My XP has silicone squeezed out everywhere around the pump housing (I have never touched this one).

I'm really baffled by this issue. I thought I did everything necessary to fix the cavitation. I actually thought I was going above and beyond by changing carbon seals that weren't leaking. The boat has always cavitated this way since purchasing last year. I was not able to do a water demo beforehand. It definitely seems I'm not on the right path to fixing it. Even if my wear rings were crap or the carbon seals weren't perfect I would expect some improvement but I have seen none.

Is the next logical step to pull the ride shoes and re-seal everything? I will try to make a trip up to bring the boat home next weekend if I can. I had another trailer and couldn't bring it back this trip. I really don't want to lose another summer. I just spent a week on the lake with my family and my kid's brought their buddies. I'm sure you can imagine the disappointment when 2 out of 3 boats had issues. The only reliable boat now is the aluminum v-hull with a 9.9 merc on the back.

I still need to figure out a plan for cable replacements but that's getting pushed to a winter project at this rate.

Sorry for rambling. Thanks again for the ongoing support and ideas.

-Sean-
 
I went up and grabbed the boat. Started taking it apart. I checked the impeller gap which is .060" + in a couple spots so that's not good. I have a pair of OEM wear rings and a local guy with a couple bronze pumps.

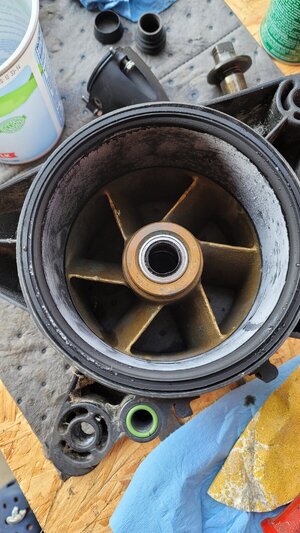
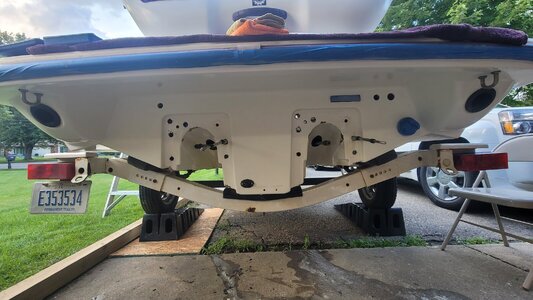
As everyone says it's a nightmare getting the ride shoe off. I used heat, pry bars, razors, and Shims. The port side is off and mostly cleaned up. This has definitely been off before. I can see stress cracks in the gelcoat where it was pried previously. As far as I can tell it was pretty well sealed. There was some water and sand in the pocket between the shoe and the pump support. Not sure if that is an issue. Also, the forward 1.5" of the shoe was not siliconed.

There are a couple spots where the gelcoat is damaged in the impeller pocket but not terribly bad. I will try to patch them.

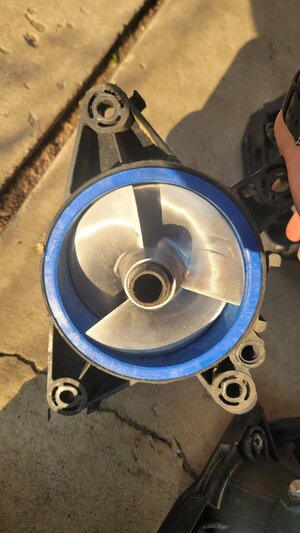
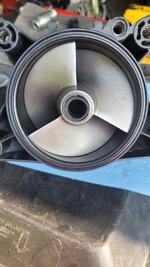
I thought it was strange that the impeller cones are different between the port and Starboard sides. One is long and one is stubby. The impellers themselves look good.

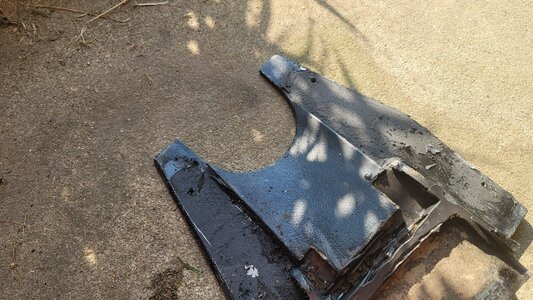
The shaft protector was cut out and somewhat blended. Let me know if this looks like a problem.

The port which I believe feeds the motor for cooling has a threaded hole on the impeller housing which has nothing threaded into it and neither side was sealed to the pump support. I'm guessing that is affecting the cooling flow.

I'm attaching some pictures for reference. I would love some feedback on what I should be concerned with and what I should not.

20240713_181012.jpg20240713_181050.jpg20240713_182057.jpg20240713_191310.jpg20240713_191430.jpg20240713_191448.jpg
 
Bump.....

Still looking for support on these questions. I picked up two brass vane pumps yesterday. I'm going to rebuild them with the new OEM wear rings. Then I plan to repair the gelcoat and start reassembly.
 
You've taken everything apart so the key is to reassemble correctly and get it right. I'd focus on the "correct material" to seal the ride plates and get that all "spot on" so you have a great foundation. If that was your problem you don't want a repeat. I've never pulled a ride plate so have no idea what you are going through. Good Luck !!
 
So I picked up a couple good bronze pumps. You can see in the pictures that the plastic vanes were damaged. I installed new OEM wear rings. I started to reassemble them and the cones leaked. It really made me angry so I decided I wasn't cutting anymore corners. I ordered rebuild kits and new cones. I also took everything (except exhaust) off the back of the boat and wet sanded and buffed it out. I will be sealing the gelcoat again. I ordered new seals for everything on the rear. I have 3M 4200 to reassemble the ride shoe and pump support.The impeller fitment is much better. Both impellers look great. I tidied up the leading edges and straightened one trailing edge tip. I am redoing the speed pickup wire as it had a previous repair and a couple nicks. I will be replacing the drain plug assembly as well. Getting closer. Just been busy with life. I am praying this thing is mint when I'm done. The rear cleanup makes it obvious I need to buff the entire hull but I want it running right first.

20240722_202536.jpg20240726_180248.jpg20240726_183447.jpg20240721_180323.jpg20240717_194840.jpg20240717_201610.jpg
 
Hey man! Awesome boat, I’ve got the same one! I had issues with cavitation on this boat and replaced everything related to cavitation. I found out the pump mount bolts had loosened enough to where that square nut would spin on the mount. What ended up happening is that when I would go to torque my pumps down the stud would spin and the square nut would tighten itself onto the jet pump and it got to bad that I ruined FOUR pumps because the mounting spots got squished and ruined. I ended it up having to retighten all the pump studs to make sure they wouldn’t spin when torquing and I got aluminum pumps just in case they did. When the square nut tightens to the pump, you actually end up torquing the square nut to the pump not the pump to the hull. And so you have uneven torques which results in a jet pump not completely flush to the hull. Hope that helps! It’s really hard to explain, but I’ll post some pics
 
IMG_3035.jpeg

If you look at where I circled on your pictures, you can see where the square nut contacts your pump first meaning it’s not going to be flush completely
 
Also, if the left pump had the longer cone might’ve been an attempt to make the rpm’s the same on both motors by putting more load on the left pump since the left engine has less load than the right
 
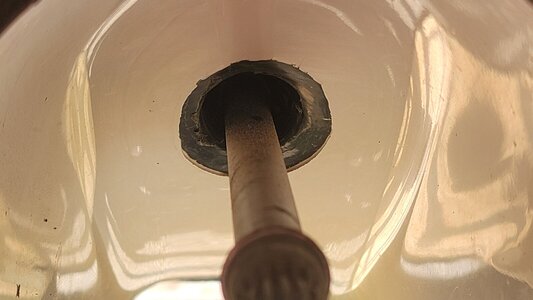
Well I got everything reinstalled with fresh 3M 4200. What a process that was. I feel good about the ride shoe and pump support now. I put the bronze jet pumps together and the caps leaked. I got mad and decided to completely overhaul both. Hoping with everything new I won't have to go back to replace things for a few years. Everything went together well. Impellers are not a rubbing fit but much better than previous. I pulled all the thru-hull fittings. Dropped one of the plastic hose supply fittings to the Starboard motor and it snapped in half. I couldn't find a replacement easily so for now it got a stainless piece intended for bilge pumps. Also installed a stainless drain plug. The steering bushings were completely destroyed so I 3D printed replacements. Not sure how they will hold up but I can easily make more or find the correct parts later.

It's finally ready for another water test. Got to the cottage last night and the weeds are crazy. Just have to see how it goes. 20240726_182113.jpg20240728_143823.jpg20240730_185725.jpg20240730_191329.jpg20240726_180248.jpg
 
Well, as I mostly expected I put the boat in the water and no change. Cavitation and can't get on plane at all. The most frustrating thing in the world. I had nothing but terrible things to say about the boat afterwards.

@kenneth.mccoy1 I feel pretty confident that my housings are good and the square nuts are good and none are spinning.

It feels impossible that this boat could still be cavitating this bad. The only other thought I had today (As I was towing the boat back home again) was that the o-rings with the new carbon seals were extremely tight. I remember reading a post somewhere on here that stated they had to swap to different o-rings for that reason. Maybe there is a possibility I cut the o-rings when installing. Seems like a long-shot but I'm running out of ideas.
 
I am still trying to come up with ideas for the cavitation if anyone has other suggestions. Boat looks pretty sad just sitting in my driveway.
 
Well, as I mostly expected I put the boat in the water and no change. Cavitation and can't get on plane at all. The most frustrating thing in the world. I had nothing but terrible things to say about the boat afterwards.

@kenneth.mccoy1 I feel pretty confident that my housings are good and the square nuts are good and none are spinning.

It feels impossible that this boat could still be cavitating this bad. The only other thought I had today (As I was towing the boat back home again) was that the o-rings with the new carbon seals were extremely tight. I remember reading a post somewhere on here that stated they had to swap to different o-rings for that reason. Maybe there is a possibility I cut the o-rings when installing. Seems like a long-shot but I'm running out of ideas.
I just sorted through the same problem with my challenger. It got to about 4,000 rpm then just rev limiter with no pull. Even with new seals, new impeller and new wear ring, It would not get on a plane and if it did it took a few minutes. My issue was the bellow on the carbon seal was not applying enough pressure to the carbon seal. I could easily grab it and pull it back 1/2 an inch or more from the stainless piece. It never leaked a drop but was apparently sucking all kinds of air in. My driveshaft had multiple slots that you could put the clip that holds the stainless piece. I slid the stainless peice back as far as I could and moved the clip up a notch. As a little extra insurance I loosened the clamp at the back of the bellow and slid the bellow toward the carbon seal just to put a little extra pressure on it.

Took it out and it did great. With it not leaking water at all I never would have figured it would have made a difference but it did. Hope you get it figured out.
 
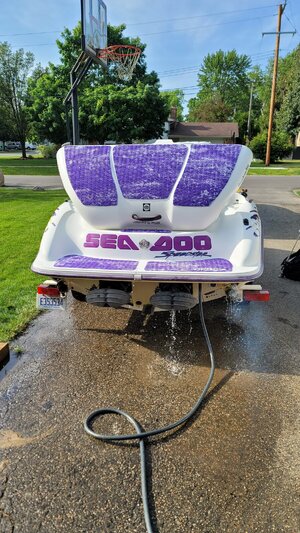
Also I would really like to know where you got the floor mats. Is hydro turf the brand? That purple is awesome.
 
Back
Top